Working out the Sharp CE-50P printer's character set
Sunday, 15th November 2026
I tend to have a way of getting sidetracked with hobby projects and as the scope increases, the chances of ever finishing steadily decreases. However, useful things can still be learned along the way, and sometimes they seem interesting enough to write about.
One of my current hobby projects is some software that can be used to transfer data to and from Sharp's graphing calculators. I was chiefly interested in the EL-9400, EL-9450, EL-9600, EL-9900 and EL-9950; these devices all seem to be broadly related to each other, and they are mostly compatible with each other as far as variable formats and data transfer protocols are concerned. I'd got the data transfer worked out, then decided to add variable editors to the software (so rather than just being able to transfer a binary blob of data back and forth, you could for example open a program and see its listing or edit the numeric data inside a list or matrix). I was due to start working on the equation editor (these calculators allow you to enter expressions using a graphical "textbook"-style editor) but couldn't really think of a good way to handle this so got sidetracked by the EL-9300.
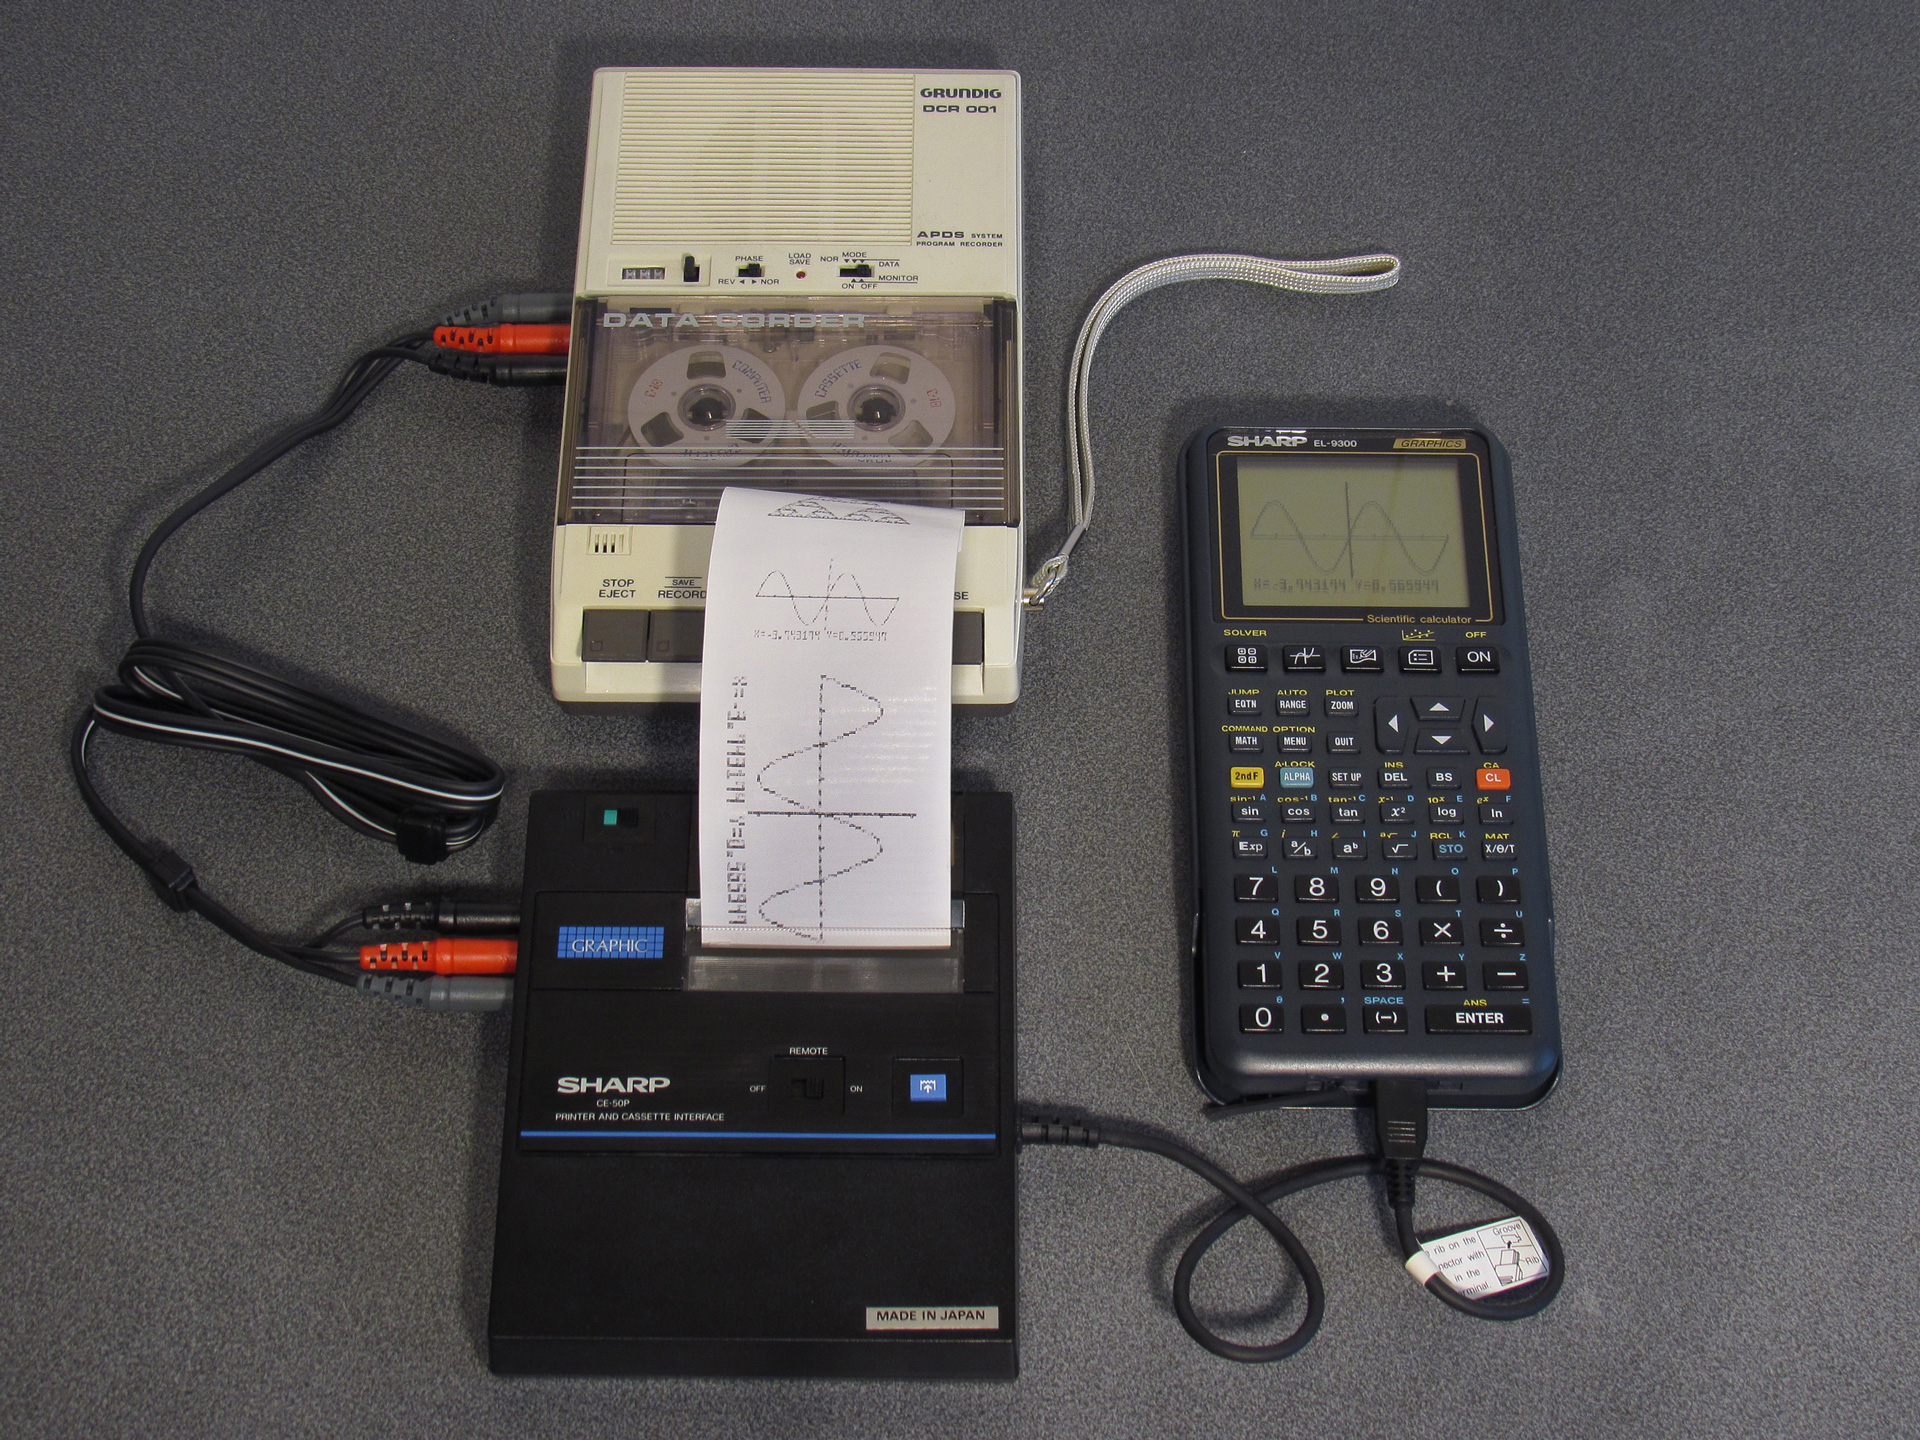
A Sharp EL-9300 connected to a CE-50P printer and cassette interface.
The EL-9300 is an older calculator model that shares a similar user interface to its younger siblings but it has some notable differences, one of which being its communication port. Rather than a 2.5mm TRS socket, it has a proprietary four-pin connector that could also be found on Sharp's organisers of the time. This allowed two calculators to be connected together, or for the calculator to be connected to a CE-50P printer and cassette interface for hard copies or long-term data storage on tape cassette. I don't know if accompanying PC transfer software was ever released by Sharp, but I do have a CE-136T "RS-232 level converter" that lets you connect devices with this four-pin port to a PC. By connecting a logic analyser to the CE-50P and sending various test prints or saving and loading from cassette from an organiser I'd been able to reverse-engineer the protcols and written some PC software that could emulate the CE-50P. This meant I could save to a "tape" on my PC and transfer data via a virtual tape image. This isn't ideal, as loading from tape replaces all other program records on the device, and the only way to transfer individual programs without clearing the others was directly from calculator to calculator. The answer, therefore, was to write some PC software that pretended to be an EL-9300 and could send and receive variable data, and then reverse-engineer those variable formats and write some editors similar to what I'd done for the later calculator models.
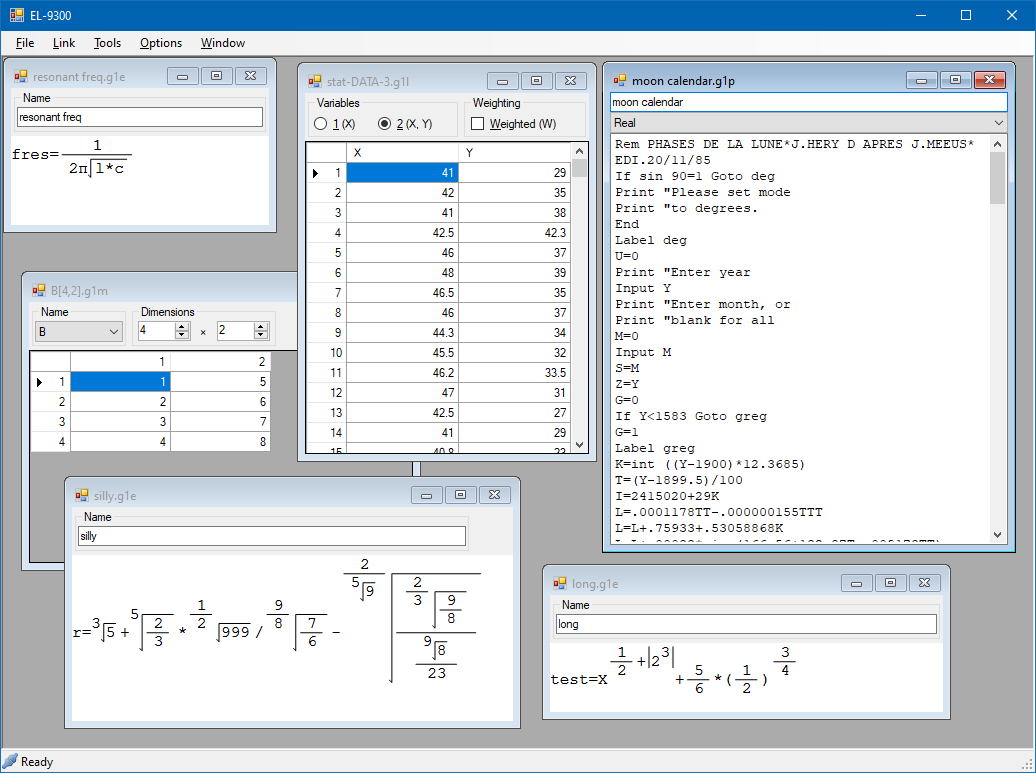
Work-in-progress PC link software for the Sharp EL-9300.
I worked on this software for a while, including starting work on the graphical equation editor. I'd got as far as being able to load and display (but not yet modify) solver equation variables copied from the EL-9300 before I got sidetracked again, this time by the EL-9000. This was Sharp's first graphing calculator, and the predecessor of the EL-9300. As far as I could tell it was quite different to use, but had the same four-pin communication port and also supported the CE-50P printer and cassette interface. I'd only been able to tell that by reading a scan of the manual, though, as this calculator seems to be somewhat rare and the only ones I'd seen for sale had been ferociously expensive, with sellers listing second-hand examples for several hundred pounds. I like vintage calculators but not quite as much as being able to afford to eat, so this seemed like it would remain out of reach until one popped up one day for around £30. Unfortunately, the reason for this comparatively low price seemed to be a black splodge of "LCD rot" in the middle of its display, so I thought I'd sleep on it. By the next morning it had sold, though, so that put an end to it... or so I thought. A few days later I got a notification that it had been re-listed at the old price, but by the time I got around to looking properly at the listing the price had halved, so I thought I'd be a fool to miss it again. I placed the order, and a few days later the calculator dropped through the letterbox.
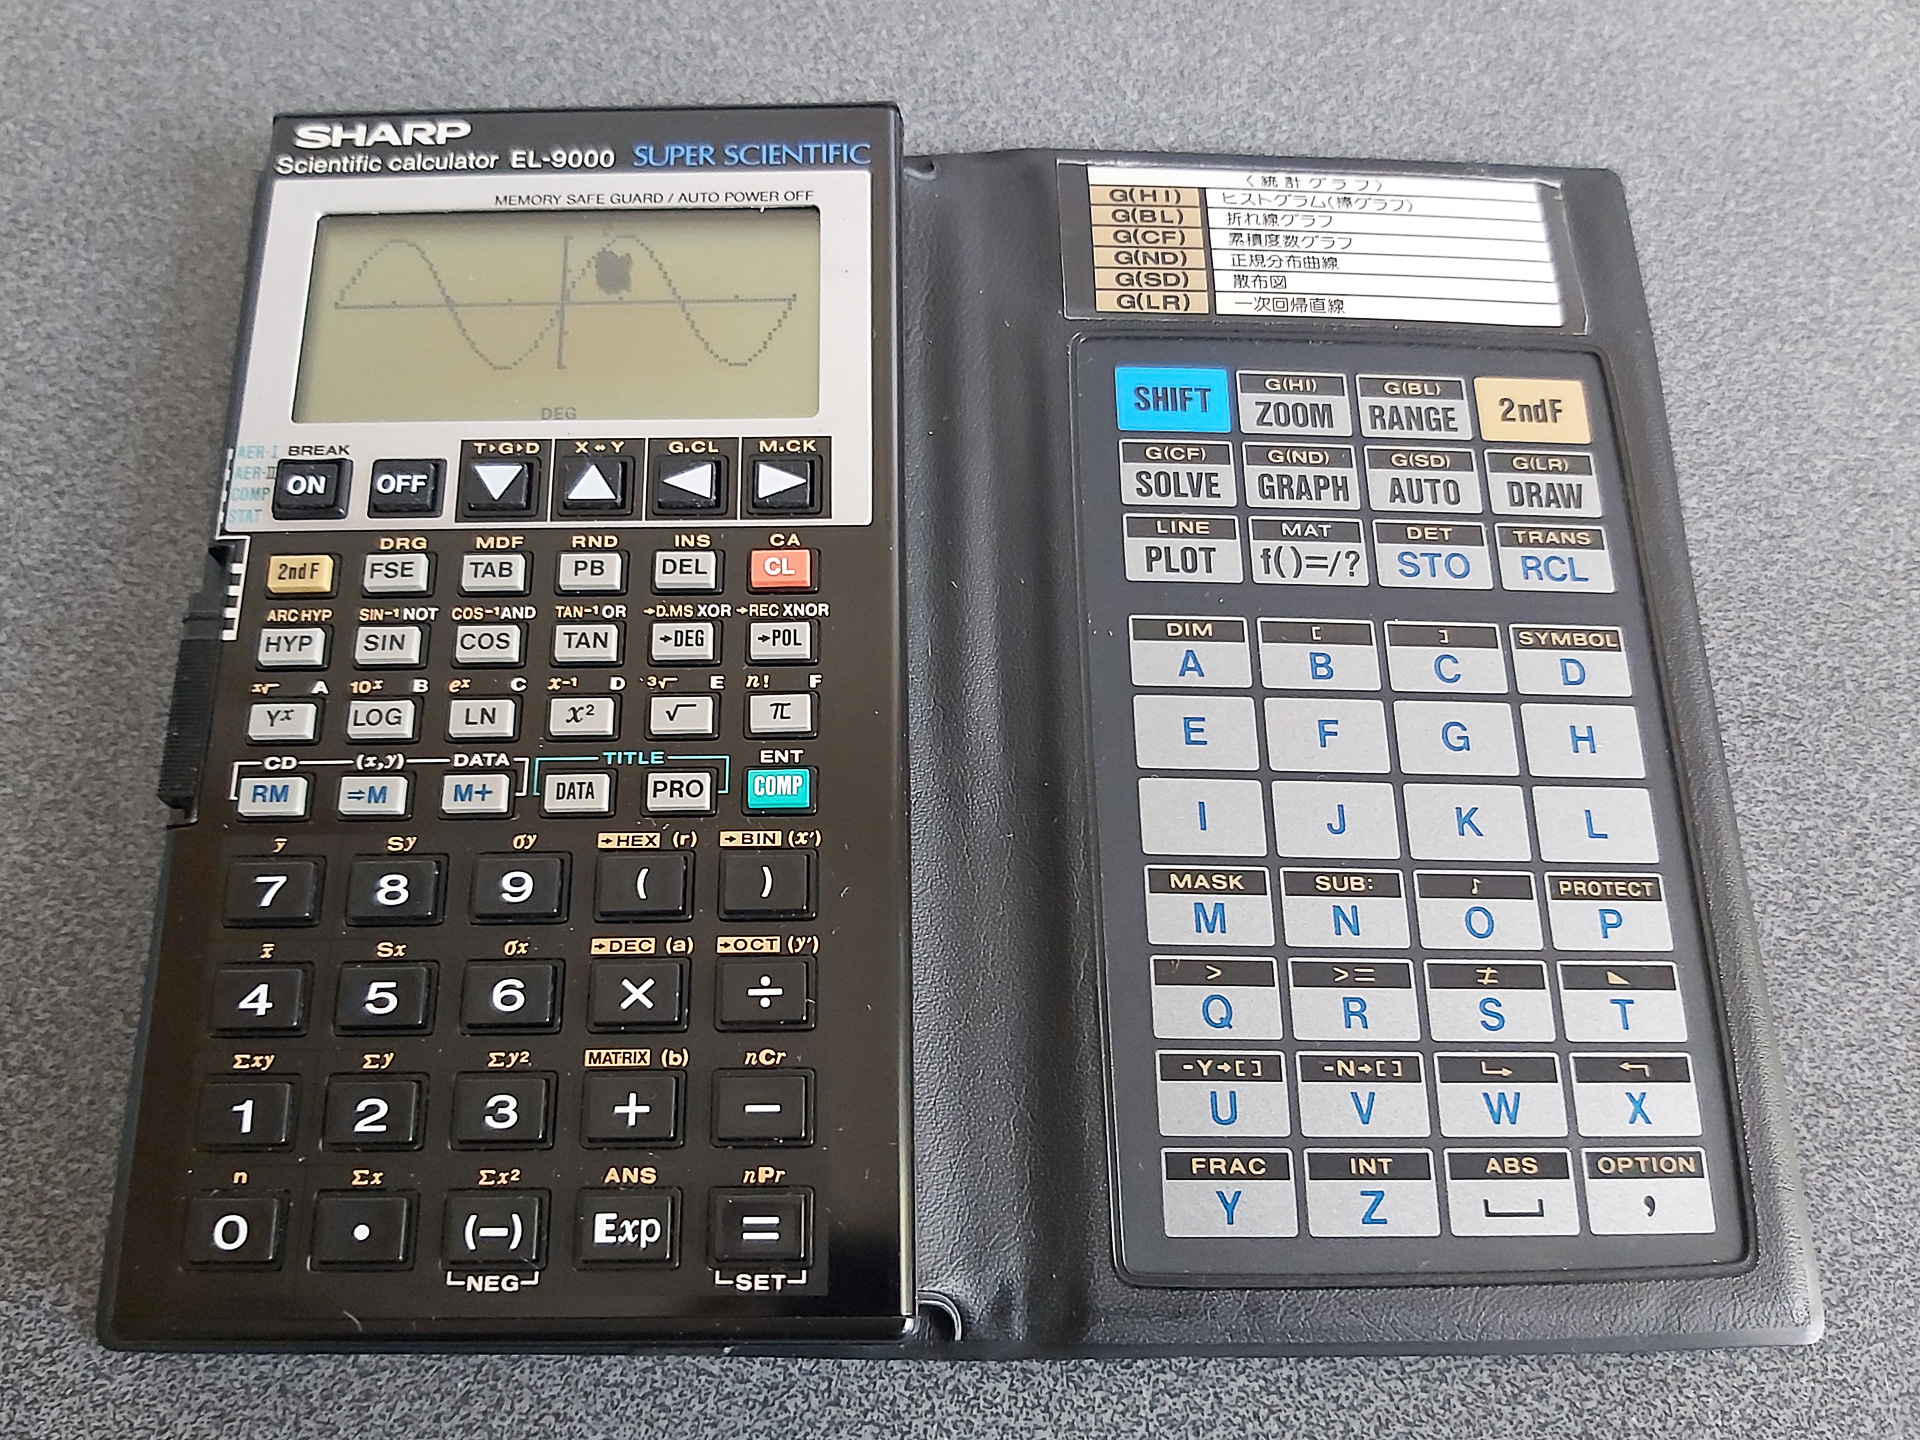
My Sharp EL-9000 with its damaged LCD. Fortunately all of the keys built into the folding cover work.
After playing with it for a while, I thought I'd try printing from it to my virtual CE-50P and almost immediately ran into issues. Every other Sharp organiser or calculator I'd tried before printed data by sending 0x59 followed by 128 bytes of pixel data, corresponding to an 8 pixel high line that filled the width of printable area. Most of these devices had 96 pixel wide displays, so they'd pad their 96 bytes of active screen data with 16 zeroes before and 16 zeroes after to reach the desired 128 bytes of data. The EL-9000 also has a 96 pixel wide display, however it printed data by sending 0x58 followed by 96 pixels of data – an option I wasn't aware existed before.
Things were even more surprising when I tried to print from the program editor, as instead of printing graphically as all of my other Sharp devices did the EL-9000 sent 0x51 followed by sixteen bytes of character data terminated by 0x0D, corresponding to the 16 columns of text on the screen. One thing that had previously puzzled me is that the CE-50P service manual describes a test mode (activated by holding the paper feed key whilst switching the printer on) which prints "an entire character set". I hadn't previously seen any devices attempt to print text directly like this, they always converted their text into a bitmap on the device and sent graphics data to the printer instead. The "entire character set" only runs as far as the lowercase 'h' in any case, so I thought maybe it was just an incomplete test pattern baked into the ROM, but no – it turns out there is a full character ROM inside the printer after all.
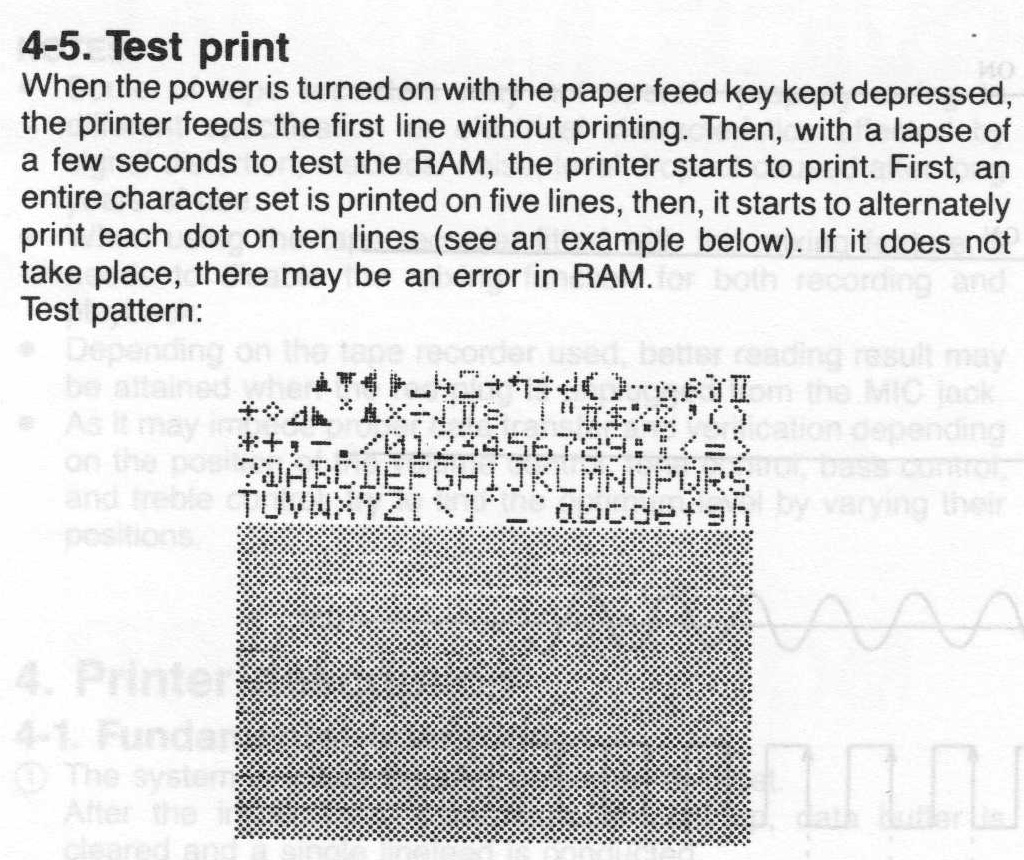
This posed a problem for my virtual CE-50P, though – how could I implement this feature without knowing what all of the characters looked like? As mentioned above I could at least use the test mode to identify the characters as far as 'h', but there are an awful lot more characters than that! By writing test programs on the EL-9000 that used as many of the available characters as I could, then printing them on a real CE-50P, I was able to fill in some of the gaps but there were still a lot of missing characters.
I do have a BASIC card for my Sharp organisers so I could try writing a program for those that would print every possible character, but the way that BASIC accesses the printer is graphical so I'd end up seeing the organiser's character set rather than the printer's, and I'd already established from the few non-ASCII characters I'd been able to identify that the two character sets did not match.
Fortunately the BASIC card lets you POKE data into memory then CALL it, so I should be able to write an assembly program that sent text to the printer. I'd still need to figure out how to do that, and working out how the organiser transferred bytes to the printer seemed like a good starting point. Fortunately I'd already hacked together Ghidra support for the organiser's ESR-L processor for a previous project where I was trying to figure out how I could enable 40-column text mode from the 16-column BASIC card, and so I started picking apart a dump of the IQ-7000 organiser's ROM using Ghidra as a disassembler.
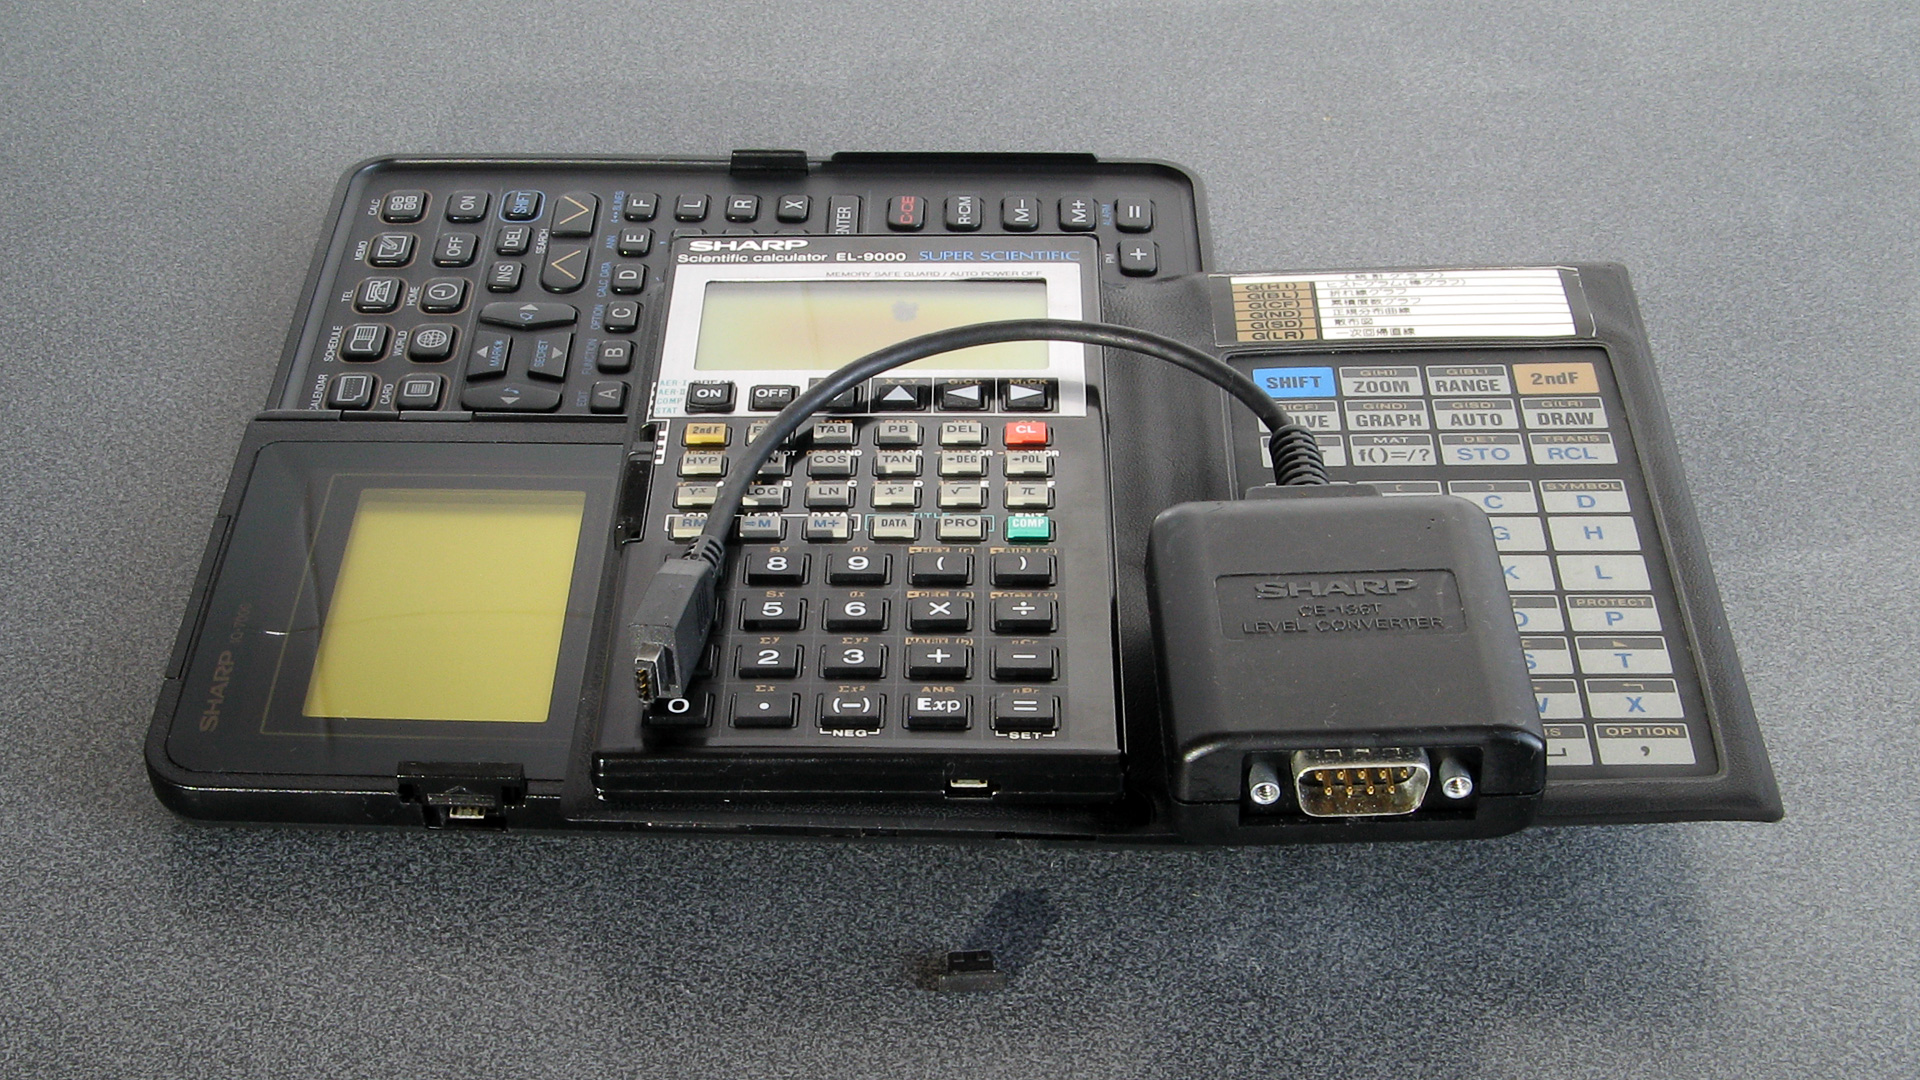
The Sharp CE-136T level converter, EL-9000 calculator and IQ-7000 organiser.
The 4-pin option port is below the screen of the organiser and below the Exp key of the calculator.
The first challenge was finding where in the ROM the code that dealt with the 4-pin option port was. According to the ESR-L Instruction Manual the CPU has a general I/O port called the "E-port" with sixteen I/O lines that could be accessed via four registers in its internal memory; EIL and EIH for input and EOL and EOH for output. Writing a program to run on the organiser that polled the input registers showed that bit 6 in register EIH (covering E8 to E15) changed state when I tried to send data to the organiser from my PC, so it looks like E14 is connected to one of the option port's I/O lines. Searching the ROM for bytes matching the EOH register found a cluster of code to disassemble that performed low-level port operations:
*************************************************************************
* Sets the So line.                                                     *
*************************************************************************
                    SET_SO
0fbbaf 30 79 f4 80       OR           (EOH),10000000b
0fbbb3 06                RET

*************************************************************************
* Resets the So line.                                                   *
*************************************************************************
                    RES_SO
0fbbb4 30 71 f4 7f       AND          (EOH),01111111b
0fbbb8 06                RET

*************************************************************************
* Gets state of Si line, returning the level in the carry flag.         *
*************************************************************************
                    GET_SI
0fbbb9 30 65 f6 40       TEST         (EIH),01000000b
0fbbbd 1a 02             JRNZ         GET_SI_HIGH
0fbbbf 9f                RC
0fbbc0 06                RET
                    GET_SI_HIGH
0fbbc1 97                SC
0fbbc2 06                RET

*************************************************************************
* Resets the So and Si lines.                                           *
*************************************************************************
                    RES_SOSI
0fbbc3 30 71 f4 3f       AND          (EOH),00111111b
0fbbc7 06                RET

*************************************************************************
* Sets the So and Si lines.                                             *
*************************************************************************
                    SET_SOSI
0fbbc8 30 79 f4 c0       OR           (EOH),11000000b
0fbbcc 06                RET
There are two data I/O lines on the 4-pin option port, referred to as "So" (source output, E15) and "Si" (sink output, E14). These are bidirectional (open collector) I/O lines and the code above uses "set" or "reset" (or "high" or "low") to denote the bit level (1 or 0) written to the port and not the actual voltage level, as at this point I just want to identify the code that is doing something with the option port. The above provides a good starting point. Now, it would seem likely that data that read bytes from the option port would call GET_SI to get the state of the Si line before rotating or shifting it into a byte variable. Now that I knew the address of the GET_SI routine (0x0fbbb9) I could search the ROM for that value to find out where it was being called from. More specifically, I'd need to truncate the address to sixteen bits as the routine returns with RET, which indicates it can only be called from the same segment; if it was intended to be called with the full 20-bit address it would need to return with RETF (the ESR-L can address up to 1MB of external memory, but this is divided into 16 segments of 64KB each).
A search was performed for the byte sequence 0xB9, 0xBB and sure enough, not far away there's a call to GET_SI followed by a left shift into the accumulator and a call to SET_SO which looks like the inner part of the byte-receiving routine:
0fbac1 04 b9 bb          CALL         GET_SI
0fbac4 f6                SHL          A
0fbac5 04 af bb          CALL         SET_SO
After some further disassembly above and below the identified code snippet, the full routine for getting a byte from the option port can be revealed:
*************************************************************************
* Gets a single byte                                                    *
*************************************************************************
                    OPTION_GET_BYTE
0fbaa2 0b eb 00          MV           I,235
0fbaa5 08 08             MV           A,8
0fbaa7 dd                EX           A,B
                    Wait for Si to go low.
                    WAIT_SI_LOW
0fbaa8 04 b9 bb          CALL         GET_SI
0fbaab 1e 0d             JRNC         SI_LOW
0fbaad 2b                PUSHU        I
0fbaae 04 cd bb          CALL         CHECK_BREAK
0fbab1 3b                POPU         I
0fbab2 1c 22             JRC          ERROR
0fbab4 7c 03             DEC          I
0fbab6 1b 10             JRNZ         WAIT_SI_LOW
0fbab8 12 1a             JR           ERROR_0
                    Si has gone low, so set So low.
                    SI_LOW
0fbaba 04 b4 bb          CALL         RES_SO
                    Sampling delay
0fbabd 0b e5 00          MV           I,229
0fbac0 ef                WAIT
                    Clock in data from Si.
0fbac1 04 b9 bb          CALL         GET_SI
0fbac4 f6                SHL          A
                    Set So high.
0fbac5 04 af bb          CALL         SET_SO
                    Wait for Si to go high
0fbac8 0b 9e 04          MV           I,1182
                    WAIT_SI_HIGH
0fbacb 04 b9 bb          CALL         GET_SI
0fbace 1c 0b             JRC          SI_HIGH
0fbad0 7c 03             DEC          I
0fbad2 1b 09             JRNZ         WAIT_SI_HIGH
                    ERROR_0
0fbad4 08 00             MV           A,0
                    ERROR
0fbad6 04 c3 bb          CALL         RES_SOSI
0fbad9 97                SC
0fbada 06                RET
                    Check if we've received all the bits
                    SI_HIGH
0fbadb dd                EX           A,B
0fbadc 7c 00             DEC          A
0fbade dd                EX           A,B
0fbadf 1b 39             JRNZ         WAIT_SI_LOW
                    Short delay loop
0fbae1 09 13             MV           IL,19
                    DELAY
0fbae3 7c 01             DEC          IL
0fbae5 1b 04             JRNZ         DELAY
                    Clear carry to denote success, then return
0fbae7 9f                RC
0fbae8 06                RET
This routine has all of the expected features of a byte-receiving routine; this includes delay loops, a counter for the eight bits of data to shift in, and counters to detect timeout (if a pin doesn't change to the expect state within a certain number of times around a loop, jump to the label that sets the error condition then bail out). It also calls a routine that I called CHECK_BREAK that checks some other bits of the organiser's state and returns error codes like "low battery" so I assume is part of the logic used to break out of communication routines in emergencies (either the aforementioned low battery state or if the On key is pressed – I haven't disassembled much of the code that the CHECK_BREAK routine also calls, so this is mostly a hunch). Immediately after the OPTION_GET_BYTE routine is this one:
*************************************************************************
* Gets a single byte, updates the checksum                              *
*************************************************************************
                    OPTION_GET_BYTE_CHECKSUM
0fbae9 04 a2 ba          CALL         OPTION_GET_BYTE
0fbaec 1c 08             JRC          EXIT
0fbaee 30 43 d8          ADD          (DL),A
0fbaf1 30 51 d9 00       ADC          (DH),0
0fbaf5 9f                RC
                    EXIT
0fbaf6 06                RET
After receiving a byte successfully via OPTION_GET_BYTE it adds the received value to the sixteen-bit DX variable, so this very much looks like part of the code that handles updating a checksum as data is received. The next routine is similar, but calls a variation of the GET_BYTE routine that I called OPTION_GET_BYTE_WAIT_INFINITE as instead of bailing out if it can't receive a byte within a short timeout period it will loop infinitely trying to receive a byte (though it does still bail out if CHECK_BREAK reports an error/break condition). The next GET_BYTE variation waits for up to a full minute before timing out:
*************************************************************************
* Gets a single byte.                                                   *
* Waits for up to one minute for the byte.                              *
*************************************************************************
                    OPTION_GET_BYTE_WAIT_MINUTE
0fbb05 08 08             MV           A,8
0fbb07 dd                EX           A,B
0fbb08 0b e0 2e          MV           I,12000
                    WAIT_SI_LOW
0fbb0b 04 b9 bb          CALL         GET_SI
0fbb0e 1f 56             JRNC         OPTION_GET_BYTE::SI_LOW
0fbb10 04 48 ad          CALL         DELAY_5MS
0fbb13 2b                PUSHU        I
0fbb14 04 cd bb          CALL         CHECK_BREAK
0fbb17 3b                POPU         I
0fbb18 1d 44             JRC          OPTION_GET_BYTE::ERROR
0fbb1a 7c 03             DEC          I
0fbb1c 1b 13             JRNZ         WAIT_SI_LOW
0fbb1e 13 4c             JR           OPTION_GET_BYTE::ERROR_0
This tries to receive a byte 12000 times before bailing out, and calls a routine that delays for 5ms, hence the one minute total timeout. This covers quite a few routines that receive bytes, surely we'd need some routines to send bytes too? Searching for routines that referenced the addresses of the RES_SO and SET_SO routines soon found the basic OPTION_SEND_BYTE routine:
*************************************************************************
* Sends a single byte.                                                  *
*************************************************************************
                    OPTION_SEND_BYTE
0fbb2f dd                EX           A,B
0fbb30 08 08             MV           A,8
0fbb32 dd                EX           A,B
                    SEND_BIT
0fbb33 0b eb 00          MV           I,235
0fbb36 04 b4 bb          CALL         RES_SO
                    WAIT_SI_LOW
0fbb39 04 b9 bb          CALL         GET_SI
0fbb3c 1e 12             JRNC         SI_LOW
0fbb3e 2b                PUSHU        I
0fbb3f 04 cd bb          CALL         CHECK_BREAK
0fbb42 3b                POPU         I
0fbb43 1c 06             JRC          ERROR
0fbb45 7c 03             DEC          I
0fbb47 1b 10             JRNZ         WAIT_SI_LOW
                    ERROR_0
0fbb49 08 00             MV           A,0
                    ERROR
0fbb4b 04 c3 bb          CALL         RES_SOSI
0fbb4e 97                SC
0fbb4f 06                RET
                    SI_LOW
0fbb50 e6                ROL          A
0fbb51 1c 05             JRC          SO_HIGH
0fbb53 04 b4 bb          CALL         RES_SO
0fbb56 12 03             JR           SO_CHANGED
                    SO_HIGH
0fbb58 04 af bb          CALL         SET_SO
                    SO_CHANGED
0fbb5b 0b 9e 04          MV           I,1182
                    WAIT_SI_HIGH
0fbb5e 04 b9 bb          CALL         GET_SI
0fbb61 1c 06             JRC          SI_HIGH
0fbb63 7c 03             DEC          I
0fbb65 1b 09             JRNZ         WAIT_SI_HIGH
0fbb67 13 20             JR           ERROR_0
                    SI_HIGH
0fbb69 04 af bb          CALL         SET_SO
0fbb6c 09 1e             MV           IL,30
                    DELAY_30_LOOP
0fbb6e 7c 01             DEC          IL
0fbb70 1b 04             JRNZ         DELAY_30_LOOP
0fbb72 dd                EX           A,B
0fbb73 7c 00             DEC          A
0fbb75 18 03             JRZ          SUCCESS
0fbb77 dd                EX           A,B
0fbb78 13 47             JR           SEND_BIT
                    SUCCESS
0fbb7a 9f                RC
0fbb7b 06                RET
This has a lot of similarity to the OPTION_GET_BYTE routine, except instead of calling GET_SI and shifting the received bit into the accumulator, it rotates the accumulator to find the bit to send then calls RES_SO or SET_SO to output the appropriate voltage level for that bit. Immediately after this routine is a variation that calls DELAY_5MS twice to introduce a 10ms delay between bytes:
*************************************************************************
* Waits 10ms, then sends a single byte.                                 *
*************************************************************************
                    OPTION_DELAYED_SEND_BYTE
0fbb7c 04 48 ad          CALL         DELAY_5MS
0fbb7f 04 48 ad          CALL         DELAY_5MS
0fbb82 04 2f bb          CALL         OPTION_SEND_BYTE
0fbb85 06                RET
...before the version of the routine that updates the checksum held in DX before transmitting the byte:
*************************************************************************
* Updates the checksum, then sends a single byte.                       *
*************************************************************************
                    OPTION_SEND_BYTE_CHECKSUM
0fbb86 30 43 d8          ADD          (DL),A
0fbb89 30 51 d9 00       ADC          (DH),0
0fbb8d 04 2f bb          CALL         OPTION_SEND_BYTE
0fbb90 06                RET
There are also routines that attempt to send the byte with an infinite timeout, with or without updating the checksum, similar to the variations available for receiving bytes.
Having these basic routines to send and receive bytes via the option port is useful, but seeing how they can be used together to actually control the printer is the real goal. Fortunately I had already figured out what a lot of the printer control command bytes are by using a logic analyser to observe what data is sent when an organiser prints something, so that gave me some command bytes to look for, e.g.:
- 0xC0: Initialise printer
- 0x59: Print a line of graphics data (128 bytes of data follows this)
- 0x70: End a print operation
- 0xAA: Get a device's ID (the printer will respond with 0x01, 0xF0)
Using the same technique as before – searching the memory for addresses of the individual byte-transfer routines to see where they are being called and disassembling the surrounding code – revealed a series of routines next to each other that perform printer-related operations, matching the command codes mentioned above:
*************************************************************************
* Initialise the printer                                                *
*************************************************************************
                    PRINTER_INIT
0fb828 04 67 b8          CALL         PRINTER_ID_CHECK
0fb82b 1c 0d             JRC          ERROR
0fb82d 08 c0             MV           A,0xc0
0fb82f 04 7c bb          CALL         OPTION_DELAYED_SEND_BYTE
0fb832 1c 06             JRC          ERROR
0fb834 04 67 ad          CALL         DELAY_1MS
0fb837 04 9a b9          CALL         OPTION_GET_ACK
                    ERROR
0fb83a 2e                PUSHU        F
0fb83b 04 c3 bb          CALL         RES_SOSI
0fb83e 04 48 ad          CALL         DELAY_5MS
0fb841 3e                POPU         F
0fb842 06                RET

*************************************************************************
* Begin printing a line                                                 *
*************************************************************************
                    PRINTER_BEGIN_LINE
0fb843 08 59             MV           A,0x59
0fb845 04 7c bb          CALL         OPTION_DELAYED_SEND_BYTE
0fb848 1c 04             JRC          ERROR
0fb84a 04 67 b9          CALL         OPTION_SEND_ZEROES
0fb84d 06                RET
                    ERROR
0fb84e 97                SC
0fb84f 06                RET

*************************************************************************
* End a print                                                           *
*************************************************************************
                    PRINTER_END_PRINT
0fb850 04 67 ad          CALL         DELAY_1MS
0fb853 08 70             MV           A,0x70
0fb855 04 2f bb          CALL         OPTION_SEND_BYTE
0fb858 1c 0c             JRC          EXIT
0fb85a 04 67 ad          CALL         DELAY_1MS
0fb85d 04 9a b9          CALL         OPTION_GET_ACK
0fb860 1c 04             JRC          EXIT
0fb862 04 c3 bb          CALL         RES_SOSI
0fb865 9f                RC
                    EXIT
0fb866 06                RET

*************************************************************************
* Check if a printer is attached.                                       *
*************************************************************************
                    PRINTER_ID_CHECK
0fb867 04 15 ba          CALL         OPTION_ID_DEVICE_AA
0fb86a 1c 0d             JRC          ERROR
0fb86c 60 01             CMP          A,0x1
0fb86e 1a 07             JRNZ         ERROR_0
0fb870 dd                EX           A,B
0fb871 60 f0             CMP          A,0xf0
0fb873 1a 02             JRNZ         ERROR_0
0fb875 9f                RC
0fb876 06                RET
                    ERROR_0
0fb877 08 00             MV           A,0
                    ERROR
0fb879 97                SC
0fb87a 06                RET
Immediately before these is a slightly longer routine that uses them to either print a single 8-pixel-high row of data from the screen (if register A is from 0 to 7) or from 96 bytes of graphics data pointed to by the X register (if A is -1). Note that OPTION_SEND_ZEROES in this routine and in PRINTER_BEGIN_LINE sends 16 zero bytes to pad the 96 bytes of actual printer data with blank space on either side to make up the full 128 byte printer width.
*************************************************************************
* Print a line of data on the printer.                                  *
* If A = -1, X is a pointer to bitmap data.                             *
* If A is not -1, it's the row on the screen to print.                  *
*************************************************************************
                    PRINTER_PRINT_GRAPHICS_LINE
0fb7c5 60 ff             CMP          A,0xff
0fb7c7 18 42             JRZ          X_IS_POINTER
0fb7c9 4d 55             SUB          Y,Y
                    A is not -1, so use it as the line number
                    FIND_Y
0fb7cb 60 00             CMP          A,0
0fb7cd 18 08             JRZ          GOT_Y
0fb7cf 09 08             MV           IL,8
0fb7d1 45 51             ADD          Y,IL
0fb7d3 7c 00             DEC          A
0fb7d5 13 0c             JR           FIND_Y
                    GOT_Y
0fb7d7 04 43 b8          CALL         PRINTER_BEGIN_LINE
0fb7da 1c 47             JRC          ERROR
0fb7dc 4d 44             SUB          X,X
                    A_IS_LINE_NUMBER_LOOP
0fb7de 2c                PUSHU        X
0fb7df 2d                PUSHU        Y
0fb7e0 30 cd d6 00       MVW          (CX),0
       00
0fb7e5 09 4b             MV           IL,0x4b
0fb7e7 05 e8 ff 0f       CALLF        IOCS
0fb7eb 3d                POPU         Y
0fb7ec 3c                POPU         X
0fb7ed 04 2f bb          CALL         OPTION_SEND_BYTE
0fb7f0 1c 31             JRC          ERROR
0fb7f2 6c 04             INC          X
0fb7f4 30 a4 da          MV           (SI),X
0fb7f7 30 61 da 60       CMP          (SI),96
0fb7fb 1b 1f             JRNZ         A_IS_LINE_NUMBER_LOOP
                    PAD_LINE_END
0fb7fd 04 67 b9          CALL         OPTION_SEND_ZEROES
0fb800 1c 21             JRC          ERROR
0fb802 04 67 ad          CALL         DELAY_1MS
0fb805 04 9a b9          CALL         OPTION_GET_ACK
0fb808 1c 5c             JRC          PRINTER_END_PRINT::EXIT
0fb80a 06                RET
                    X_IS_POINTER
0fb80b 04 43 b8          CALL         PRINTER_BEGIN_LINE
0fb80e 1c 13             JRC          ERROR
0fb810 0d 60 00 00       MV           Y,96
                    X_IS_POINTER_LOOP
0fb814 90 24             MV           A,[X++]
0fb816 04 2f bb          CALL         OPTION_SEND_BYTE
0fb819 1c 08             JRC          ERROR
0fb81b 7c 05             DEC          Y
0fb81d 1b 0b             JRNZ         X_IS_POINTER_LOOP
0fb81f 13 24             JR           PAD_LINE_END
                    ERROR_0
0fb821 08 00             MV           A,0x0
                    ERROR
0fb823 04 c3 bb          CALL         RES_SOSI
0fb826 97                SC
0fb827 06                RET
This routine is then used as a building block in a more comprehensive routine, that also allows the user to pass -2 in register A to print the whole screen. This version of the routine also initialises the printer and preserves some state on entry and restores it on exit via OPTION_PRESERVE and OPTION_RESTORE routines:
*************************************************************************
* Prints either a line of graphics data or the whole screen.            *
* If A = -2, the whole screen is printed.                               *
* If A = -1, X is a pointer to bitmap data for a single line.           *
* If A is 0 to 7, it's the row on the screen to print.                  *
*************************************************************************
                    PRINTER_PRINT_GRAPHICS_LINE_OR_SCREEN
0fb6fd 04 eb bb          CALL         OPTION_PRESERVE
0fb700 60 fe             CMP          A,0xfe
0fb702 18 1b             JRZ          FULL_SCREEN
0fb704 28                PUSHU        A
0fb705 04 67 b8          CALL         PRINTER_ID_CHECK
0fb708 1c 0f             JRC          POP_EXIT
0fb70a 38                POPU         A
0fb70b 04 c5 b7          CALL         PRINTER_PRINT_GRAPHICS_LINE
0fb70e 1c 0a             JRC          EXIT
0fb710 04 50 b8          CALL         PRINTER_END_PRINT
0fb713 1c 05             JRC          EXIT
0fb715 04 e0 bb          CALL         OPTION_RESTORE
0fb718 06                RET
                    POP_EXIT
0fb719 39                POPU         IL
                    EXIT
0fb71a 04 e0 bb          CALL         OPTION_RESTORE
0fb71d 97                SC
0fb71e 06                RET
                    FULL_SCREEN
0fb71f 30 7d ec          DEC          (BP)
0fb722 04 60 09          CALL         FUN_0f0960
0fb725 88 a1 fd 01       MV           A,[TEXTFLAGS]
0fb729 28                PUSHU        A
0fb72a 72 a1 fd 01       AND          [TEXTFLAGS],0xdf
       df
0fb72f 7a a1 fd 01       OR           [TEXTFLAGS],0x40
       40
0fb734 30 cd d6 00       MVW          (CX),0x0
       00
0fb739 09 5e             MV           IL,0x5e
0fb73b 4d 44             SUB          X,X
0fb73d 30 cd d4 00       MVW          (BX),0x700
       07
0fb742 30 cd d8 0f       MVW          (DL),0x70f
       07
0fb747 05 e8 ff 0f       CALLF        IOCS
0fb74b 30 cd d4 00       MVW          (BX),0x700
       07
0fb750 0c b5 b7 0f       MV           X,PRINTING_CAPTION = "   -PRINTING-   "
0fb754 0d 10 00 00       MV           Y,0x10
0fb758 4c 22             SUB          BA,BA
0fb75a 30 cd d6 00       MVW          (CX),0x0
       00
0fb75f 09 42             MV           IL,0x42
0fb761 05 e8 ff 0f       CALLF        IOCS
0fb765 04 28 b8          CALL         PRINTER_INIT
0fb768 1c 29             JRC          FULL_SCREEN_EXIT
0fb76a 04 67 b8          CALL         PRINTER_ID_CHECK
0fb76d 1c 24             JRC          FULL_SCREEN_EXIT
0fb76f cc 00 00          MV           (BP+0x0),0x0
                    FULL_SCREEN_LOOP
0fb772 80 00             MV           A,(BP+0x0)
0fb774 04 c5 b7          CALL         PRINTER_PRINT_GRAPHICS_LINE
0fb777 1c 1a             JRC          FULL_SCREEN_EXIT
0fb779 6d 00             INC          (BP+0x0)
0fb77b 61 00 07          CMP          (BP+0x0),7
0fb77e 1b 0e             JRNZ         FULL_SCREEN_LOOP
0fb780 fd 46             MV           X,U
0fb782 08 06             MV           A,6
0fb784 45 40             ADD          X,A
0fb786 08 ff             MV           A,0xff
0fb788 04 c5 b7          CALL         PRINTER_PRINT_GRAPHICS_LINE
0fb78b 1c 06             JRC          FULL_SCREEN_EXIT
0fb78d 04 50 b8          CALL         PRINTER_END_PRINT
0fb790 1c 01             JRC          FULL_SCREEN_EXIT
0fb792 9f                RC
                    FULL_SCREEN_EXIT
0fb793 b0 37             MV           [--S],A
0fb795 4f                PUSHS        F
0fb796 30 6d ec          INC          (BP)
0fb799 30 cd d6 00       MVW          (CX),0
       00
0fb79e 09 5f             MV           IL,0x5f
0fb7a0 4d 44             SUB          X,X
0fb7a2 05 e8 ff 0f       CALLF        IOCS
0fb7a6 38                POPU         A
0fb7a7 a8 a1 fd 01       MV           [TEXTFLAGS],A
0fb7ab 04 97 09          CALL         FUN_0f0997
0fb7ae 5f                POPS         F
0fb7af 90 27             MV           A,[S++]
0fb7b1 04 e0 bb          CALL         OPTION_RESTORE
0fb7b4 06                RET
                    PRINTING_CAPTION
0fb7b5 20 20 20 2d       char[16]     "   -PRINTING-   "
       50 52 49 4e
       54 49 4e 47
Knowing that these routines exist and where to find them in the ROM is one thing, but how were they intended to be called? I also have a ROM dump from an IQ-7400 organiser and the routines aren't at the same memory addresses, and most of them return with RET which means they can only be called from the same segment. The PC-E500's technical reference manual describes a routine called IOCS that performs certain operations on I/O devices based on a device and drive number in variable CX and a command number in register I, so it would seem likely that somewhere in the ROM is a table of addresses that map the command numbers to their respective routines.
Searching for some of the addresses of routines that were likely to be made publicly accessible soon produced a table of routines that could be called along with the routine that would invoke the target routine with the command number in the register IL:
*************************************************************************
* Calls a printer routine with the command number in IL.                *
*************************************************************************
                    PRINTER_FN
0fb477 2a                PUSHU        BA
0fb478 2c                PUSHU        X
0fb479 fd 01             MV           A,IL
0fb47b 60 3f             CMP          A,0x3f
0fb47d 1e 11             JRNC         FN_3F_OR_OVER
0fb47f 48 08             SUB          A,0x8
0fb481 0c 98 b4 0f       MV           X,FN_TABLE
                    INVOKE
0fb485 45 40             ADD          X,A
0fb487 45 40             ADD          X,A
0fb489 92 04             MV           BA,[X]
0fb48b b2 37             MV           [--S],BA
0fb48d 3c                POPU         X
0fb48e 3a                POPU         BA
0fb48f 06                RET
                    FN_3F_OR_OVER
0fb490 0c a6 b4 0f       MV           X,FN_TABLE_3F_OR_OVER
0fb494 48 3f             SUB          A,0x3f
0fb496 13 13             JR           INVOKE
                    FN_TABLE
0fb498 dc b5             ushort       B5DCh      0x08 ? PRINTER_IOCS_08
0fb49a 00 b6             ushort       B600h      0x09 ? PRINTER_IOCS_09
0fb49c e6 b4             ushort       B4E6h      0x0A PRINTER_DRIVE_DOES_NOT_EXIST
0fb49e fc b4             ushort       B4FCh      0x0B ? PRINTER_IOCS_0B
0fb4a0 e6 b4             ushort       B4E6h      0x0C PRINTER_DRIVE_DOES_NOT_EXIST
0fb4a2 05 b6             ushort       B605h      0x0D ? PRINTER_IOCS_0D
0fb4a4 e6 b4             ushort       B4E6h      0x0E PRINTER_DRIVE_DOES_NOT_EXIST
                    FN_TABLE_3F_OR_OVER
0fb4a6 ed b9             ushort       B9EDh      0x3F PRINTER_RESET
0fb4a8 ea b4             ushort       B4EAh      0x40 PRINTER_RESET_A
0fb4aa fd b6             ushort       B6FDh      0x41 PRINTER_PRINT_GRAPHICS_LINE_OR_SCREEN
0fb4ac 5d b9             ushort       B95Dh      0x42 PRINTER_PRINT_TEXT_0_SAFE
0fb4ae 53 b9             ushort       B953h      0x43 PRINTER_PRINT_TEXT_1_SAFE
0fb4b0 dc b5             ushort       B5DCh      0x44 ? PRINTER_IOCS_08
0fb4b2 00 b6             ushort       B600h      0x45 ? PRINTER_IOCS_09
0fb4b4 05 b6             ushort       B605h      0x46 ? PRINTER_IOCS_0D
0fb4b6 fc b4             ushort       B4FCh      0x47 ? PRINTER_IOCS_OB
0fb4b8 c3 bb             ushort       BBC3h      0x48 RES_SOSI
0fb4ba af bb             ushort       BBAFh      0x49 SET_SO
0fb4bc b4 bb             ushort       BBB4h      0x4A RES_SO
0fb4be b9 bb             ushort       BBB9h      0x4B GET_SI
0fb4c0 28 b8             ushort       B828h      0x4C PRINTER_INIT
0fb4c2 15 ba             ushort       BA15h      0x4D OPTION_ID_DEVICE_AA
0fb4c4 38 ba             ushort       BA38h      0x4E OPTION_ID_DEVICE_A5
0fb4c6 63 ba             ushort       BA63h      0x4F SET_SO_CHECK_SI_HIGH_ERR_RES_SO
0fb4c8 81 ba             ushort       BA81h      0x50 SET_SO_CHECK_SI_HIGH
0fb4ca 9a b9             ushort       B99Ah      0x51 OPTION_GET_ACK
0fb4cc 7c bb             ushort       BB7Ch      0x52 OPTION_DELAYED_SEND_BYTE
0fb4ce 2f bb             ushort       BB2Fh      0x53 OPTION_SEND_BYTE
0fb4d0 86 bb             ushort       BB86h      0x54 OPTION_SEND_BYTE_CHECKSUM
0fb4d2 91 bb             ushort       BB91h      0x55 OPTION_SEND_BYTE_CHECKSUM_WAIT_IN
0fb4d4 9c bb             ushort       BB9Ch      0x56 OPTION_SEND_BYTE_WAIT_INFINITE
0fb4d6 a2 ba             ushort       BAA2h      0x57 OPTION_GET_BYTE
0fb4d8 e9 ba             ushort       BAE9h      0x58 OPTION_GET_BYTE_CHECKSUM
0fb4da f7 ba             ushort       BAF7h      0x59 OPTION_GET_BYTE_CHECKSUM_WAIT_INF
0fb4dc 05 bb             ushort       BB05h      0x5A OPTION_GET_BYTE_WAIT_MINUTE
0fb4de 20 bb             ushort       BB20h      Ox5B OPTION_GET_BYTE_WAIT_INFINITE
0fb4e0 cd bb             ushort       BBCDh      0x5C CHECK_BREAK
0fb4e2 eb bb             ushort       BBEBh      0x5D OPTION_PRESERVE
0fb4e4 e0 bb             ushort       BBE0h      0x5E OPTION_RESTORE

*************************************************************************
* Sets carry flag and error code A to 0x01,                             *
* "The drive does not exist".                                           *
*************************************************************************
                    PRINTER_DRIVE_DOES_NOT_EXIST
0fb4e6 08 01             MV           A,0x1
0fb4e8 97                SC
0fb4e9 06                RET
As it seems likely that this is part of the organiser's IOCS routine, the problem can now be approached from the opposite direction – look for code that handles the call to IOCS and find where it calls the printer PRINTER_FN routine that was just identified. In fact, we don't even need to go that far, as each device that can be accessed via IOCS (screen, keyboard, serial port, option port etc) has a "header" that describes it, including its device name and entry point of its routine handler, so finding this table of headers should be enough. Searching the ROM for the printer device name "PRN:" soon finds it, fourth in the list of devices:
                    IOCS_HDR_STDO_SCRN
0f03f5 08 04 0f          addr         IOCS_HDR_STDI_KYBD
0f03f8 00                db           0h
0f03f9 a2                db           A2h
0f03fa a5 04 0f          addr         LAB_0f04a5
0f03fd 53 54 44 4f       ds           "STDO:SCRN:"
       3a 53 43 52
       4e 3a 00
                    IOCS_HDR_STDI_KYBD
0f0408 1b 04 0f          addr         IOCS_HDR_COM
0f040b 01                db           1h
0f040c a1                db           A1h
0f040d 0a 36 0f          addr         LAB_0f360a
0f0410 53 54 44 49       ds           "STDI:KYBD:"
       3a 4b 59 42
       44 3a 00
                    IOCS_HDR_COM
0f041b 28 04 0f          addr         IOCS_HDR_STDL_PRN
0f041e 02                db           2h
0f041f d3                db           D3h
0f0420 fe a5 0f          addr         FUN_0fa5fe
0f0423 43 4f 4d 3a       ds           "COM:"
       00
                    IOCS_HDR_STDL_PRN
0f0428 3a 04 0f          addr         IOCS_HDR_CAS
0f042b 03                db           3h
0f042c a2                db           A2h
0f042d 39 b4 0f          addr         PRINTER_FN_PRESERVE
0f0430 53 54 44 4c       ds           "STDL:PRN:"
       3a 50 52 4e
       3a 00
                    IOCS_HDR_CAS
0f043a 47 04 0f          addr         IOCS_HDR_S1_S2_S3
0f043d 04                db           4h
0f043e d7                db           D7h
0f043f c0 ae 0f          addr         FUN_0faec0
0f0442 43 41 53 3a       ds           "CAS:"
       00
                    IOCS_HDR_S1_S2_S3
0f0447 59 04 0f          addr         IOCS_HDR_SYSTM
0f044a 06                db           6h
0f044b c3                db           C3h
0f044c 83 7c 0f          addr         LAB_0f7c83
0f044f 53 31 3a 53       ds           "S1:S2:S3:"
       32 3a 53 33
       3a 00
                    IOCS_HDR_SYSTM
0f0459 68 04 0f          addr         IOCS_HDR_RTC
0f045c 08                db           8h
0f045d 00                db           0h
0f045e 02 57 0f          addr         LAB_0f5702
0f0461 53 59 53 54       ds           "SYSTM:"
       4d 3a 00
                    IOCS_HDR_RTC
0f0468 75 04 0f          addr         IOCS_HDR_PANET
0f046b 0a                db           Ah
0f046c 00                db           0h
0f046d ef 31 0f          addr         LAB_0f31ef
0f0470 52 54 43 3a       ds           "RTC:"
       00
                    IOCS_HDR_PANET
0f0475 84 04 0f          addr         IOCS_HDR_PACOM
0f0478 0b                db           Bh
0f0479 c0                db           C0h
0f047a 3d bc 0f          addr         LAB_0fbc3d
0f047d 50 41 4e 45       ds           "PANET:"
       54 3a 00
                    IOCS_HDR_PACOM
0f0484 93 04 0f          addr         IOCS_HDR_UNKNOWN_1
0f0487 0c                db           Ch
0f0488 53                db           53h
0f0489 00 bc 0f          addr         LAB_0fbc00
0f048c 50 41 43 4f       ds           "PACOM:"
       4d 3a 00
                    IOCS_HDR_UNKNOWN_1
0f0493 9c 04 0f          addr         IOCS_HDR_UNKNOWN_2
0f0496 0d                db           Dh
0f0497 00                db           0h
0f0498 77 67 0f          addr         LAB_0f6777
0f049b 00                ds           ""
                    IOCS_HDR_UNKNOWN_2
0f049c ff ff 0f          addr         LAB_0fffff
0f049f 0e                db           Eh
0f04a0 00                db           0h
0f04a1 88 5c 0f          addr         LAB_0f5c88
0f04a4 00                ds           ""
From this we can see that the printer has device number 0x03, attributes 0xA2 (bit 7: "able to handle file-control", bit 5: "character device", bit 1: "write enable") and a handler at 0x0fb439 which I named PRINTER_FN_PRESERVE as it looks like this:
                    PRINTER_FN_PRESERVE
0fb439 04 43 b4          CALL         PRINTER_STATE_PRESERVE
0fb43c 04 77 b4          CALL         PRINTER_FN
0fb43f 04 5d b4          CALL         PRINTER_STATE_RESTORE
0fb442 07                RETF

                    PRINTER_STATE_PRESERVE
0fb443 30 ea 36 da       MVP          [--U],(SI)
0fb447 30 ea 36 dd       MVP          [--U],(DI)
0fb44b 30 e9 36 d4       MVW          [--U],(BX)
0fb44f 30 e9 36 d6       MVW          [--U],(CX)
0fb453 30 e9 36 d8       MVW          [--U],(DX)
0fb457 30 e8 36 ed       MV           [--U],(PX)
0fb45b 2b                PUSHU        I
0fb45c 06                RET

                    PRINTER_STATE_RESTORE
0fb45d 3b                POPU         I
0fb45e 30 e0 26 ed       MV           (PX),[U++]
0fb462 30 e1 26 d8       MVW          (DX),[U++]
0fb466 30 e1 26 d6       MVW          (CX),[U++]
0fb46a 30 e1 26 d4       MVW          (BX),[U++]
0fb46e 30 e2 26 dd       MVP          (DI),[U++]
0fb472 30 e2 26 da       MVP          (SI),[U++]
0fb476 06                RET
That is, a bunch of variables and the I register are preserved on the user stack before PRINTER_FN is called and then restored afterwards. Knowing all this we can finally try to print something from assembly! Previously we'd looked at the PRINTER_PRINT_GRAPHICS_LINE_OR_SCREEN routine, which we know will print the entire screen if register A is set to -2 when called. This appears as entry 0x41 on the list of functions that can be called, so we'll need to set register I to 0x41. We also know that the printer is device 3, so that needs to be stored in variable CX which can be found at address 0xD6. Finally, IOCS can be called at address 0xFFFE8:
    mvw ($D6), 3
    mv i, $41
    mv a, -2
    callf $FFFE8
    retf
This sample program can be assembled using XASM, POKEd into memory and then CALLed – at which point it does indeed print out the current screen! Success! It took a while to get there, but now with a better idea of how the organiser handles the printer internally it should be possible to write a program that sends text (rather than graphics) to the printer and from that work out what every character in the printer's character set looks like.
I have glossed over one minor technical detail – where do we POKE the program into memory? There should be some free space in the BASIC card's memory but I haven't figured out a way to properly set some aside, least of all with a fixed address so that when the code is assembled it's at the right address. Instead, I've been using what I think is the organiser's clipboard buffer, as that should start at a fixed address and provide enough space for a few bytes of machine code.
To find out where the clipboard buffer is, I first copy a known string (e.g. "CLIP") into the clipboard using the organiser's "memo" application. I then use this BASIC program to search for the string:
10 INPUT "Search for: ",S$
20 F=ASC S$
30 INPUT "Start addr: ",A
40 IF F<>PEEK A LET A=A+1:GOTO 40
50 M=1
60 FOR T=1TO LEN S$
70 IF ASC MID$ (S$,T,1)<>PEEK (A+T-1)LET M=0:T=LEN S$
80 NEXT T
90 IF M PRINT HEX A
100 A=A+1:GOTO 40
Using a start address of (for example) &1F000 I found what appears to be the clipboard buffer at the following addresses:
- IQ-7000: &1FBF2
- IQ-7400: &1FBCD
- IQ-8000: &1F35E
However, I can't make any promises that the above values are correct or how much code you could store there, and you may end up overwriting other things inadvertently. You could check that the address seems plausible by modifying the byte at that address and seeing if the first character of the clipboard contents changes too.
I hacked together a program that would print sixteen characters using the printer command byte 0x52 but found it wouldn't work on the organiser. It would work sometimes if I printed only three or four characters at a time, but any more than that it and it would fail to print. I took a closer look at some of the routines built into the ROM that successfully transferred a lot of data to the printer and found that they used a pair of routines before and after the bulk of their code that preserved then restored some state:
                    OPTION_RESTORE
0fbbe0 3f                POPU         IMR
0fbbe1 4f                PUSHS        F
0fbbe2 b0 37             MV           [--S],A
0fbbe4 04 00 36          CALL         FUN_0f3600
0fbbe7 90 27             MV           A,[S++]
0fbbe9 5f                POPS         F
0fbbea 06                RET

                    OPTION_PRESERVE
0fbbeb b4 37             MV           [--S],X
0fbbed b5 37             MV           [--S],Y
0fbbef b0 37             MV           [--S],A
0fbbf1 04 da 35          CALL         DELAY_SET_BZ_100
0fbbf4 90 27             MV           A,[S++]
0fbbf6 95 27             MV           Y,[S++]
0fbbf8 94 27             MV           X,[S++]
0fbbfa 2f                PUSHU        IMR
0fbbfb 30 cc fb c0       MV           (IMR),11000000b
0fbbff 06                RET
I hadn't fully disassembled them and haven't yet established what the BZ register values are being used for, but the way that the interrupt mask was preserved and then changed to 11000000b, disabling everything other than external interrupts, seemed the most relevant – if an interrupt fired in the middle of a data transfer it would muck up the timing, and that could well explain why the data wasn't getting through to the printer properly.
Fortunately, the above two routines are exposed via IOCS (command number 0x5D disables interrupts, 0x5E re-enables them) and so I just wrapped my entire sample program with calls to those two routines and the printer was now able to print all 16 characters in a line! Unfortunately it would then return to BASIC but lock up almost immediately afterwards; the organiser's LCD would dim slightly and it wouldn't respond to keys. It looked like it was stuck executing something (hence the dimmed LCD) but I wasn't sure what; assuming it was also related to interrupts I wrapped all of the code with pushu IMR and popu IMR to provide a second back-up of the interrupt mask register and that seemed to fix it. Again, I don't really know what I'm doing, but if it lets me print a test pattern then so be it!
The final assembly program ended up looking like this:
    org		$1FBF2 ; IQ-7000

    pre_on

    pushu IMR ; preserve interrupt mask

    mv i, $5D ; disable interrupts
    call iocs

    mv i, $40 ; reset printer
    mv a, 0
    call iocs
    jrc exit

    mv i, $4D ; check ID (using AA)
    call iocs
    jrc exit

    mv a, $51 ; print line
    call send
    jrc exit

    mv x, buffer
    mv il, 16

charloop:
    mv a,[x++]
    pushu x
    pushu il
    call send
    popu il
    popu x
    dec il
    jrnz charloop

    mv a, $0D ; line end
    call send
    jrc exit

    call get_ack
    jrc exit

    mv a, $70 ; end print
    call send
    jrc exit

    call get_ack

exit:
    mv i, $48 ; reset So and Si
    call iocs

    mv i, $5E ; re-enable interrupts
    call iocs

    popu IMR ; restore interrupt mask

    retf


get_ack:
    mv i,$51 ; get acknowledgement
    jr iocs

send:
    mv i, $52 ; send a byte (delayed)
    ; fall-through

iocs:
    mvw ($D6), 3
    callf $FFFE8
    ret

buffer:
    db '0123456789ABCDEF'

    end
Once assembled and embedded into a BASIC program which steps through all 256 characters and prints them (16 at a time), it looks like this:
10 REM PRNTCHARS
20 O=&1FBF2:P=O
30 READ H$:IF H$="END"THEN GOTO 60
40 FOR I=1TO LEN H$ STEP 2:POKE P,EVAL("&"+MID$ (H$,I,2))
50 P=P+1:NEXT I:GOTO 30
60 P=P-16:FOR C=0 TO 255 STEP 16
70 FOR X=0 TO 15:L=C+X:IF L=13 LET L=255
80 POKE P+X,L:NEXT X
90 CALL O:NEXT C
100 DATA 2F0B5D000451FC0B400008000451FC1C380B4D000451FC1C300851044EFC1C29
110 DATA 0C5BFC01091090242C29044EFC393C7C011B0D080D044EFC1C0F0449FC1C0A08
120 DATA 70044EFC1C030449FC0B48000451FC0B5E000451FC3F070B510012030B520030
130 DATA CDD6030005E8FF0F0630313233343536373839414243444546
140 DATA END
Line 70 intentionally skips printing character 13, as this is the line terminator (you can print lines shorter than 16 characters, and they are left-aligned unlike some of Sharp's other printers that right-align the text like a traditional printing calculator). Fortunately the test pattern built into the ROM shows us what character 13 should look like, even though I'm not sure how you'd print it normally.
After running the program a couple of times I scanned the printout and then carefully transcribed every character from the printout into a font file using the Fony editor.
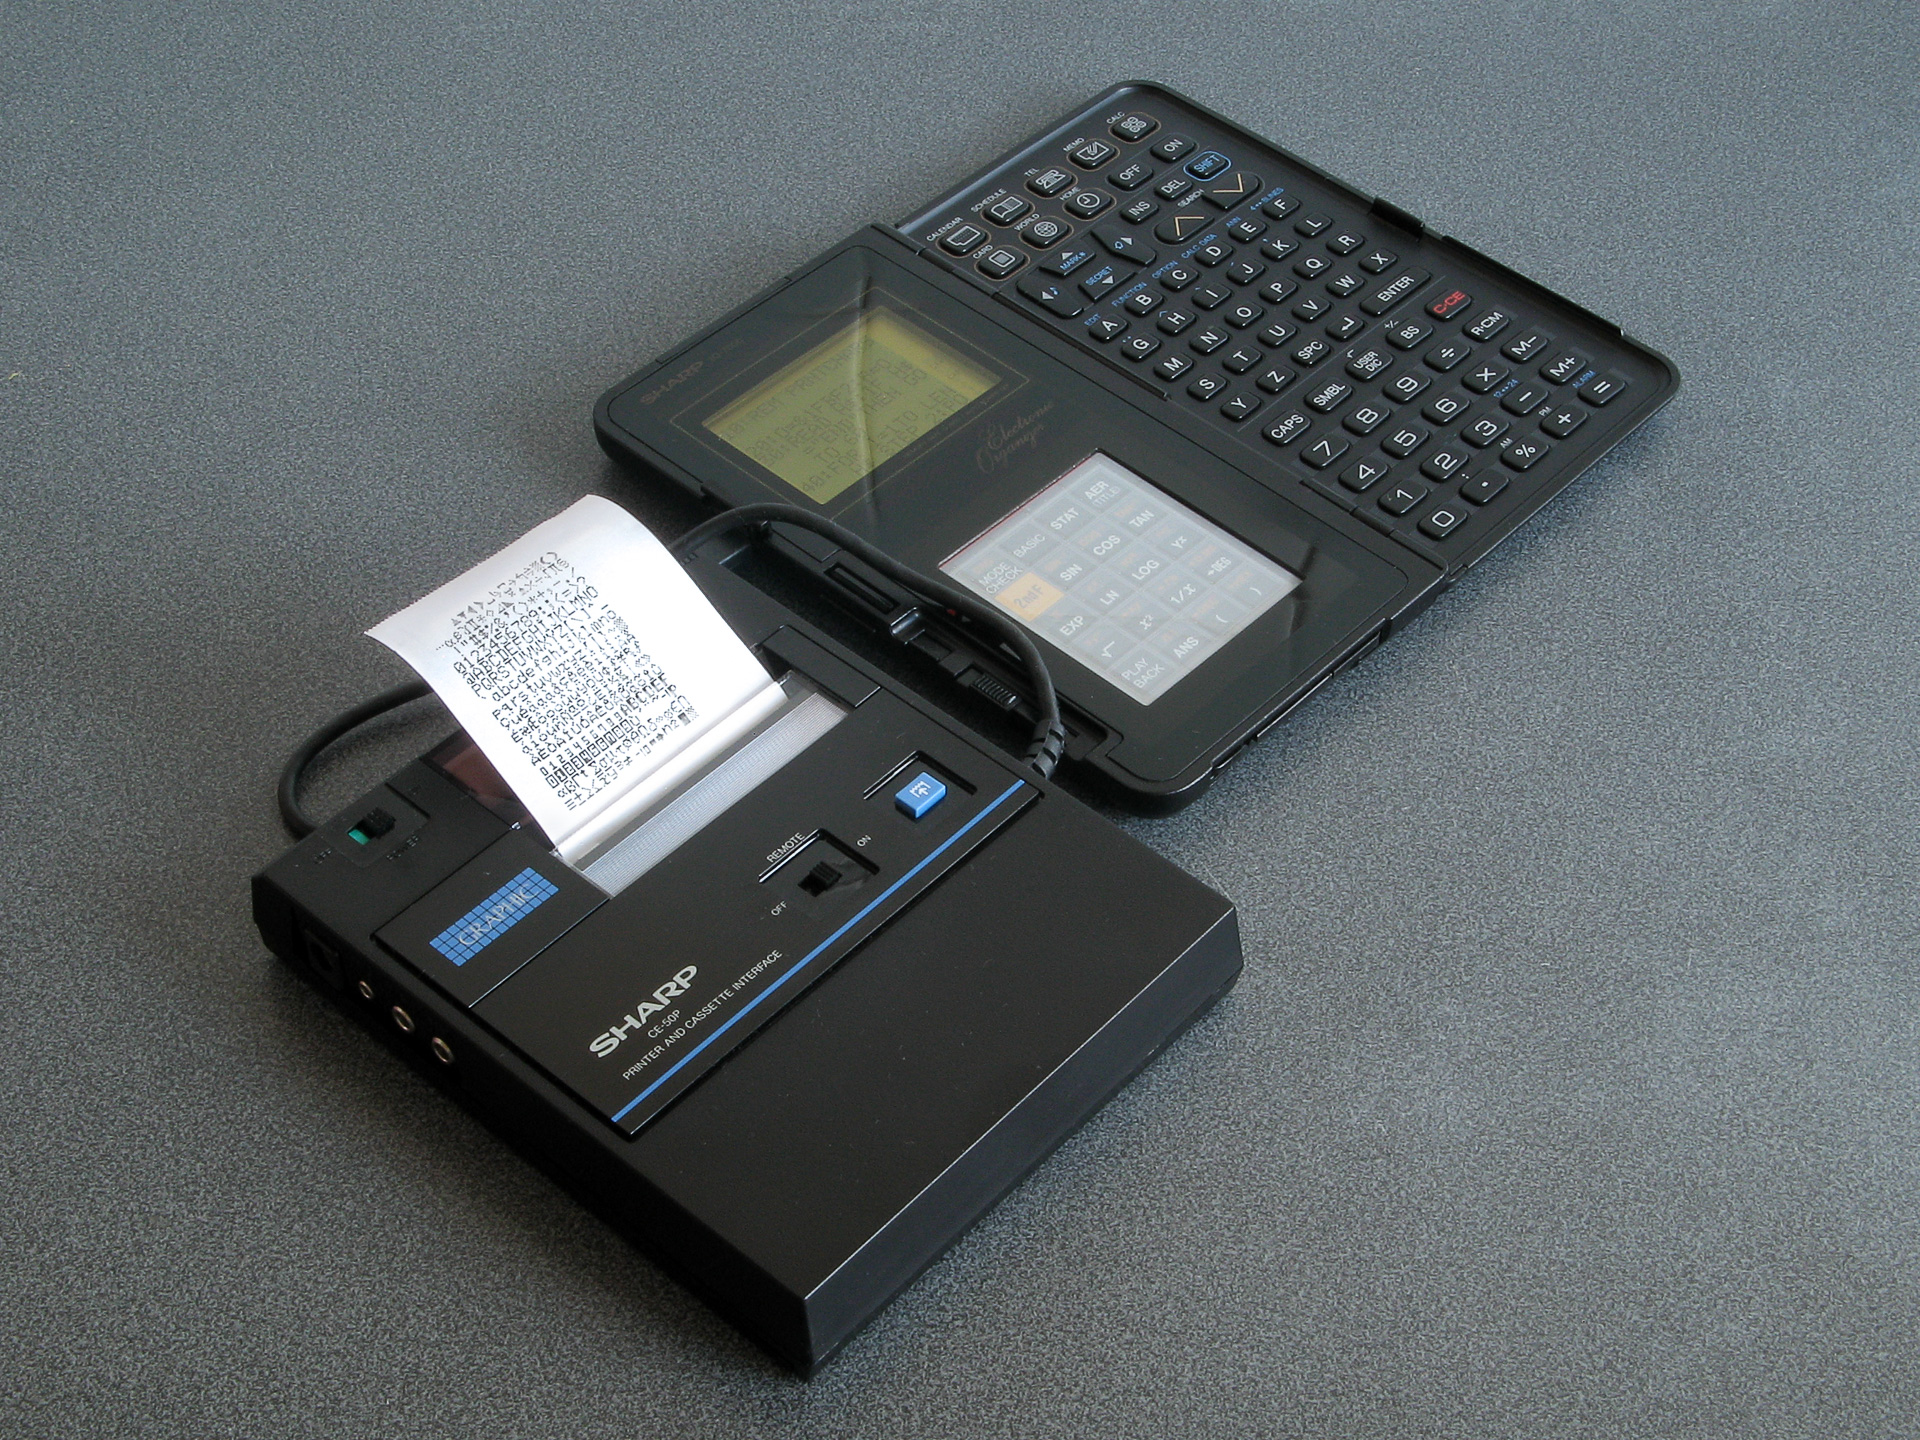
The result of running the test program on the IQ-7000: a printout of the CE-50P's full character set.
From that I was able to export a bitmap that I could then turn back into binary data for my CE-50P emulator, and I could then run the test program on the organiser again to check that the output from the emulated printer properly matched the output from the real one. I found some misplaced pixels by overlaying a screenshot of the virtual CE-50P's output over the scan and quickly flipping between them; once these were corrected, I was pretty happy that I had a decent version of the CE-50P's character set.
I did run into one further quirk of the printer; its output is 128 pixels wide, which can accommodate up to 21 characters per line, but the EL-9000 only prints 16 characters per line (as does my test program above). When I tried printing 21 characters nothing happened – indeed, any attempt at printing 17 or more characters in a line resulted in a silent printer. On a hunch I tried changing the printer command code from 0x51 to 0x52, and found that that allowed me to print up to 21 characters, as did 0x53. I'd previously allowed my emulated CE-50P to print any number of characters per line, but following those experiments I limited 0x51 to sixteen characters and 0x52/0x53 to 21, as per the behaviour of the real printer.
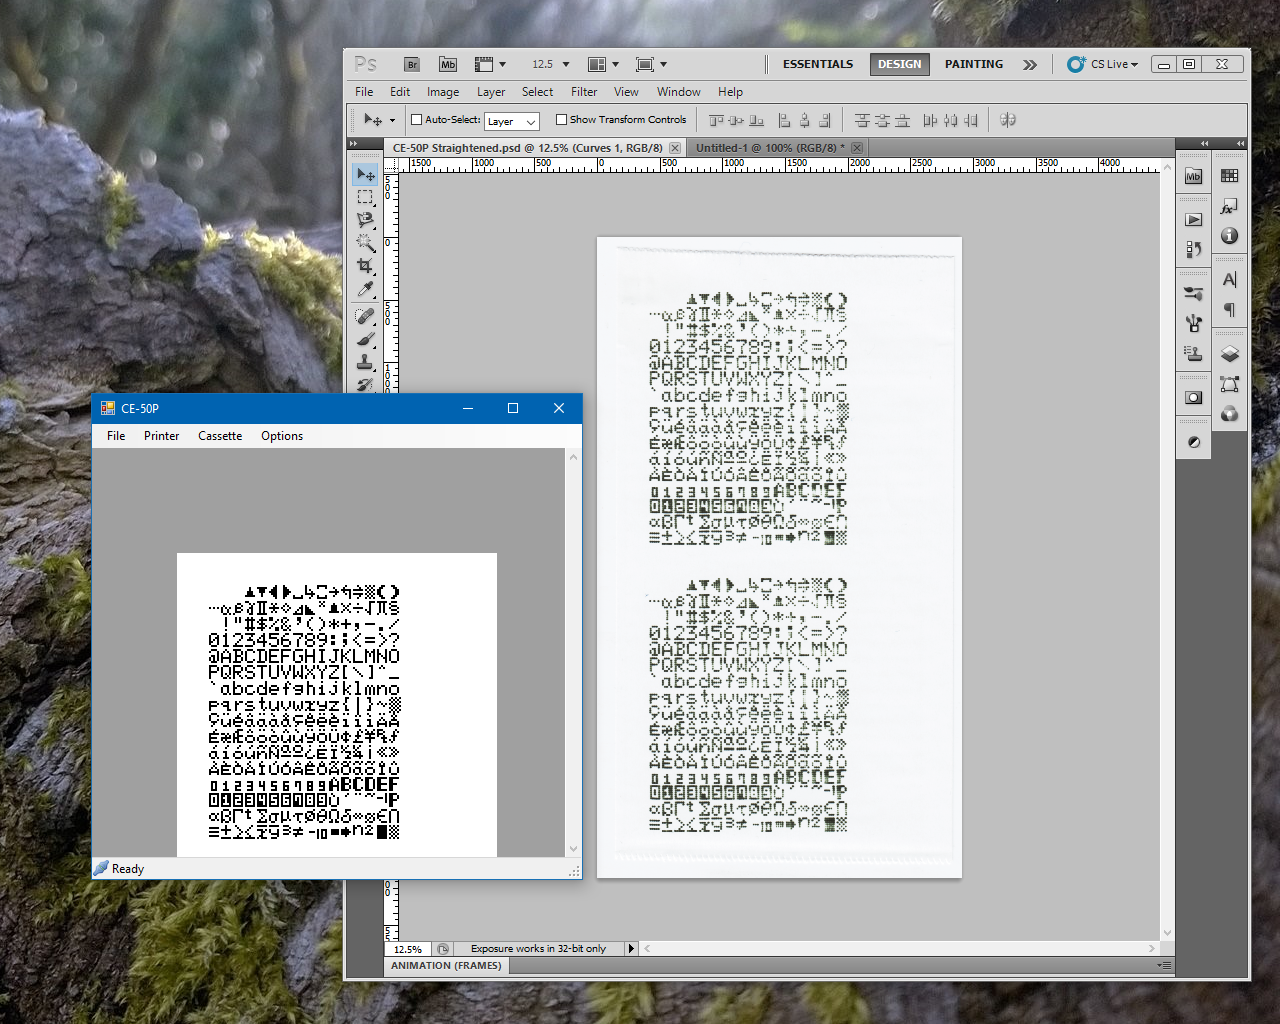
Comparing the virtual printer's output with the scans from the real one.
Now that I have a solution to the CE-50P's undocumented character set, maybe I can get to work implementing the rest of the EL-9000's data transfer protocol. Once I've finished that, maybe I can finish working on the EL-9300's equation editor. Once that's working to my satisfaction, maybe I can extend it for use in my EL-9400/EL-9450/EL-9600/EL-9900/EL-9950 link software. And then, if I'm very lucky, I might have something I could release... if I don't get sidetracked by something else in the process!
Targeted repairs for missing rows and columns on the Sharp EL-9900's LCD
Wednesday, 2nd September 2026
Sharp don't seem to have the best reputation when it comes to graphing calculators however I do have a bit of a soft spot for them as they do have some interesting features. The EL-9300 lets you connect a printer and cassette interface to print out screenshots, program listings or formulae as well and save data to (and load data back from) tape cassette. The EL-9600 has a touch screen which does rather speed up menu navigation. The EL-9900 loses the touch screen but has a reversible keyboard with a "basic" side and an "advanced" side, which changes available menu options and defaults as well as the keyboard layout.
Unfortunately, the EL-9900 seems to suffer from the flex cable that connects the main PCB to the LCD coming unstuck, resulting in an increasing number of missing rows and columns as it ages. Fortunately, there is direct access to the flex cable on the EL-9900 calculator, which means it can be reattached by reheating it.
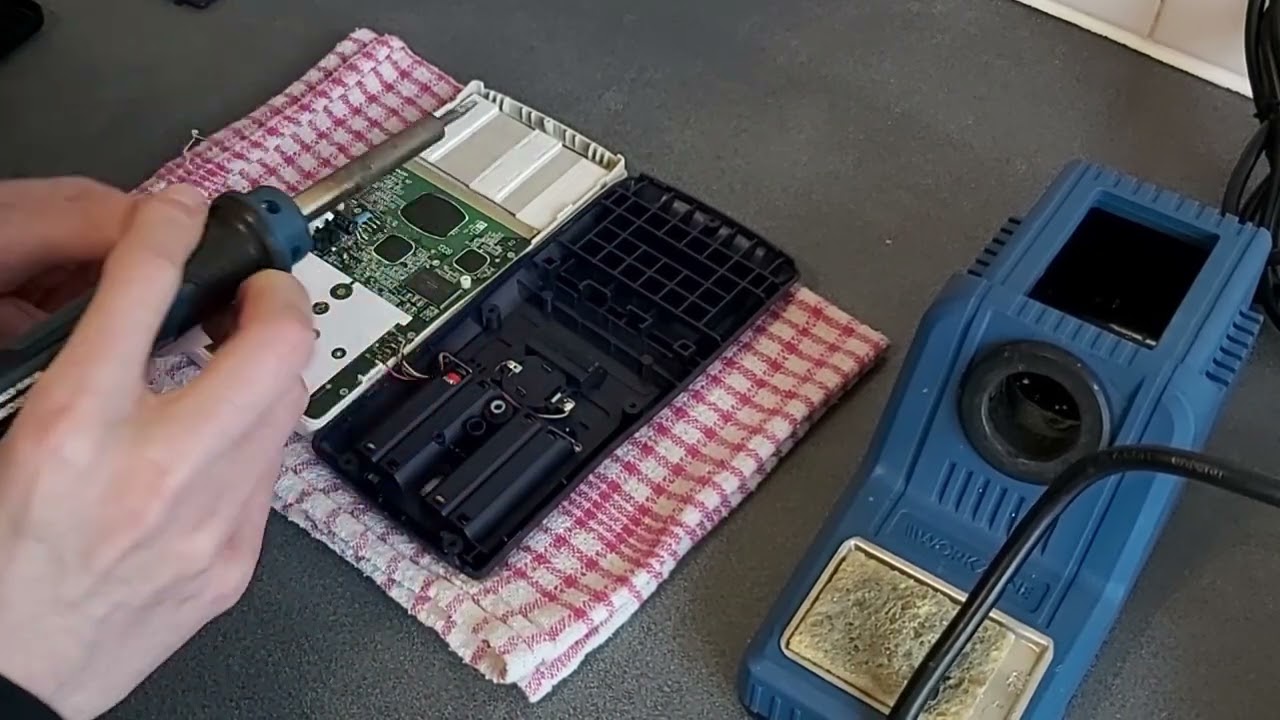
I have four EL-9900 calculators now and all had this issue. The first one I repaired by gingerly poking around with a soldering iron (set to around 250°C) until all the rows and columns came back. The next one I repaired in a video for YouTube and I dealt with that one by working my way along the whole flex cable from left to right until everything was working. Not exactly a scientific approach, but with so many missing columns I figured the cable needed some serious attention anyway and that calculator is still fully working 20 months later.
The first calculator I tried to repair didn't fare so well, unfortunately. After the initial success it started losing rows and columns again and so I'd try re-heating the flex cable. That would work for a week or so until yet another row or column disappeared. Eventually I had reheated the cable so many times it started to look very crusty and the repairs became less effective, until I ended up melting a hole straight through a section of it, destroying it completely.
I recently acquired another pair of EL-9900 calculators, both with only two or three missing rows and columns on them. I thought it would be a good opportunity to try a more targeted approach, as reheating the whole flex cable when there were only a small number of faults seems unnecessarily risky. There are two issues here: identifying which rows and columns are faulty, and then identifying where the corresponding point on the flex cable is to heat with the soldering iron. To this end, I developed this printable guide (LibreOffice Draw file) that has three rulers on it.
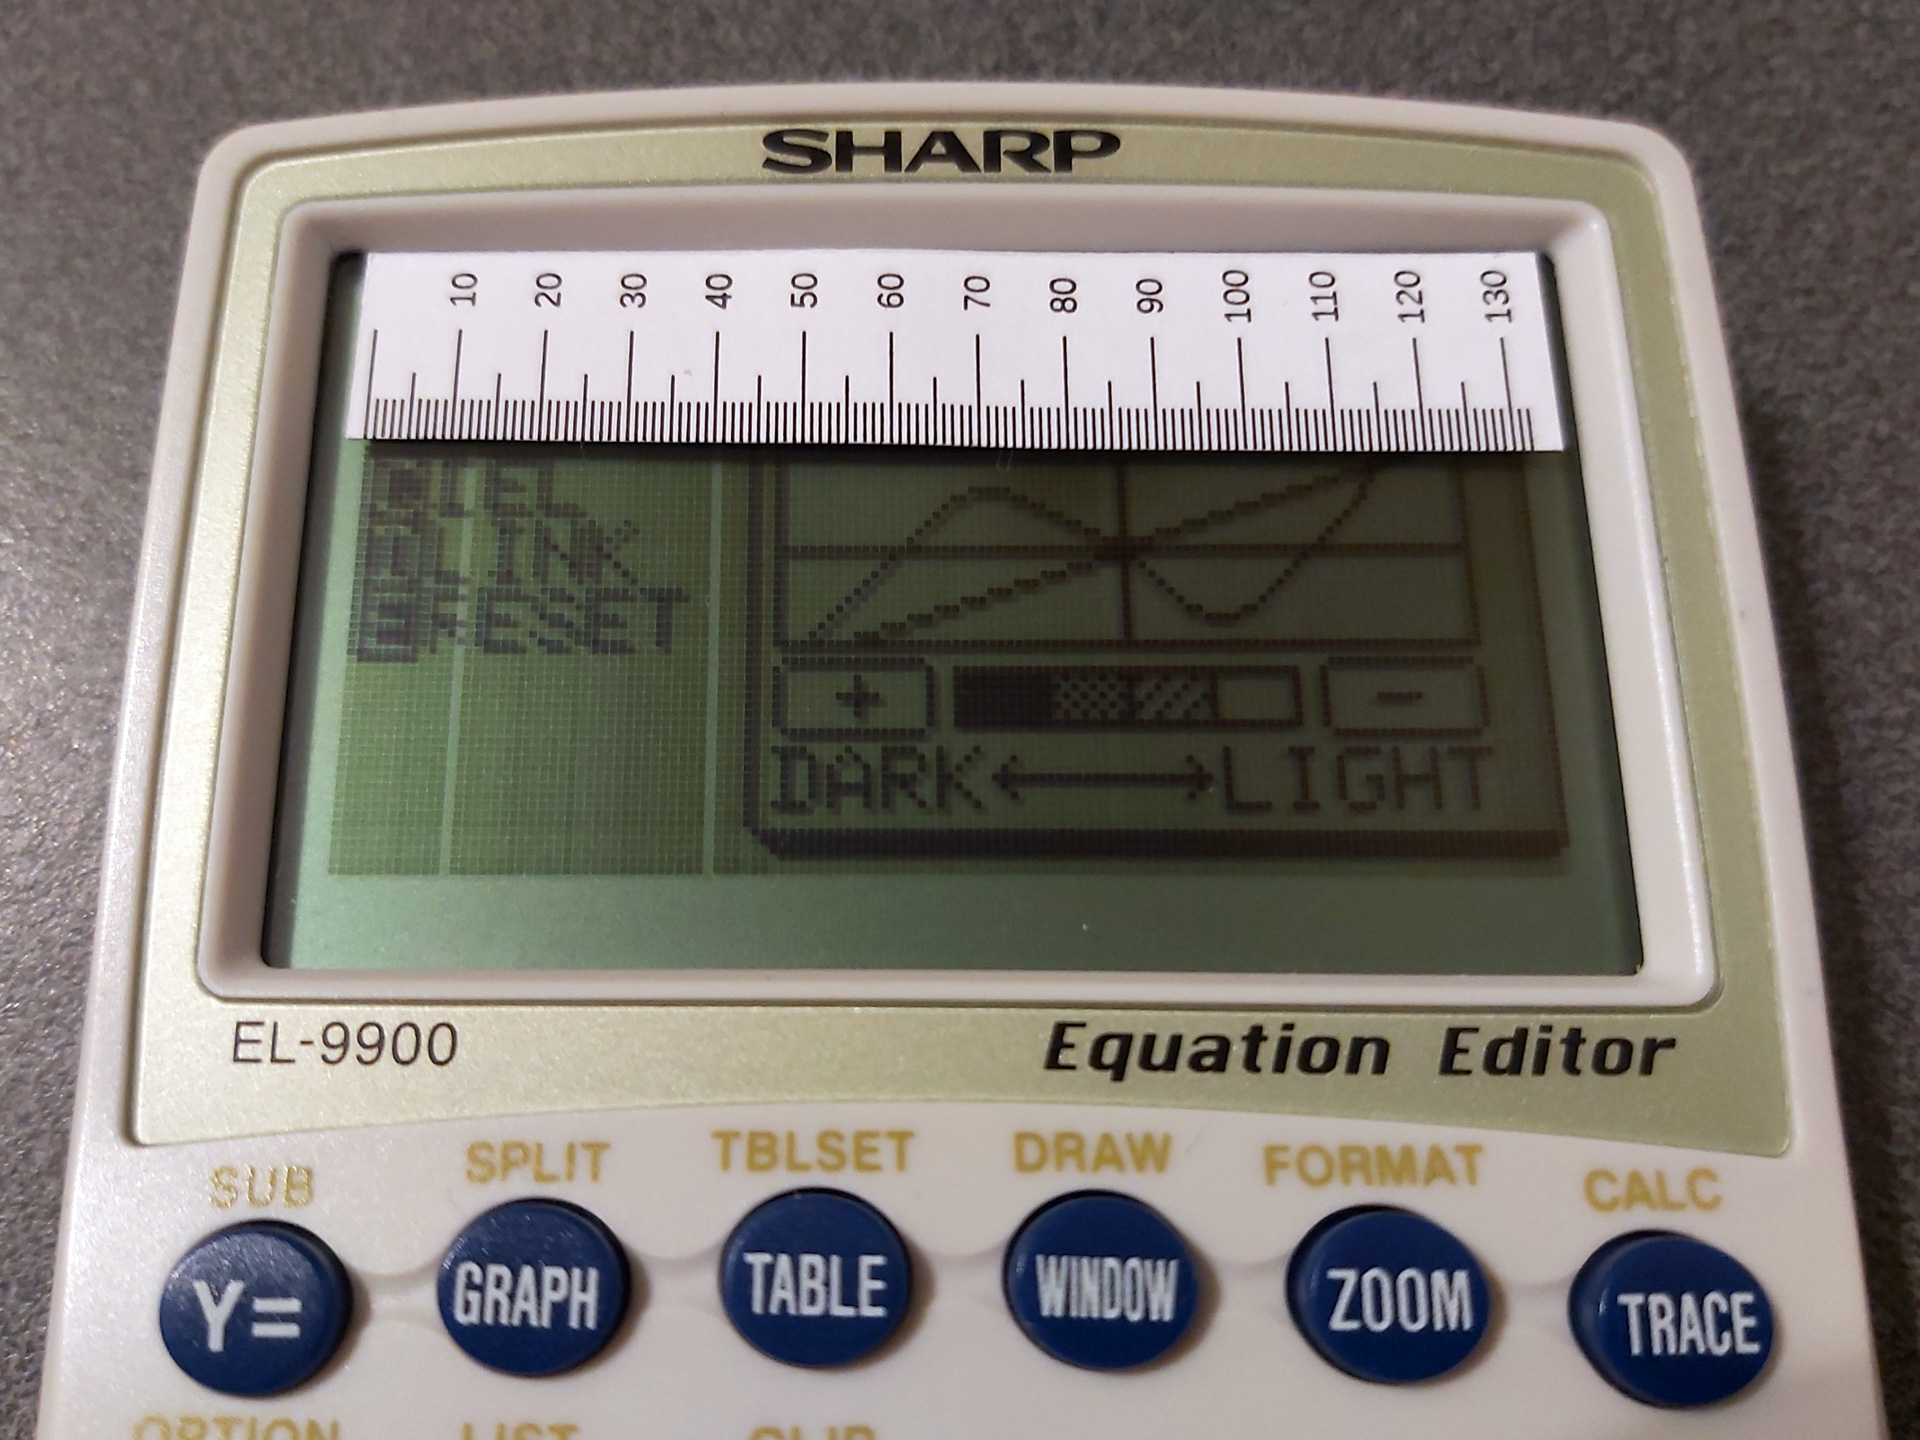
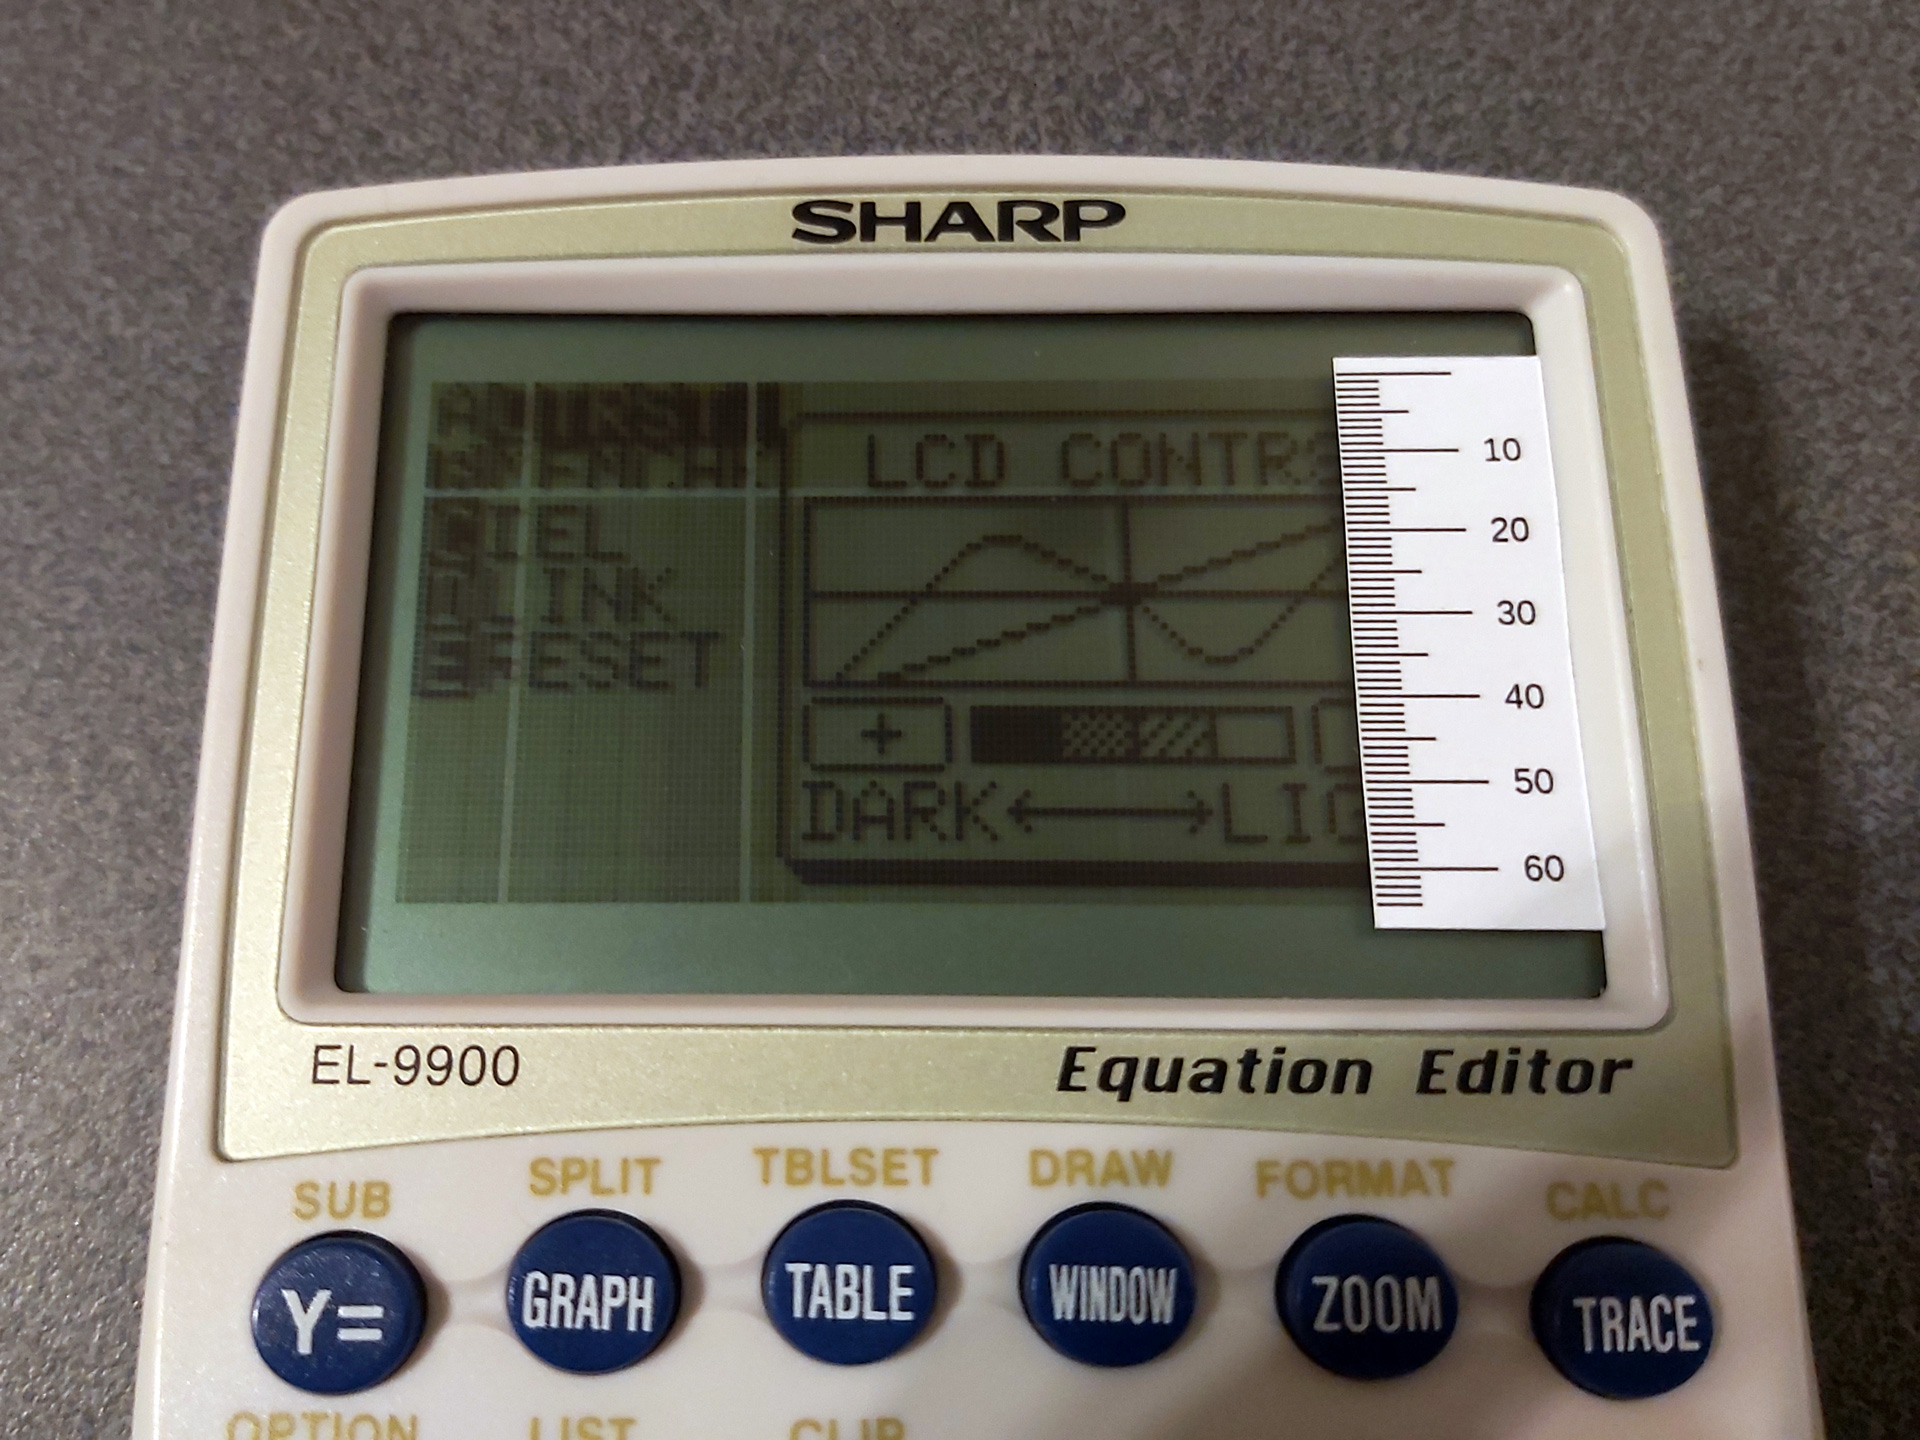
The first two rulers can be used to measure the column or row number of the missing pixels. You could just count these, but that can quickly get very tedious! The third ruler can then be used to find where to heat up the flex cable:
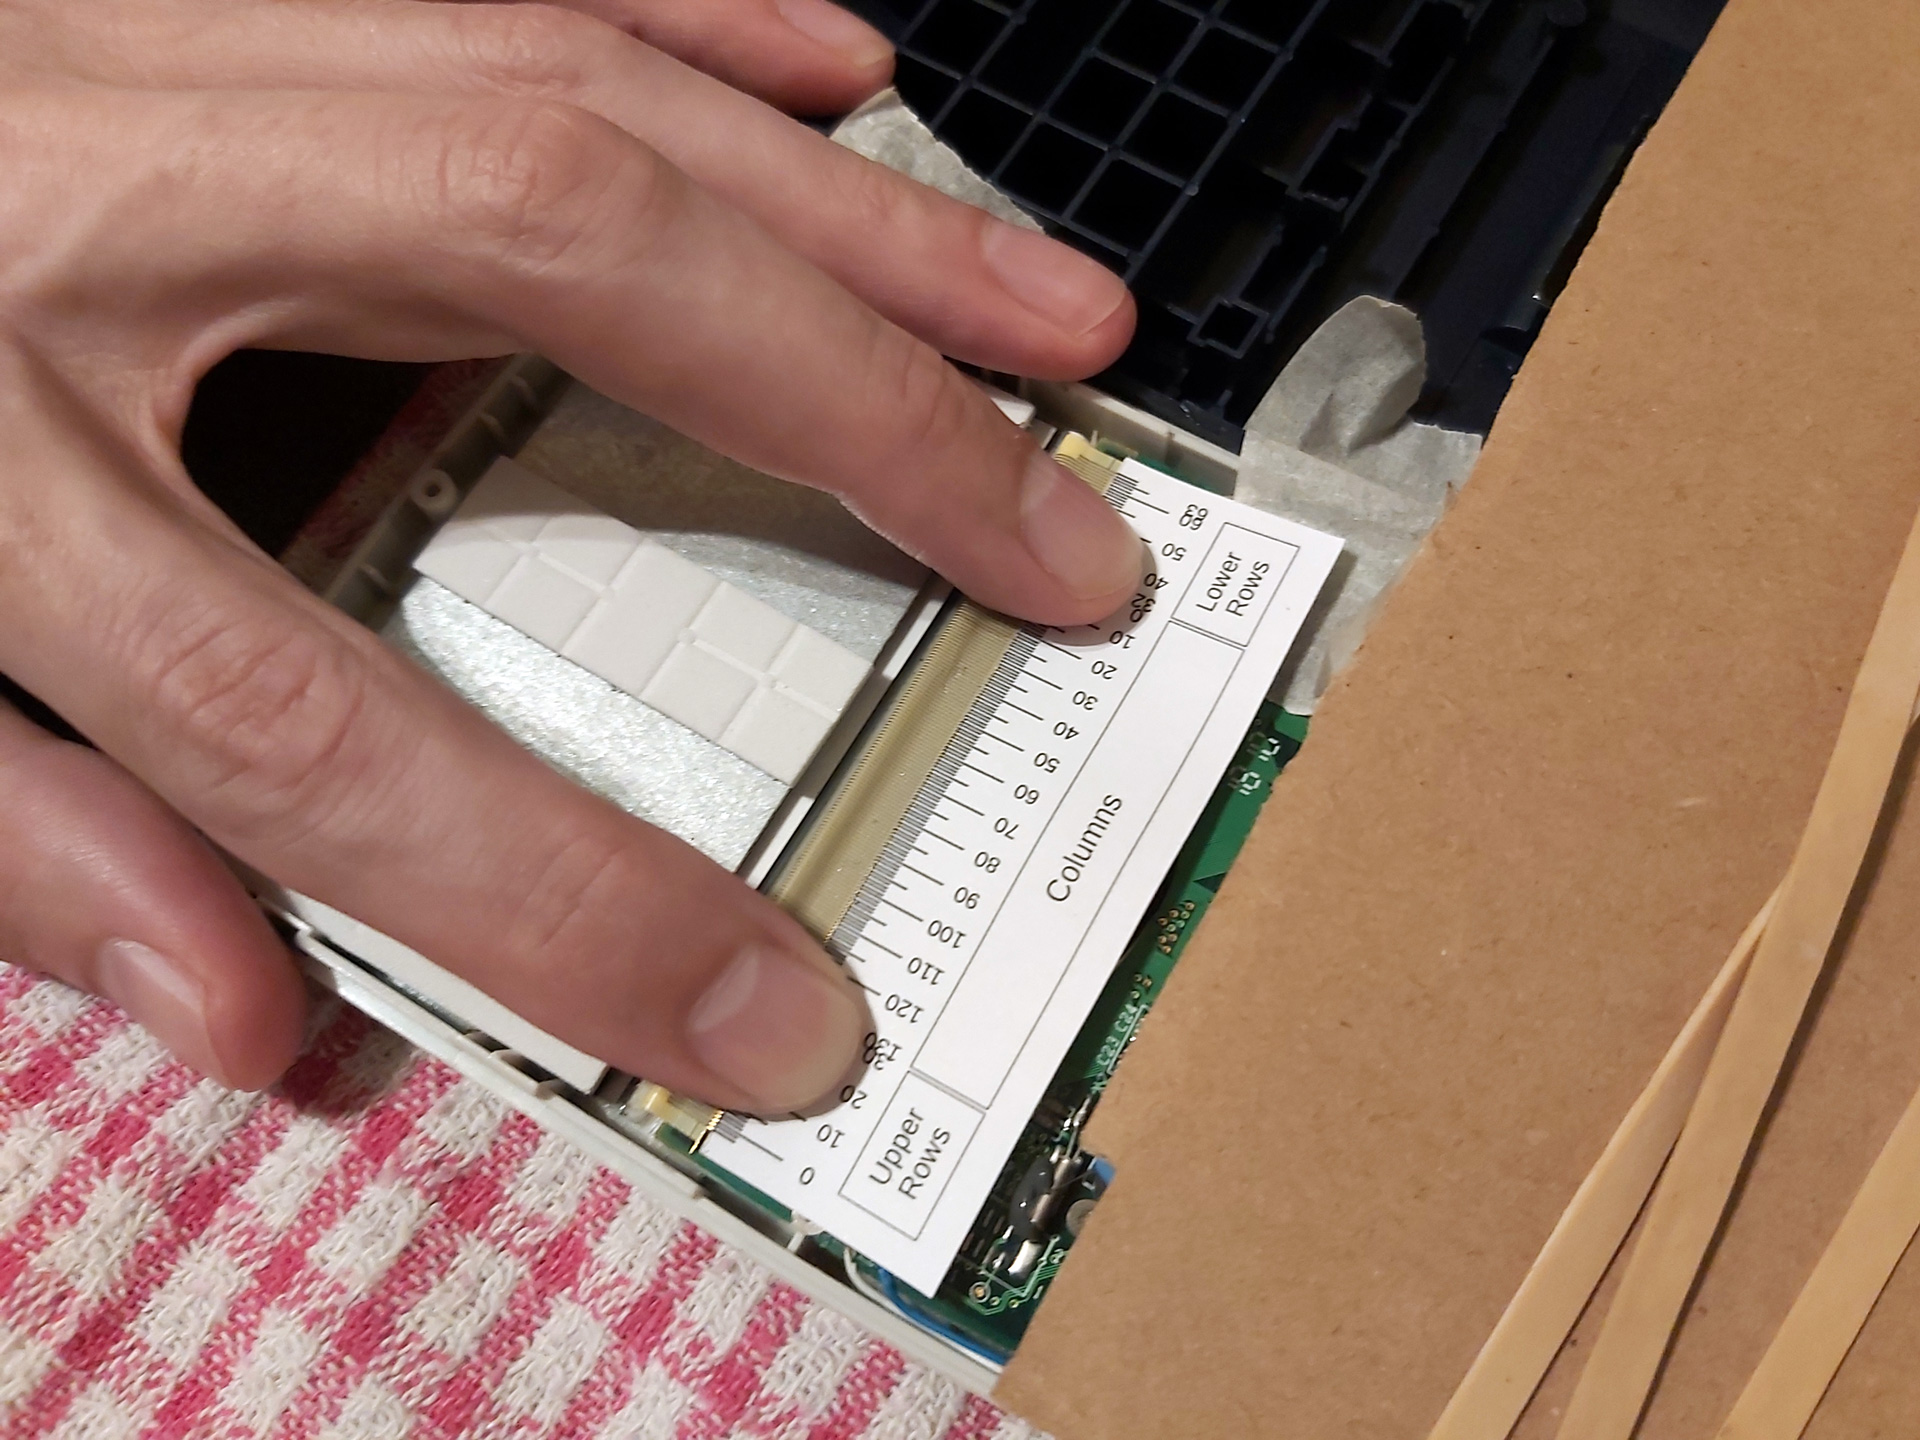
Note that the "Lower Rows" are – I think – incorrectly ordered in this photo.
The flex cable can be broken down into three areas. The large central area corresponds to the columns, though as we are working on the back of the LCD the column numbers are reversed (and so run from right to left, rather than left to right). The left hand side of the flex cable corresponds to the top half of the display and the right hand side corresponds to the bottom half. I worked this out by removing the LCD from the calculator I'd previously destroyed and holding it up to a bright light to see where the traces in the glass went. Fortunately for me but unfortunately for testing purposes the LCDs in the calculators I've repaired have only had faulty rows in the upper half of the display, which means that I initially got the order of the "lower rows" reversed – having sketched it out on some paper I think the middle row (32) will be connected on the outside of the flex cable and the bottom row (63) will be on the inside, nearest the "columns" section, as otherwise the traces would have to cross over each other. I have updated the PDF and ODG, but that explains the error in the above photo, and until I find a calculator with a fault in the lower half I won't be able to double check.
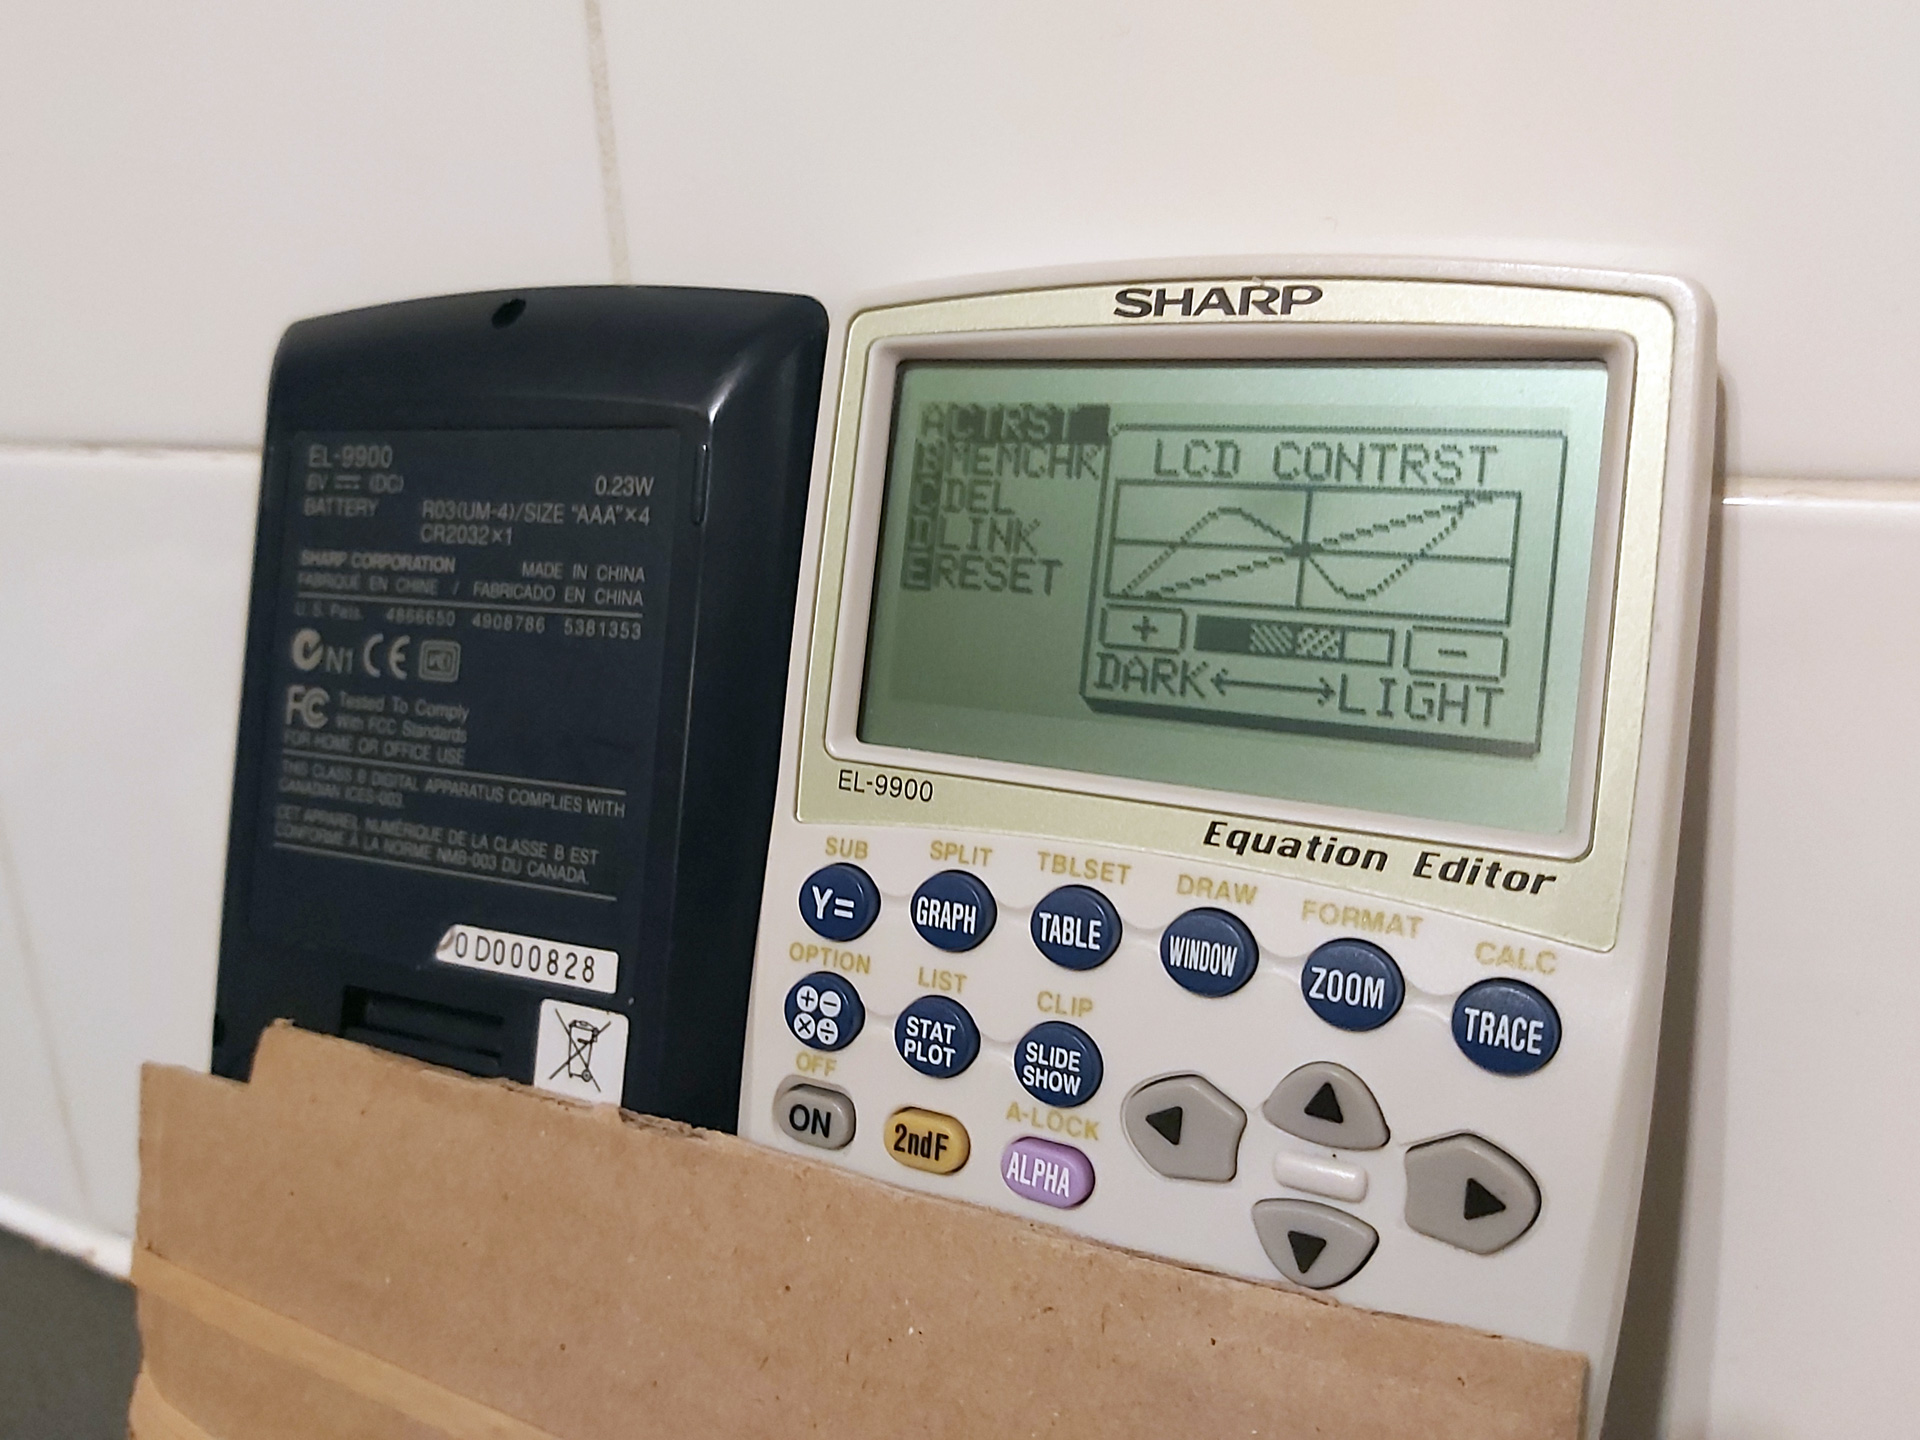
All the rows and columns are back, but sadly I can't do much about the LCD "bruise" below the C in CONTRST.
I was able to use the guides to successfully repair the two recently-acquired calculators by only heating the affected parts of the flex cable. I also used a lower temperature on the soldering iron than before (220°C) and that seemed to be enough to stick the cable back down – I'd only hold it against the flex cable for a short amount of time, lightly running it down the cable in the direction of the traces and then holding the flex against the PCB firmly with a finger as it cooled.
In case you found this post because you also have a faulty EL-9900 calculator and are looking for some repair tips, here's what springs to mind:
- The calculator has five main screws on the back as well as one smaller one inside the battery compartment under the third cell from the left. You do not need to remove the screw on the memory battery backup door.
- The case has four clips on the sides holding the two halves together. I find it easiest to unclip the first two from the top (the guide for the hard case widens at the top, giving you plenty of room to insert your fingers to pull, with the two clips being towards the bottom of the LCD). Squeezing the white front half of the calculator whilst continuing to pull will release the lower two clips. Do not fully separate the two halves yet, you just want to release the clips.
- There are four very thin wires between the rear half of the case (containing the battery compartment) and the front half of the case (containing the main PCB). The two halves of the case can be opened like a book with the opening on the right hand side when looking at the front of the calculator.
- As the battery compartment is connected with wires (rather than, say, spring contacts to the main PCB) the calculator can be operated when open. However, a switch on the main PCB (normally pressed by a stud on the battery compartment door) prevents this from happening – a piece of tape will hold this down and let you switch the calculator on.
- The connections for the thin wires between the battery compartment and main PCB are extremely fragile, so if you keep opening and closing the calculator when working on it these will likely break and need to be resoldered. To avoid this, I recommend only opening the calculator up once, then using some tape to join the two halves of the calculator together at the "hinge" and using two pieces of cardboard and an elastic band to hold everything together as this will let you flip the calculator over between working on the flex cable and checking the LCD without stressing those thin wires. The keyboard should also be popped out to prevent the cardboard from holding down the keys (the fixed keys above the removable keyboard are more than sufficient to test the calculator when working on it).
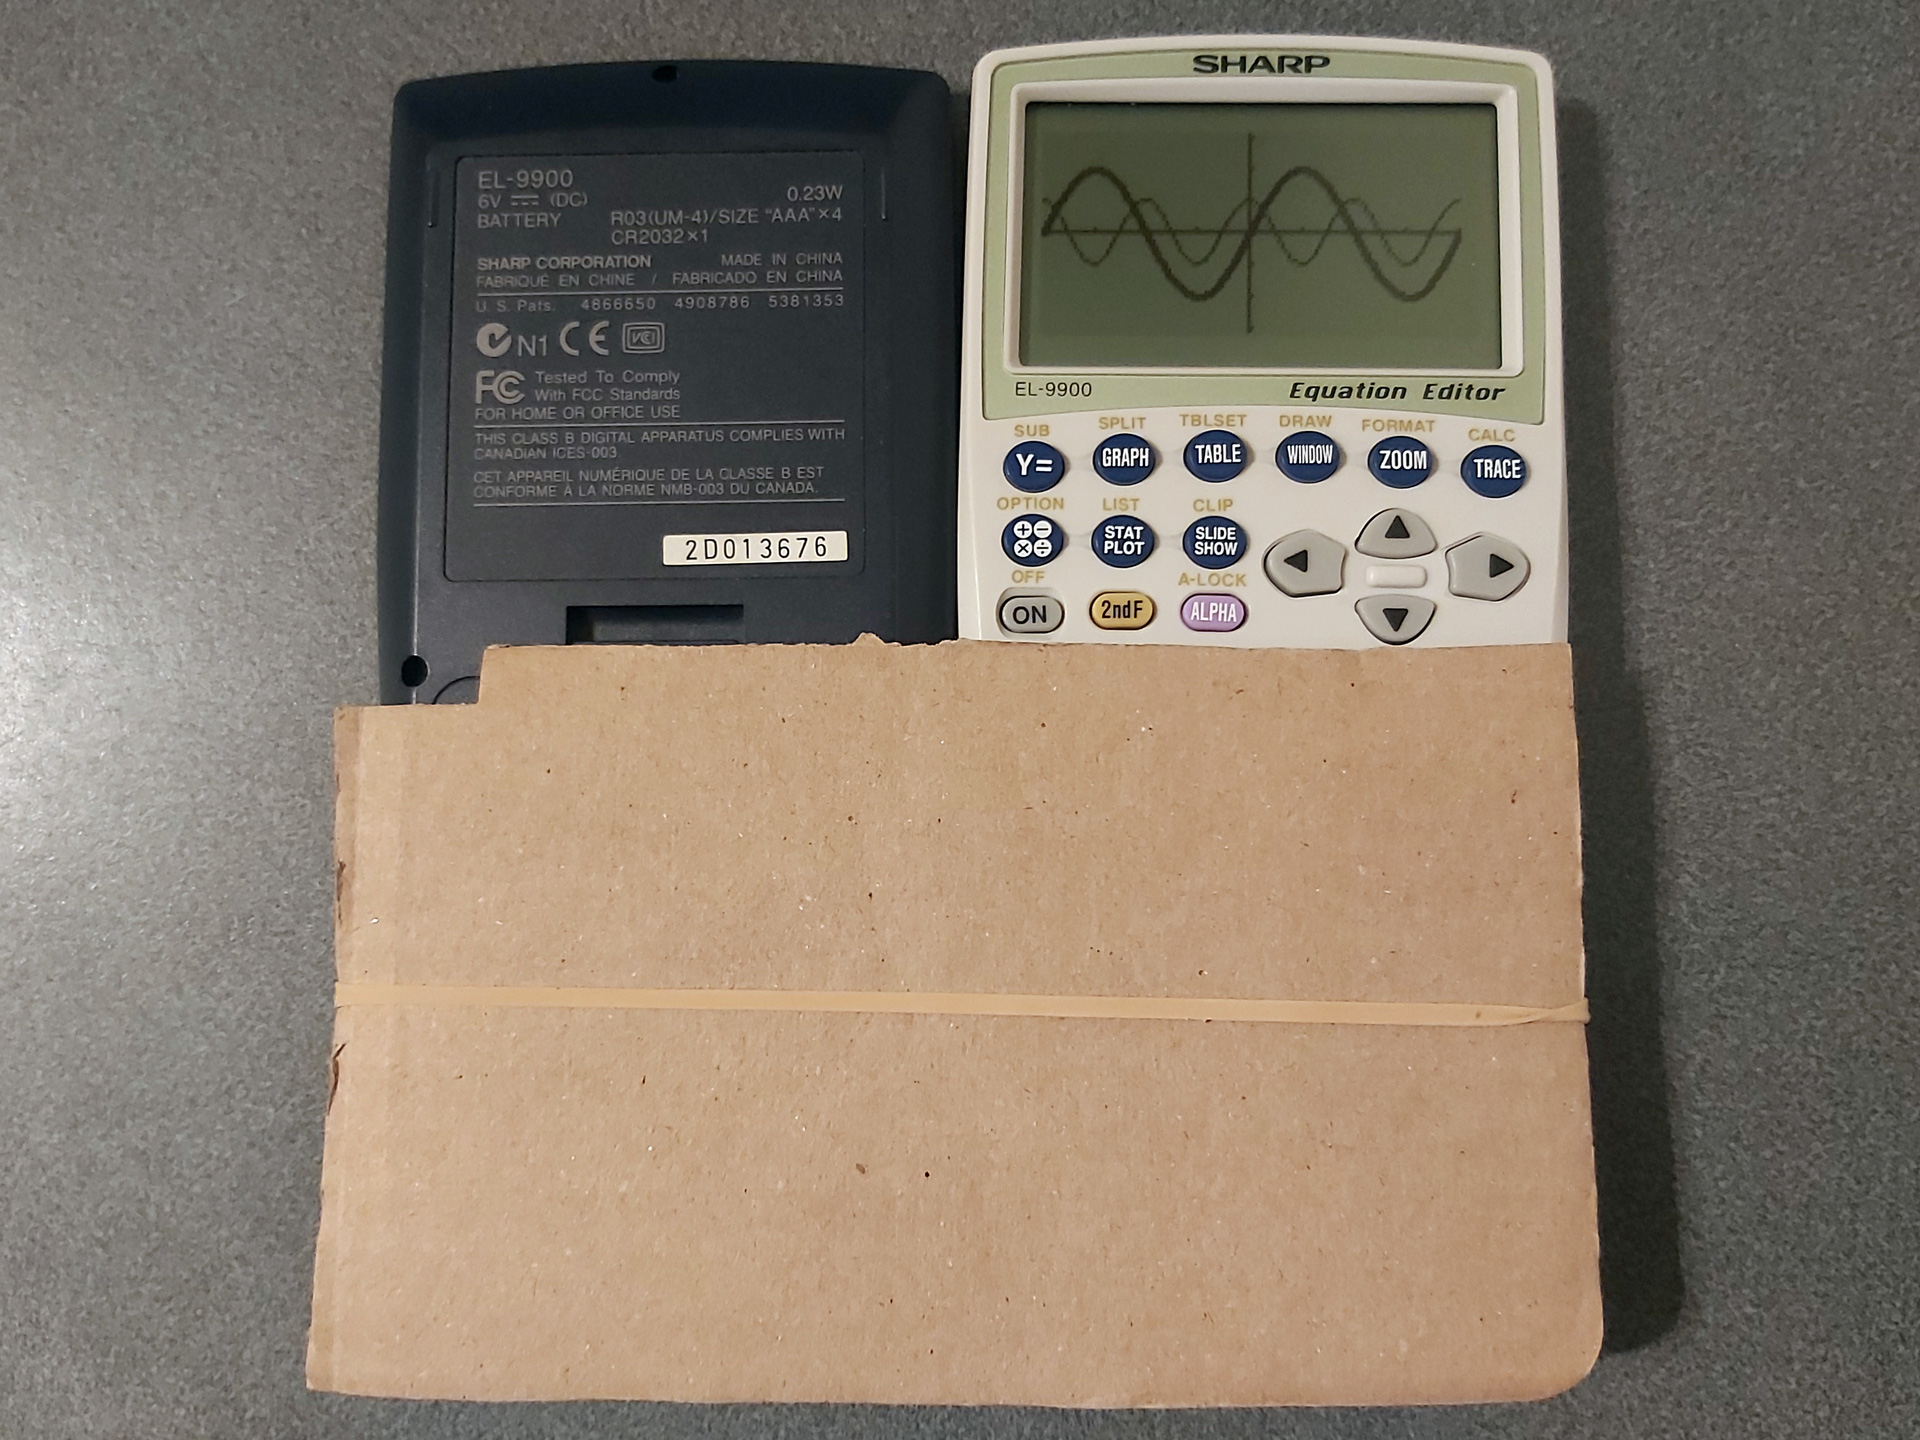
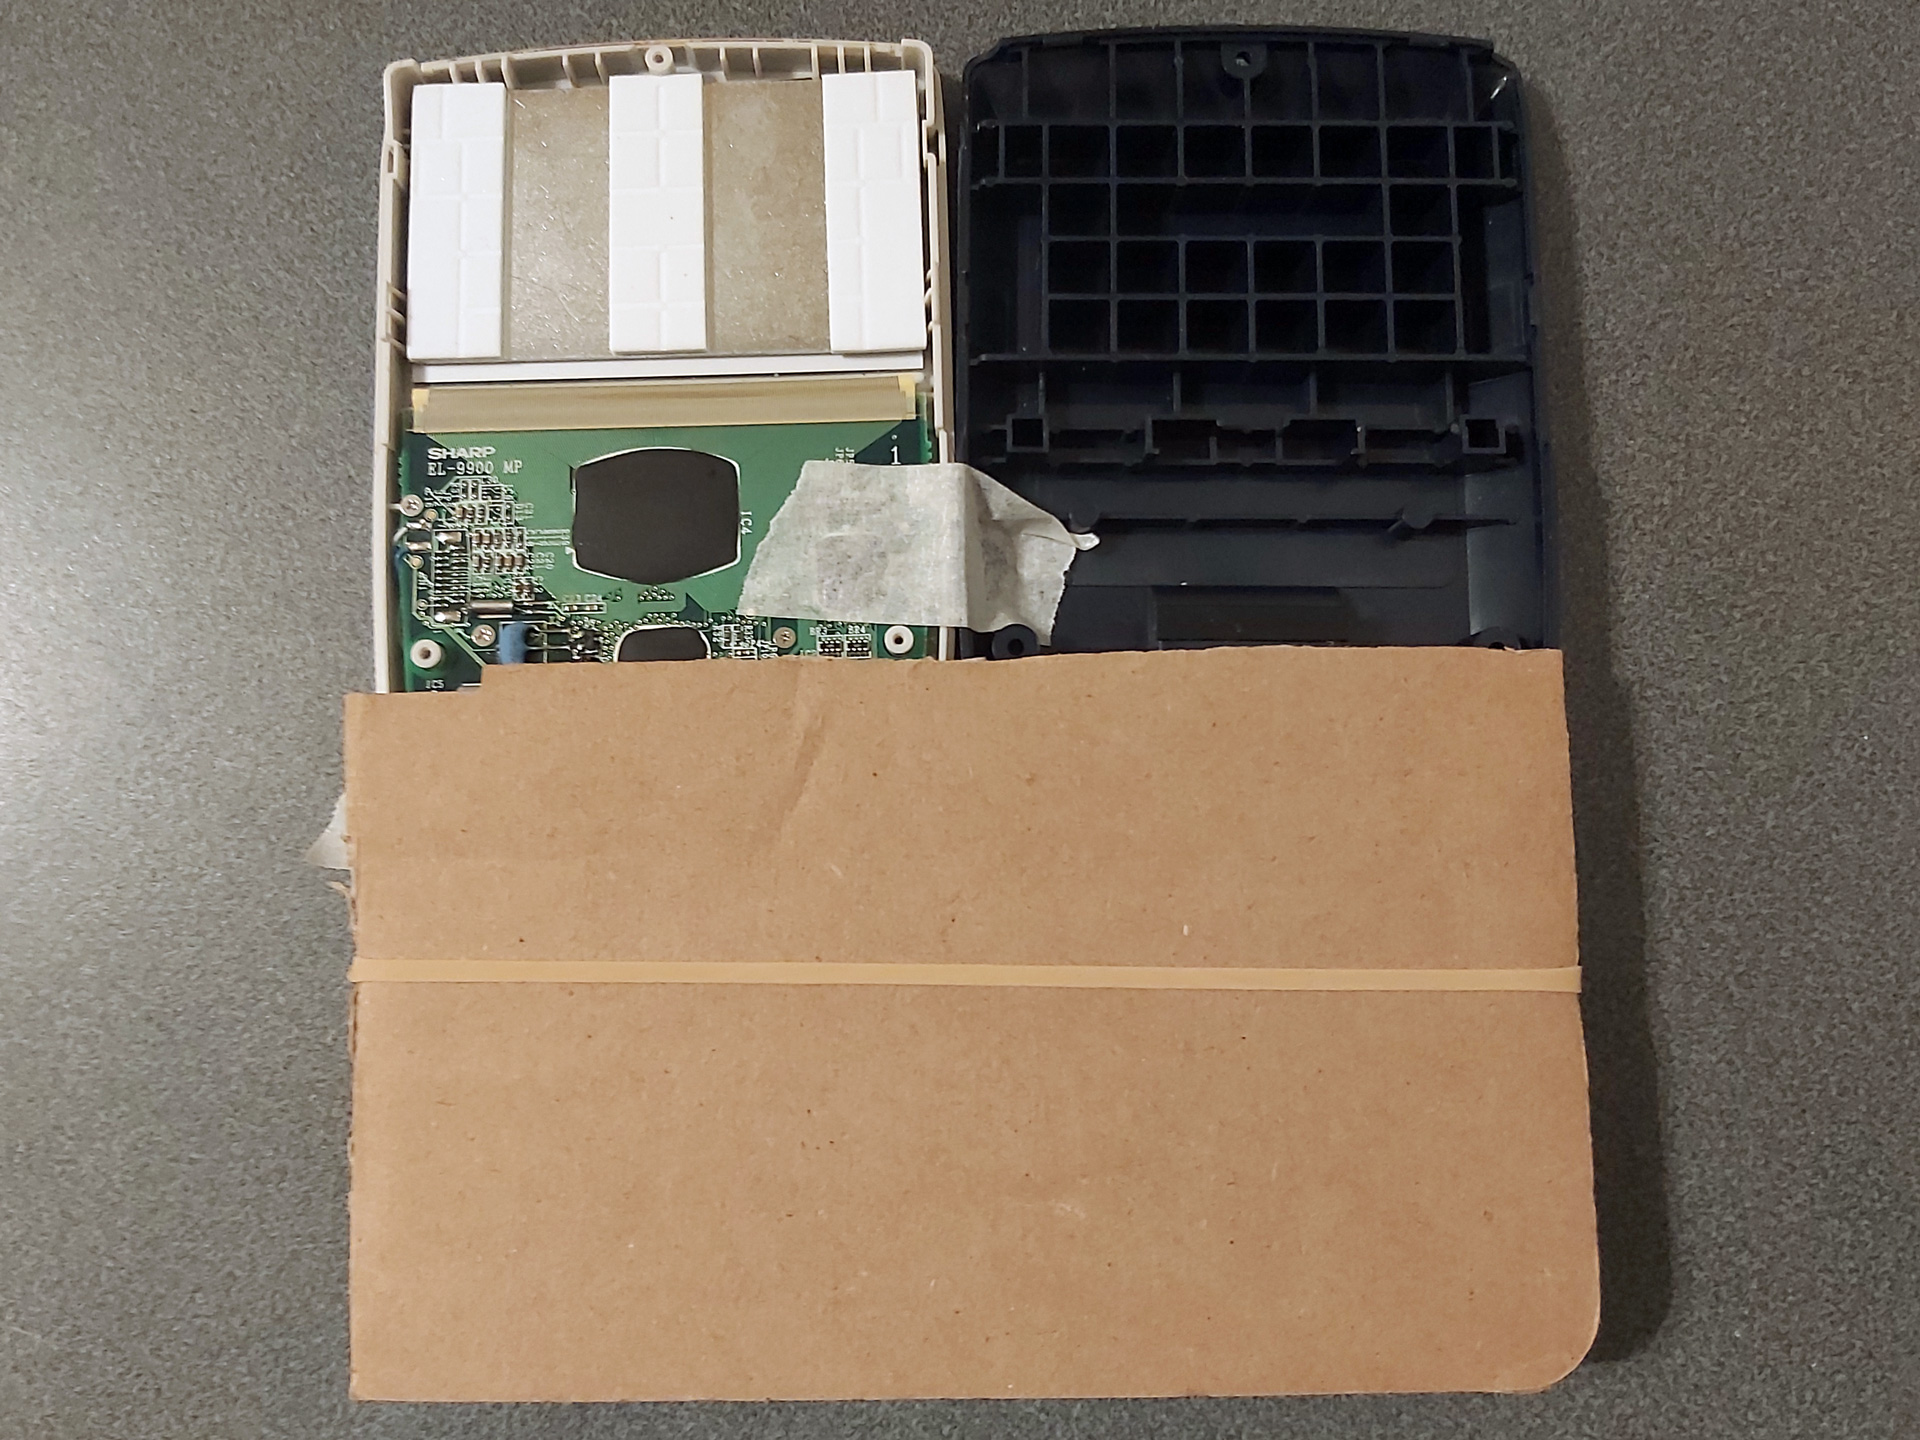
- Only poke the soldering iron near the part of the flex cable that's stuck to the board. The soldering iron will very easily melt a hole in the flex cable if you touch it in the unsupported gap between the PCB and the LCD glass.
- Once you've repaired any known faulty rows or columns, test the calculator over a period of a few hours before closing it back up in case the fixes don't hold or any new faults appear after disturbing the flex cable. Keep a list of rows or columns you've repaired to see whether the issue is one you've repaired before or whether it really is a new fault.
- When closing the calculator back up, it's much easier to do this without the keyboard installed due to the sprung pin that normally tries to push the keyboard out. I also find it easier to put the spring and pin in the back half of the calculator and to lower the front half on top of it (threading the pin through the small hole in the front) rather than balancing the pin with the spring on top of it in the front half and lowering the back half on top of that.
Here again is the link to the printable repair guide (LibreOffice Draw file), and maybe it'll help you if you have a faulty EL-9900. It's certainly helped me – good luck!
Calculating the approximate phase of the moon on a range of devices
Tuesday, 7th April 2026
Calculating the phase of the moon always struck me as a fun little program for a calculator, and with the current Artemis II mission it seemed like as good a time as any to look at a few example programs for this on a range of different calculators and pocket computers.
Sharp PC-1211
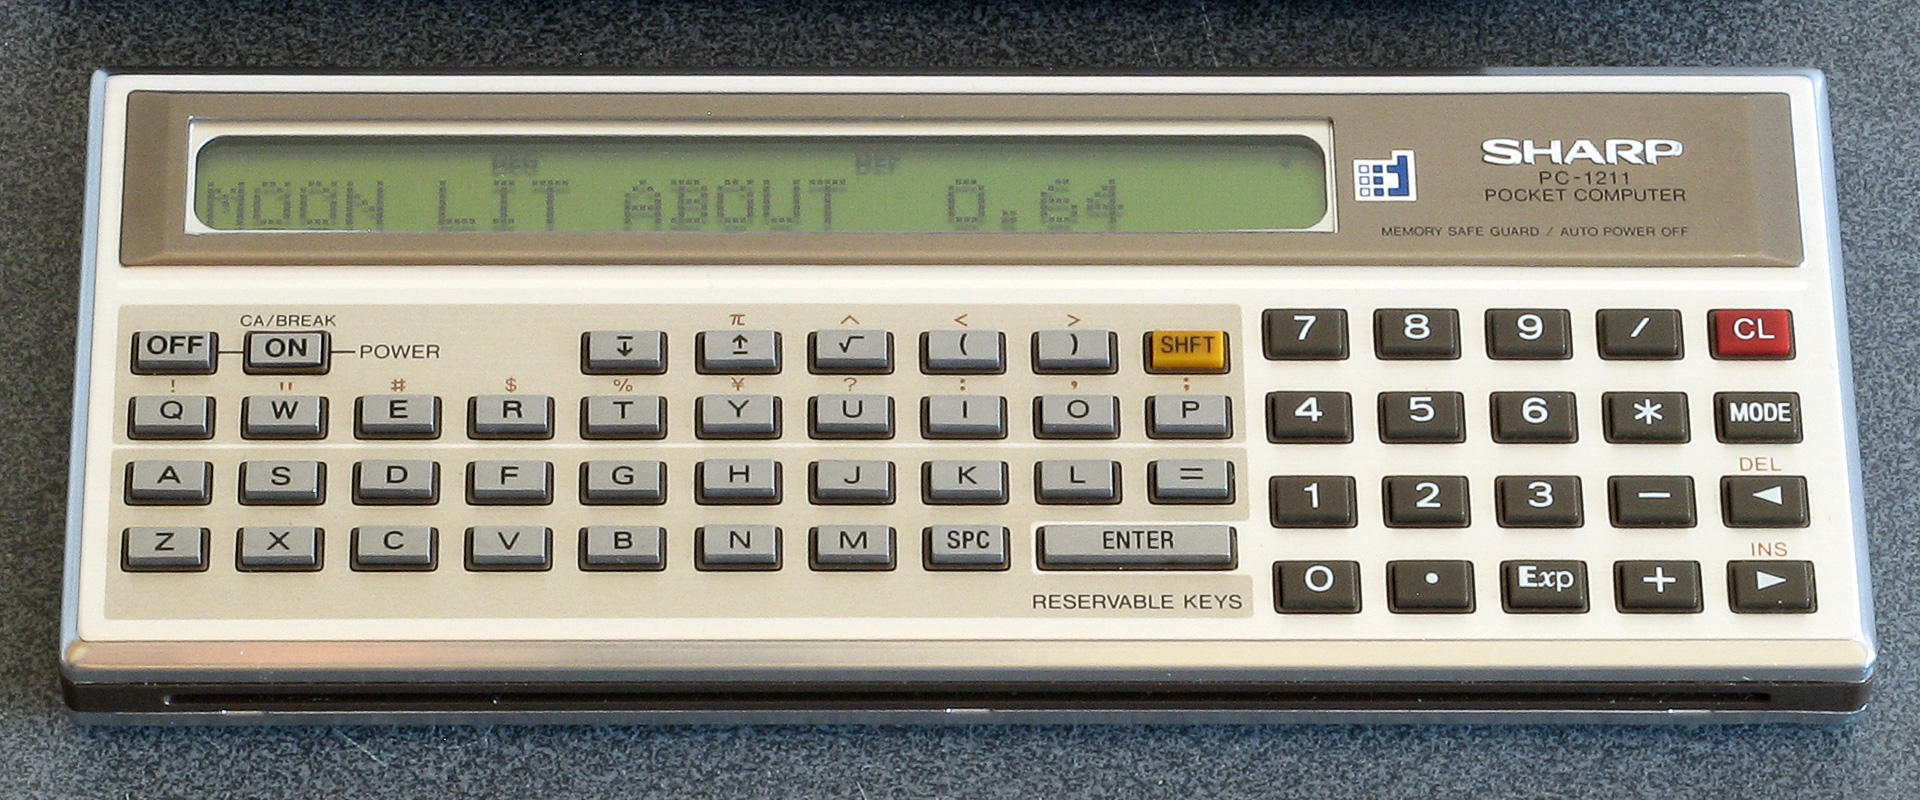
I copied the following program from the book 119 Practical Programs for the TRS-80 Pocket Computer and it forms the basis of most of the subsequent programs:
  100 "MOON"INPUT "DATE M?",M,"D?",D,"Y?",Y: GOSUB "DJ"
  110 M=(J+4.867)/29.53058:M=2*(M-INT M)-1:N=ABS M
  120 USING "##.##": PRINT "MOON LIT ABOUT ";N
  130 Z$="NEW": IF M>0 LET Z$="FULL"
  140 PRINT "HEADED FOR A ";Z$;" MOON.": END
  900 "DJ"J=INT (365.2422Y+30.44*(M-1)+D+1):N=M-2+12*(M<3)
  905 Z=Y-(M<3):E=INT (Z/100):Z=Z-100E
  910 W=INT (2.61N-.2)+D+Z+INT (Z/4)+INT (E/4)-2E
  915 W=W-7*INT (W/7):X=J-7*INT (J/7)
  920 J=J-X+W-7*(X<W)+1721061: RETURN
The program has two parts; the first is to convert a date from its year, month and day components into a Julian day number which it does via the subroutine DJ. It then calculates the phase of the moon by adding an offset (4.867 in this case) and dividing by 29.53058, the length of the synodic month (lunar cycle) in days. The fractional part of the result of this calculation corresponds to the phase of the moon, and by multiplying by two and subtracting one you can get a value roughly corresponding to how illuminated the moon is on a particular date and whether it's waxing (heading for a full moon) or waning (heading for a new moon).
Incidentally, the program listing printed in the book does have a bug: line 130 just checks IF M instead of IF M>0, and so the program will nearly always report a waxing moon (heading for a full moon). This is corrected in the version of the code shown above.
Sharp PC-1500
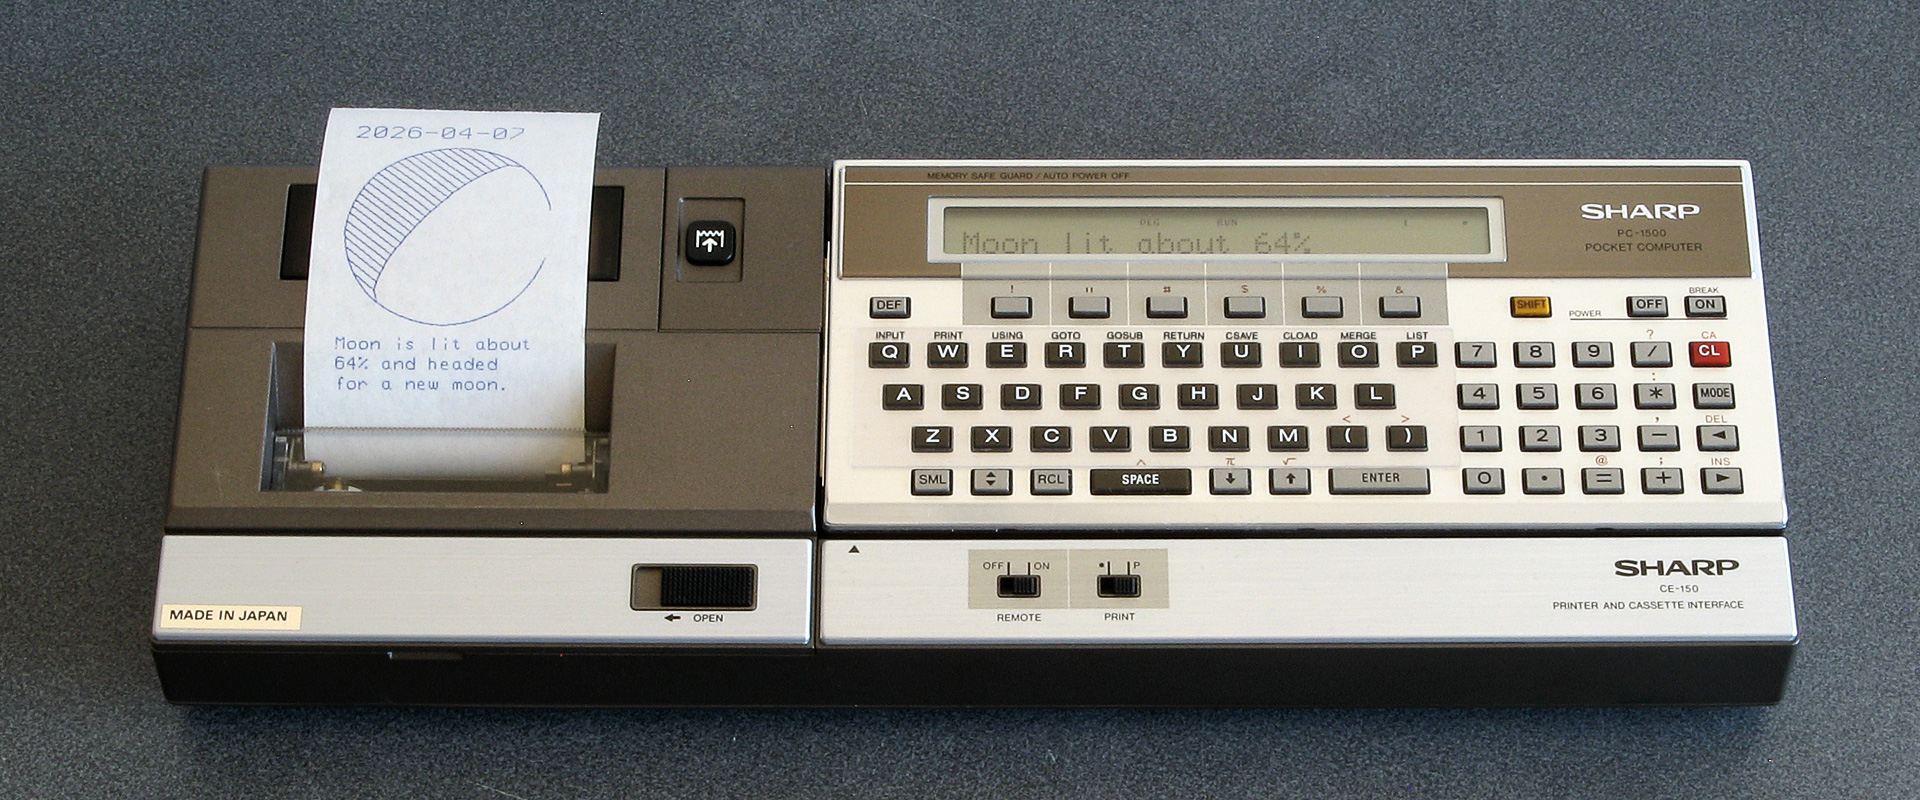
The next page of the book where I copied the PC-1211 listing from showed a graphical representation of the moon's phase which I thought would be fun to replicate, though as the PC-1211's printer doesn't support graphics it would be a very crude representation indeed. Fortunately, the PC-1500's plotter allows for graphical output, so I added an optional plotting routine to the above program as well as some other niceties like automatically populating the month and day fields with the value from the real-time clock:
   30 T=TIME :Y=2000:M=INT (T/1E4):T=T-M*1E4:D=INT (T/1E2)
   40 L=-50
   50 WAIT 0
   60 CLS : PRINT "Year (";STR$ Y;") ";: INPUT Y
   70 CLS : PRINT "Month (";STR$ M;") ";: INPUT M
   80 CLS : PRINT "Day (";STR$ D;") ";: INPUT D
   90 CLS : WAIT
  110 J=INT (365.2422*Y+30.44*(M-1)+D+1)
  120 N=M-2+12*(M<3)
  130 Z=Y-(M<3)
  140 E=INT (Z/100)
  150 Z=Z-100*E
  160 W=INT (2.61*N-.2)+D+Z+INT (Z/4)+INT (E/4)-2*E
  170 W=W-7*INT (W/7)
  180 X=J-7*INT (J/7)
  190 J=J-X+W-7*(X<W)+1721061
  210 P=(J+4.867)/29.53058
  220 P=2*(P-INT P)-1
  230 N=ABS P
  240 Q=INT (N*100+.5)
  250 CLS : PRINT "Moon lit about";Q;"%"
  260 Z$="full": IF P<0 LET Z$="new"
  270 CLS : PRINT "Headed for a ";Z$;" moon."
  290 IF PEEK &A000<>&C0 END
  300 WAIT 0:P$="Y": PRINT "Print output (Y/N) ";: INPUT P$
  310 IF P$<>"Y" END
  320 "MPRINT" CLS : PRINT "Latitude (";STR$ L;") ";: INPUT L
  330 IF L<-90 LET L=-90
  340 IF L>90 LET L=90
  360 CLS : PRINT "Printing...": WAIT
  380 M$=STR$ M: IF M<10 LET M$="0"+M$
  390 D$=STR$ D: IF D<10 LET D$="0"+D$
  400 TEXT : CSIZE 3: LPRINT STR$ Y;"-";M$;"-";D$
  410 GRAPH : GLCURSOR (216/2,-216/2+15): SORGN :R=108: DEGREE
  420 C=9: FOR A=0 TO 360 STEP 6
  430 LINE -(R*SIN (A),R*COS (A)),C
  440 C=0: NEXT A
  450 V=N*2:C0=9:C1=0
  460 IF P>=0 LET V=2-V:C0=0:C1=9
  470 FOR S=1 TO 2:C=9
  480 FOR I=-R TO R STEP 8
  490 XO=I*COS (-L):YO=I*SIN (-L)
  500 W=√(R*R-I*I)
  510 XN=W*SIN (L):YN=W*COS (L)
  520 X=XO-XN+V*XN:Y=YO-YN+V*YN
  530 IF S=1 LINE -(X,Y),C:C=0
  540 IF S=2 GLCURSOR (XO-XN,YO-YN): LINE -(X,Y),C0: LINE -(XO+XN,YO+YN),C1
  550 NEXT I: NEXT S
  560 GLCURSOR (-216/2,-216/2-25): SORGN
  710 TEXT : CSIZE 2: LPRINT "Moon is lit about"
  720 LPRINT STR$ Q;"% and headed"
  730 LPRINT "for a ";Z$;" moon."
  740 LF 3: END
The program also prompts for latitude to rotate the drawing appropriately – the moon appears to fill with light from the right to the left in the Northern hemisphere, from top to bottom at the equator and from the left to the right in the Southern hemisphere.
HP-12C
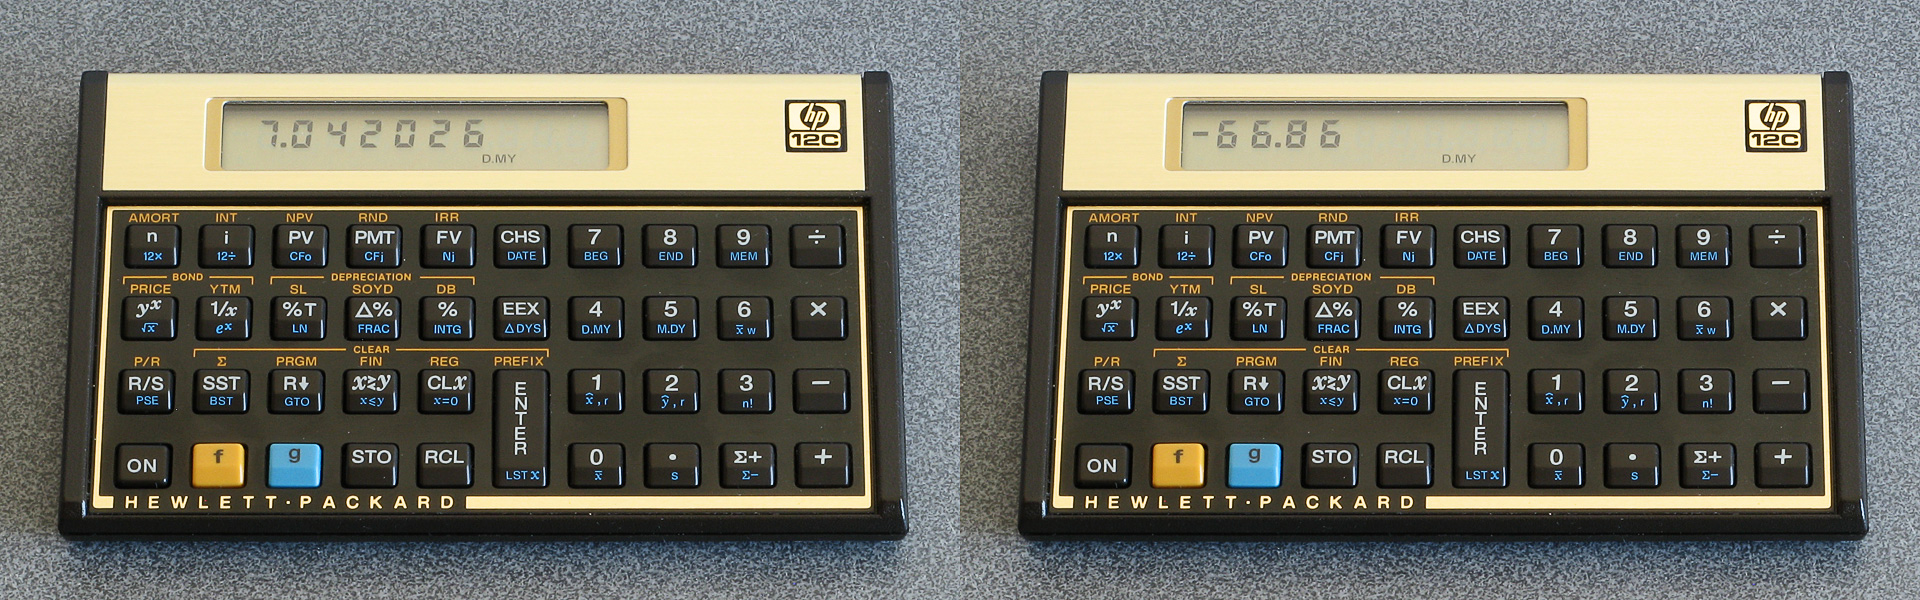
This calculator is really designed for financial applications but it is keystroke programmable and so a phase of moon calculation program would be a good learning project. Fortunately it can already calculate the number of days difference between two dates, so that would save having to write a program to calculate the Julian day number.
| Step | Key | Display | Comment |
|---|---|---|---|
| 01 | ENTER | 36 | Enter the current on-screen value onto the stack. |
| 02 | 1 | 1 | Enter "1.012" (1st January 2000). |
| 03 | . | 48 | |
| 04 | 0 | 0 | |
| 05 | 1 | 1 | |
| 06 | 2 | 2 | |
| 07 | g ΔDYS | 43 26 | Calculate number of days between 1st January 2000 and the submitted date. |
| 08 | CHS | 16 | Change sign to get the number of days after 1st January 2000. |
| 09 | 2 | 2 | Enter "20.195" (offset to 21st January 2000, 04:41). |
| 10 | 0 | 0 | |
| 11 | . | 48 | |
| 12 | 1 | 1 | |
| 13 | 9 | 9 | |
| 14 | 5 | 5 | |
| 15 | - | 30 | Subtract to get the number of days since the full moon. |
| 16 | 2 | 2 | Enter "29.53059" (synodic month, lunar cycle duration in days). |
| 17 | 9 | 9 | |
| 18 | . | 48 | |
| 19 | 5 | 5 | |
| 20 | 3 | 3 | |
| 21 | 0 | 0 | |
| 22 | 5 | 5 | |
| 23 | 9 | 9 | |
| 24 | ÷ | 10 | Divide to get lunar phase. |
| 25 | g FRAC | 43 24 | Extract the fractional part. |
| 26 | 1 | 1 | Add 1. |
| 27 | + | 40 | |
| 28 | g FRAC | 43 24 | Extract fractional part again (corrects negative values). |
| 29 | 2 | 2 | Multiply by 2 (value in range 0 to 2). |
| 30 | × | 20 | |
| 31 | 1 | 1 | Subtract one (value in range -1 to +1). |
| 32 | - | 30 | |
| 33 | ENTER | 36 | Enter result onto the stack (Y). |
| 34 | 1 | 1 | Enter 1 into X. |
| 35 | x⇔y | 34 | Swap so X=result, Y=1. |
| 36 | %T | 23 | Express X (result) as a percentage of Y (1). |
| 37 | g GTO 00 | 43,33 00 | End program. |
Dates on the HP-12C are represented as decimal values, either MM.DDYYYY or DD.MMYYYY depending on the current calculator mode. To keep things simple, rather than calculate the correct Julian day number the number of days since the first of January 2000 is used as the reference as this can be represented as 1.012 in either mode.
This change of date meant that the offset from the Julian day number (previously 4.867) could no longer be used. As the range of moon phases (0 to 1) are mapped to being from full to full (-100% to +100%) the 0 reference value also needs to be a full moon. I found a list of moon phases for the year 2000 which put a full moon at 04:41 on 21st January, so the offset was set to 20.195 – 20 days after the 1st January is the 21st, and 04:41 is (4+(41/60))/24=0.195 hours into the day.
One other very minor change from previous programs is the use of 29.53059 as this is a closer approximation than 29.53058, but in the grand scheme of things it doesn't make much difference to the accuracy. The program can be run by typing in the desired date (e.g. 7.042026) and pressing the R/S key.
Casio fx-3800P
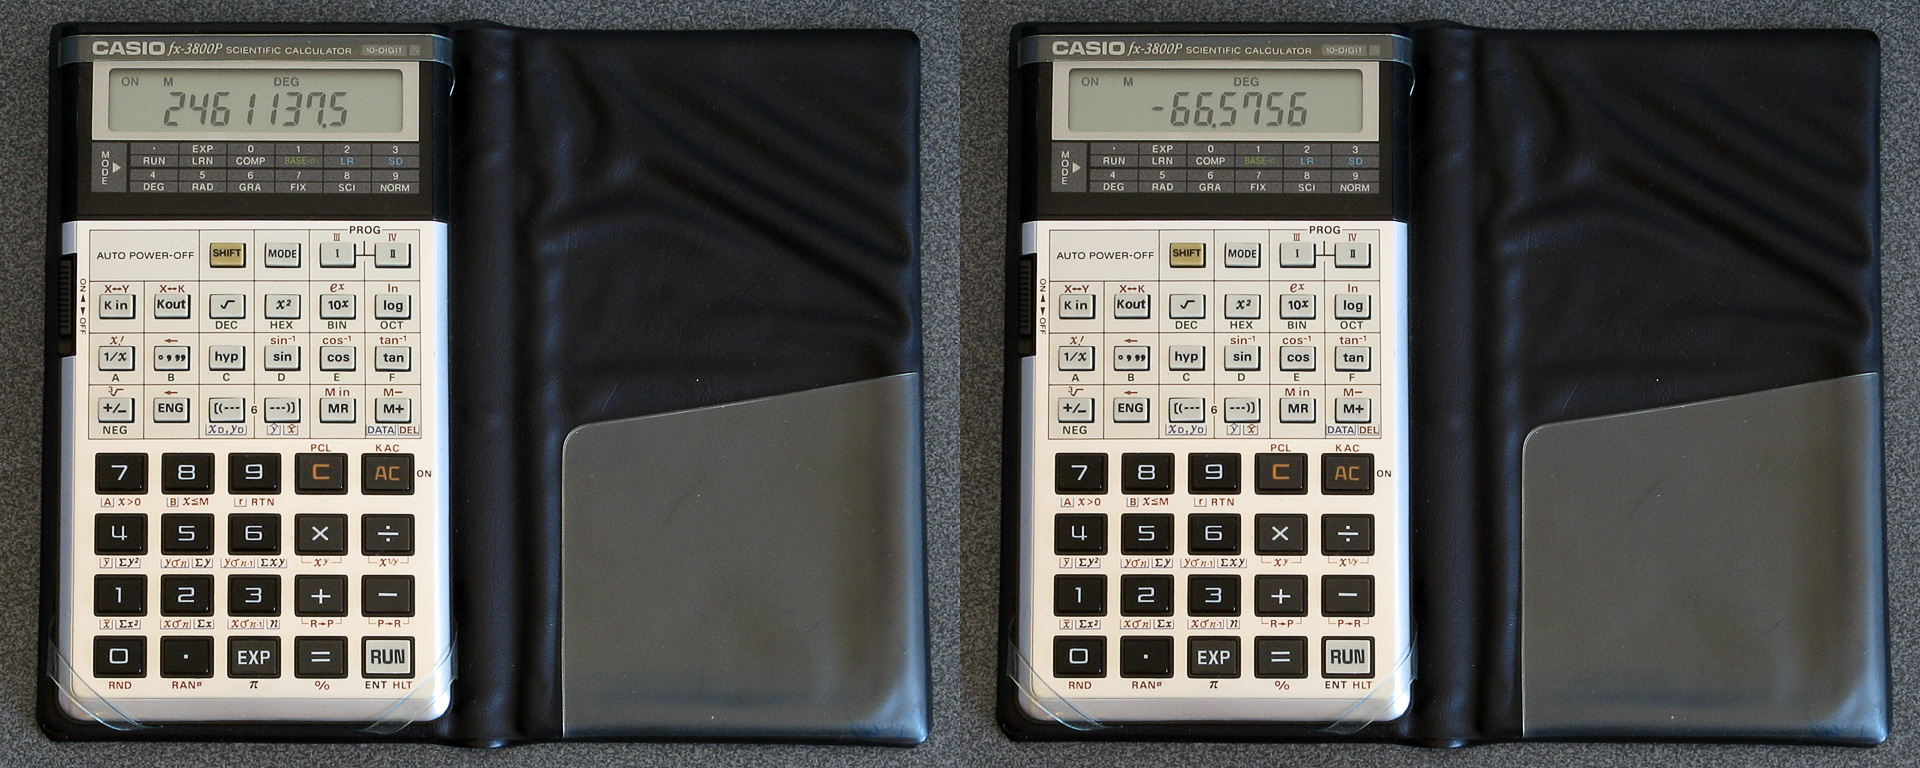
This is another keystroke programmable calculator, though life is made a little more difficult for us compared to the HP-12C as it doesn't have a built-in function to compute the number of days between two dates. One complication with adapting date computation algorithms to scientific calculators is that they often lack functions to truncate values to integers, and even if they do have a way to round a number (e.g. by switching to a mode that only shows a certain number of fixed decimal places and using a "modify" key to convert the displayed number to the stored one) they sometimes don't allow mode switches mid-program.
Fortunately, the Casio fx-3800P will store mode changes in its programs. Even better, you can switch between different numerical bases and the value will be truncated (not rounded) without raising an error which is the behaviour we want when handling date calculations, and when in this BASE-n mode calculations are carried out using integer division and multiplication which suits the algorithm perfectly.
The program is split into two parts: PROG I converts a date (stored in constant registers K1=year, K2=month, K3=day) into the Julian day number and stores the result in the memory register M. The second part, PROG II, converts the Julian day number stored in M into the approximate phase of the moon.
PROG I is adapted from Julian Day Numbers by Bill Jefferys, and is as follows:
| Keys | Comment |
| 1 Kin - 1 | Subtract 1 from year. |
| 12 Kin + 2 | Add 12 to month. |
| 15 - Kout 2 = | Check if month is in valid range. |
| x>0 | If not, loop back to start. |
| 1 Kin + 1 | Add 1 back to year. |
| 12 Kin - 2 | Subtract 12 back from month. |
| Kout 1 + 4716 = × 365.25 = | Base of Julian day number based on current year. |
| MODE 1 DEC MODE 0 Min | Truncate to an integer and store in M. |
| Kout 2 + 1 = × 30.6001 = | Offset Julian day number by value from month number. |
| MODE 1 M+ | Truncate to an integer and add to M. |
| Kout 1 ÷ 100 = M- | Account for centuries not being leap years. |
| Kout 1 ÷ 400 = M+ | Account for special case century leap years. |
| Kout 3 M+ | Offset Julian day number by the day of the month. |
| Kout 2 ÷ 13 = Kin + 1 | Restore original year if we shifted it back. |
| Kout 2 ÷ 13 × 12 = Kin - 2 | Restore original month if we shifted it forward. |
| MODE 0 | Switch back to COMP for floating point. |
| MR - 1522.5 = Min | Subtract offset to get Julian day number. |
PROG II is somewhat simpler, and follows the same sort of logic as previous programs:
| Keys | Comment |
| MR + 5.867 = ÷ 29.53059 = | Add Julian day offset and divide by synodic month. |
| Kin 4 | Store phase in K4. |
| MODE 1 + 0 = MODE 0 | Truncate phase to an integer. |
| Kin - 4 | Subtract from K4 to get fractional part of phase. |
| 200 × Kout 4 - 100 = | Convert to range -100 to +100. |
As mentioned above the programs make fairly heavy use of mode switching to truncate values to integers. Program flow control is very limited on these programmable scientific calculators, usually only permitting a jump back to the start of the program based on a certain condition – hence the slightly clumsy month/year adjustment at the start and end of PROG I.
The Julian day number calculation returns a value that is 0.5 smaller than the value returned by the PC-1211 program that was the basis for most of the other programs (e.g. for 7th April 2026 the Bill Jefferys algorithm returns the correct 2461137.5, the algorithm in the PC-1211 program returns 2461138). To compensate for this the offset used to calculate the current phase of the moon is made 1 larger; not 0.5, as through some experimentation a value of 1 produced results that more closely matched a lunar phase calculator I found elsewhere.
That said, none of the programs above line up particularly well with any other lunar phase calendar, and if you search through days to find when the new moon, full moon and quarters are based on the values closest to 0%, 50% and 100% you'll often find yourself a day off to one side or the other. A more accurate program would be useful, which brings me to the final and most sophisticated program.
Sharp PC-1251
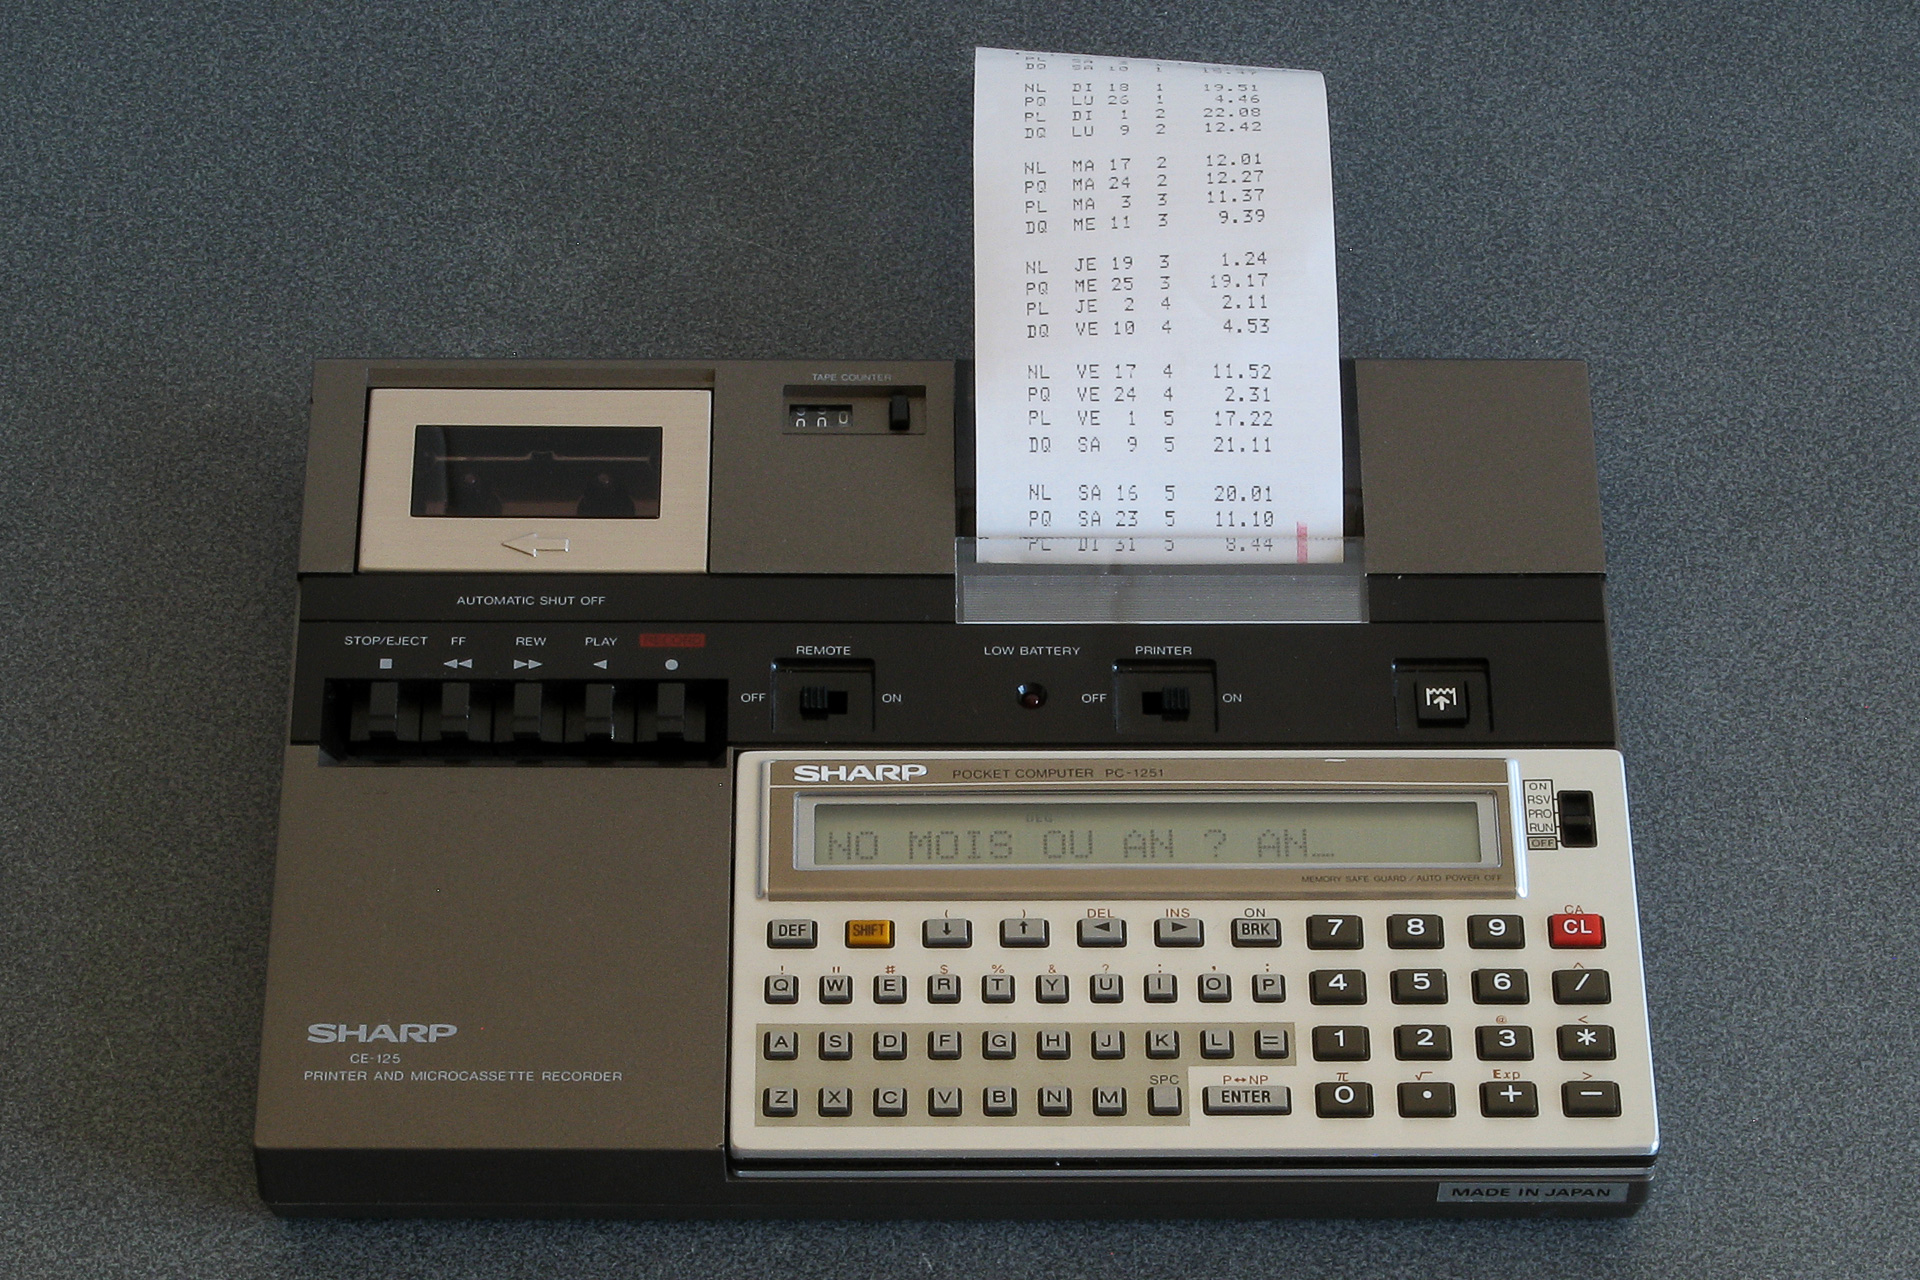
When leafing through old issues of La revue des Sharpentiers, a French publication about all things Sharp from the 1980s, I found an interesting program for the PC-1261: Les phases de la lune.
This program can produce an accurate calendar of moon phases, showing the dates and times of the new moon, full moon and quarters on a month-by-month basis. The article goes into detail about how it works, and I was keen to try it, but unfortunately I do not own a PC-1261! The closest machine I have is the PC-1251, as that matches the 24-column display and printer. However, there are some troublesome differences; the PC-1251 only has a single-line display, and so the PC-1261's code would need to have anything referring to the second line of the display adjusted or removed. A more significant issue is variable names; the PC-1261 supports two-character variable names, whereas the PC-1251 only supports a single character for its variable names.
I typed in the PC-1261 program and made a list of the two-character variable names it used along with a list of the single-character variable names it does not use. There were too many two-character names to fit in the space left over, so I had to make some further adjustments to reduce variable usage such as reusing the same variable in different places for different purposes or reordering code to avoid needing to store a value in an intermediate variable.
    1 "A": PRINT =LPRINT : GOTO 5
    2 "Z": PRINT =PRINT : GOTO 5
    3 REM PHASES DE LA LUNE*J.HERY D APRES J.MEEUS* EDI.20/11/85
    5 CLEAR : WAIT 100: DEGREE :U=0: DIM M$(12)*9,L$(7)*2: RESTORE
    7 FOR I=1 TO 12: READ M$(I): NEXT I
   10 FOR I=1 TO 7: READ L$(I): NEXT I
   20 PRINT "**PHASES DE LA LUNE**"
   25 INPUT "ANNEE ? ";Y: INPUT "NO MOIS OU AN ? ";S$:Z=Y
   30 G=1: IF Y<1583 LET G=0
   35 USING "#####": PRINT "AN:";Y: IF S$<>"AN"PRINT "MOIS: ";M$(VAL S$)
   40 PRINT " PH.   DATE    TU.(H.M)": PRINT ":--:----------:--------:": WAIT
   45 K=INT ((Y-1900)*12.3685)
   50 T=(Y-1899.5)/100
   60 I=2415020+29K
   65 L=.0001178TT-.000000155TTT
   70 L=L+.75933+.53058868K
   75 L=L+.00033*SIN (166.56+132.87T-.009173TT)
   80 L=L-.000837T-.000335TT
   85 N=.08084821133K
   90 N=360*(N-INT N)+359.2242
   95 N=N-.0000333TT
  100 N=N-.00000347TTT
  105 O=.07171366128K
  110 O=360*(O-INT O)+306.0253
  115 O=O+.0107306TT
  120 O=O+.00001236TTT
  125 V=.08519585128K
  130 V=360*(V-INT V)+21.2964
  135 V=V-.0016528TT-.00000239TTT
  140 K=4*(VAL S$-1): IF S$="AN"LET K=0
  145 FOR K=K TO 53
  150 J=I+7K:F=L+.38264717K
  160 P=N+K/4*29.10535608
  165 Q=O+K/4*385.81691806
  170 W=V+K/4*390.67050646
  180 IF U=0 OR U=1 GOSUB 300
  185 IF U=.5 OR U=1.5 GOSUB 340
  190 F=F+.5/1440
  195 J=J+INT F:F=F-INT F
  197 R=J+F+1.5:R=R-7*INT (R/7)+1
  200 GOSUB 400
  205 IF Y<Z GOTO 260
  210 IF S$="AN" OR M=VAL S$ GOTO 220
  215 GOTO 255
  220 IF U=0 PRINT "":P$=" NL"
  230 IF U=.5 LET P$=" PQ"
  235 IF U=1 LET P$=" PL"
  240 IF U=1.5 LET P$=" DQ"
  245 PRINT P$;"  ";L$(R);USING "###";D;M;USING "#####.##";DMS H
  255 IF M>VAL S$ AND S$<>"AN"GOTO 270
  260 U=U+.5: IF U=2 LET U=0
  265 NEXT K
  270 PRINT "": END
  300 F=F-.4068*SIN Q
  305 F=F+(.1734-.000393T)*SIN P
  310 F=F+.0161*SIN (2Q)-.0004*SIN (3Q)
  315 F=F+.0104*SIN (2W)+.0004*SIN (2W+P)
  320 F=F-.0074*SIN (P-Q)-.0004*SIN (2W-P)
  325 F=F-.0051*SIN (P+Q)-.0006*SIN (2W+Q)
  330 F=F+.0021*SIN (2P)+.0005*SIN (P+2Q)
  335 F=F+.0010*SIN (2W-Q): RETURN
  340 F=F+(.1721-.0004T)*SIN P+.0021*SIN (2P)
  345 F=F-.6280*SIN Q+.0089*SIN (2Q)
  350 F=F-.0004*SIN (3Q)+.0079*SIN (2W)
  355 F=F-.0119*SIN (P+Q)-.0047*SIN (P-Q)
  360 F=F+.0003*SIN (2W+P)-.0004*SIN (2W-P)
  365 F=F-.0006*SIN (2W+Q)+.0021*SIN (2W-Q)
  370 F=F+.0003*SIN (P+2Q)+.0004*SIN (P-2Q)-.0003*SIN (2P+Q)
  380 F=F+SGN (1-U)*(.0028-.0004*COS P+.0003*COS Q)
  385 RETURN
  400 F=F+.5
  405 IF F<1 GOTO 415
  410 F=F-1:J=J+1
  415 IF G=1 GOTO 425
  420 A=J: GOTO 435
  425 B=INT ((J/36524.25)-51.12264)
  430 A=J+1+B-INT (B/4)
  435 B=A+1524
  440 C=INT ((B/365.25)-.3343)
  445 D=INT (365.25C)
  450 E=INT ((B-D)/30.61)
  455 D=B-D-INT (30.61E)+F
  460 M=E-1:Y=C-4716
  465 IF E>13.5 LET M=M-12
  470 IF M<2.5 LET Y=Y+1
  475 H=24*(D-INT D):D=INT D
  480 RETURN
  500 DATA "JANVIER","FEVRIER","MARS","AVRIL"
  510 DATA "MAI","JUIN","JUILIET","AOUT"
  520 DATA "SEPTEMBRE","OCTOBRE","NOVEMBRE","DECEMBRE"
  530 DATA "DI","LU","MA","ME","JE","VE","SA"
Another optimisation is related to the PC-1251's lack of support for long variable names; it supports implicit multiplication in certain situations, for example 2*A can be written as 2A. Whereas the original program used T2 and T3 to store the values of T² and T³ respectively, I could instead use TT and TTT in their place and save having to use up more previous variable names. I could also replace instances of Q+Q+Q with 3Q or W+W with 2W. After making these changes the program was a few bytes smaller and had enough spare single-character variable names free to use for the remaining two-character names; the end result is somewhat harder to read, but it does run on the PC-1251 and matches the output of the PC-1261 original.
Sharp PC-1245
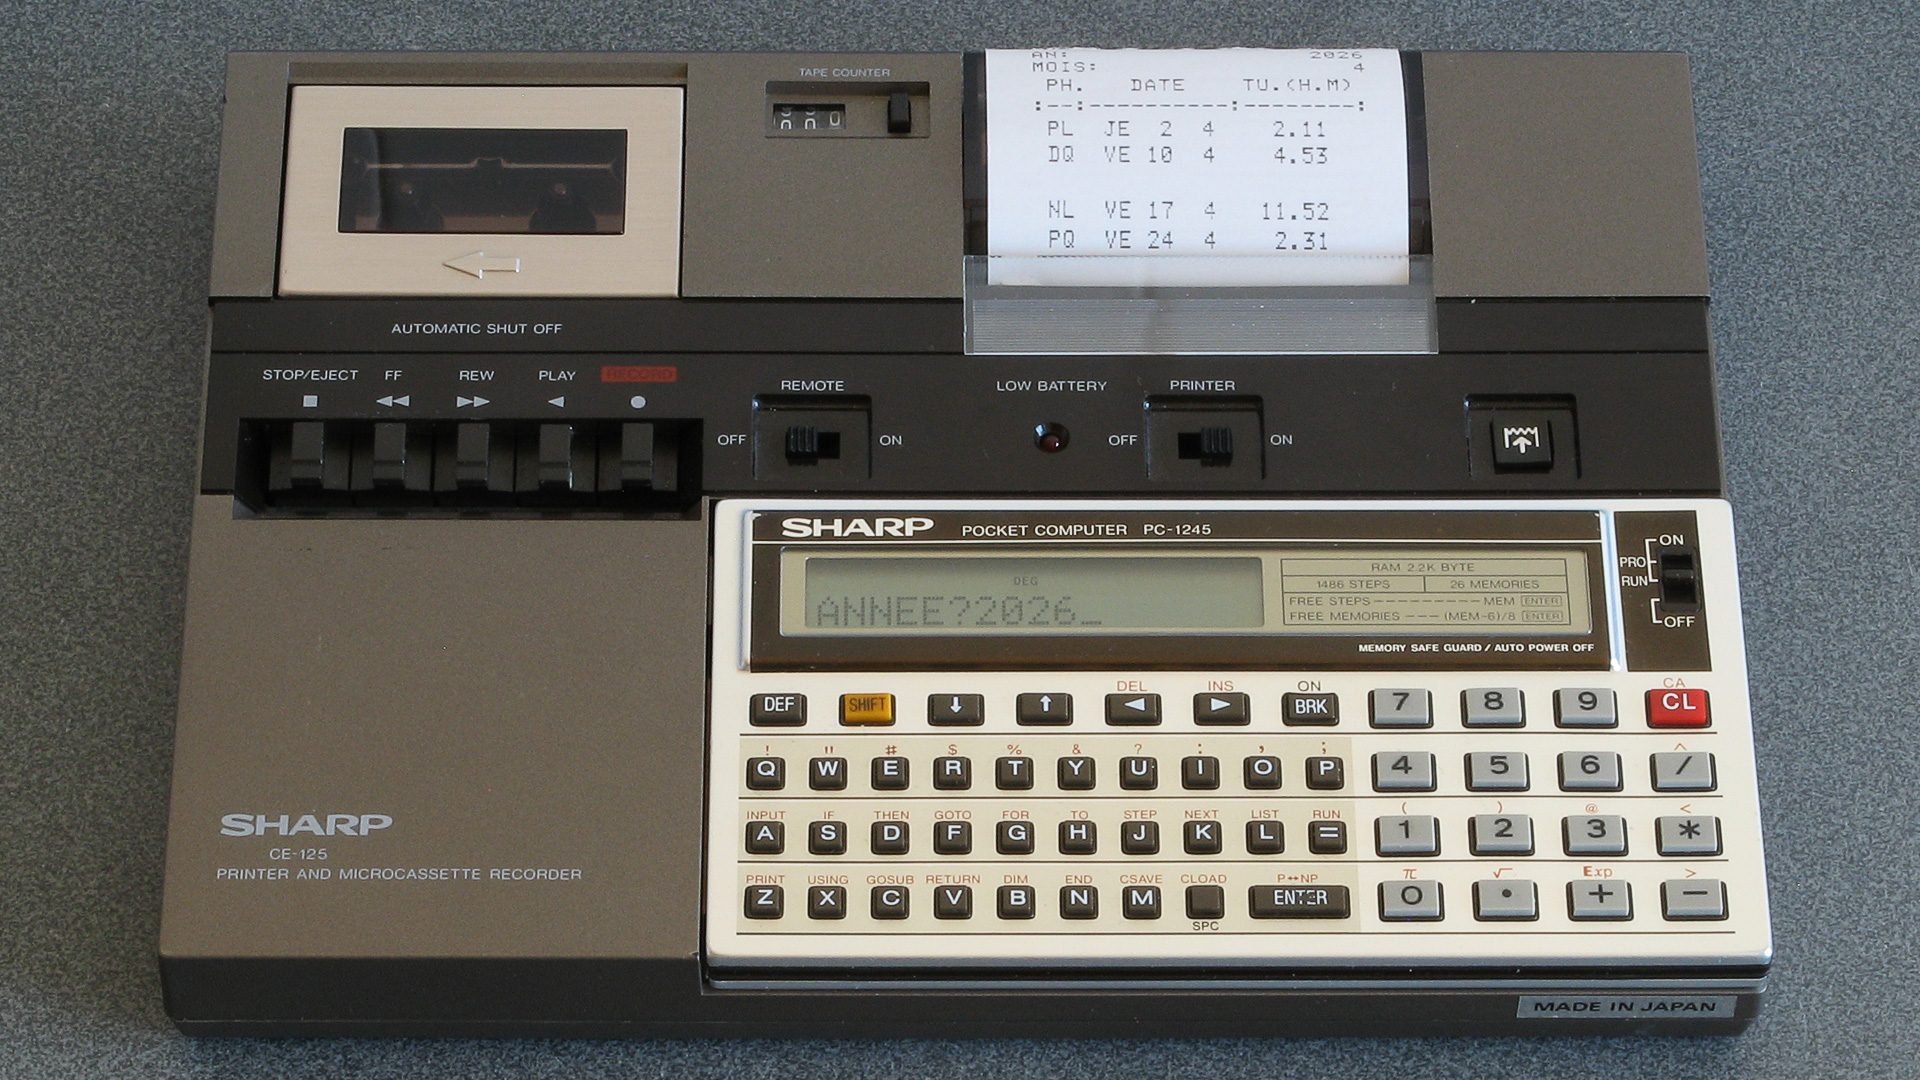
A very similar computer to the Sharp PC-1251 is the PC-1245. This can drive the same 24-column printer, however its display is only 16 characters wide. A bigger problem, however, is the amount of available RAM: the PC-1245 only has 1486 bytes free for a program and dynamically-named variables, and the PC-1251 program is 2112 bytes in length. Slimming the program down to fit was a considerable challenge, but here are some of the changes that were made:
- Dynamically-allocated variables were removed; a month number is shown instead of a name, and weekday names come from indexing into a string instead of storing them in an array.
- Where possible, multiple lines of code were condensed into single lines of code separated by colons.
- Constant variables with long sequences of zeroes at the start were replaced with scientific notation where it saved space (e.g. .000000155 to 155𝐄-9).
- The user-supplied month number is stored in a numeric variable S with a value of 0 to print a year instead of a string with a value of "AN" – this saves a lot of comparisons and use of VAL to convert back to a number where required.
- Parentheses around function arguments were removed where not required.
- Conditions were simplified or removed if possible, for example G=1: IF Y<1583 LET G=0 becomes G=Y>1582.
- Decorative text and comments were condensed or removed entirely.
- Support for outputting to the screen was removed; information would be cut off due to the narrower screen, so making it printer-only felt like an acceptable loss.
The resulting code is much harder to read, but the resulting program is not too much of a compromise from the original in my opinion. It comes to exactly 1486 bytes, which means it completely fills the computer's memory.
   25 "A"CLEAR : INPUT "ANNEE?";Y: INPUT "MOIS?";S
   35 Z=Y:G=Y>1582: USING "#####": LPRINT "AN:",Y: IF S LPRINT "MOIS:",S
   40 LPRINT " PH.   DATE    TU.(H.M)": LPRINT ":--:----------:--------:"
   45 K=INT ((Y-1900)*12.3685):T=(Y-1899.5)/100:I=2415020+29K
   65 L=1178€-7TT-155€-9TTT+.75933+.53058868K
   75 L=L+33€-5*SIN (166.56+132.87T-.009173TT)-837€-6T-335€-6TT
   85 N=.08084821133K:N=360*(N-INT N)+359.2242-333€-7TT-347€-8TTT
  105 O=.07171366128K:O=360*(O-INT O)+306.0253+.0107306TT+1236€-8TTT
  125 V=.08519585128K:V=360*(V-INT V)+21.2964-.0016528TT-239€-8TTT
  145 FOR K=(4S-4)*(S>0) TO 53:J=I+7K
  150 F=L+.38264717K:P=N+K/4*29.10535608:Q=O+K/4*385.81691806:W=V+K/4*390.67050646
  180 IF U=INT U GOSUB 300
  185 IF U<>INT U GOSUB 340
  190 F=F+.5/1440:J=J+INT F:F=F-INT F:R=J+F+1.5:R=INT (R-7*INT (R/7)): GOSUB 400
  205 IF Y<Z GOTO 260
  210 IF S*(M<>S) GOTO 255
  220 IF U=0 LPRINT ""
  230 P$=MID$ ("NLPQPLDQ",4U+1,2)+"  "+MID$ ("DILUMAMEJEVESA",2R+1,2)
  245 LPRINT " ";P$;USING "###";D;M;USING "#####.##";DMS H
  255 IF S*(M>S) GOTO 270
  260 U=((2U+1) AND 3)/2: NEXT K
  270 LPRINT "": END
  300 F=F-.4068*SIN Q+(.1734-393€-6T)*SIN P+.0161*SIN 2Q-4€-4*SIN 3Q
  315 F=F+.0104*SIN 2W+4€-4*SIN (2W+P)-.0074*SIN (P-Q)-4€-4*SIN (2W-P)
  325 F=F-.0051*SIN (P+Q)-6€-4*SIN (2W+Q)+.0021*SIN 2P+5€-4*SIN (P+2Q)
  335 F=F+.0010*SIN (2W-Q): RETURN
  340 F=F+(.1721-4€-4T)*SIN P+.0021*SIN 2P-.6280*SIN Q+.0089*SIN 2Q
  350 F=F-4€-4*SIN 3Q+.0079*SIN 2W-.0119*SIN (P+Q)-.0047*SIN (P-Q)
  360 F=F+3€-4*SIN (2W+P)-4€-4*SIN (2W-P)-6€-4*SIN (2W+Q)+.0021*SIN (2W-Q)
  370 F=F+3€-4*SIN (P+2Q)+4€-4*SIN (P-2Q)-3€-4*SIN (2P+Q)
  380 F=F+SGN (1-U)*(.0028-4€-4*COS P+3€-4*COS Q): RETURN
  400 F=F+.5: IF F>=1 LET F=F-1:J=J+1
  420 A=J: IF G LET B=INT ((J/36524.25)-51.12264):A=J+1+B-INT (B/4)
  435 B=A+1524:C=INT ((B/365.25)-.3343):D=INT 365.25C:E=INT ((B-D)/30.61)
  455 D=B-D-INT 30.61E+F:M=E-1:Y=C-4716
  465 IF E>13.5 LET M=M-12
  470 IF M<2.5 LET Y=Y+1
  475 H=24*(D-INT D):D=INT D: RETURN
I had originally hoped to squeeze the program onto the Sharp PC-1246, but that only has 1278 bytes of program memory so I'd need to shave a further 208 bytes from the program which I don't think I'll be able to pull off without some significant reworking. It should be reasonably easy to split the program into two, and have one program perform the initial setup and calculations and then CHAIN the second half that prints the calendar from tape, but for now I think I've got enough calculators calculating phases of the moon to keep me occupied.
Repairing and using a Sharp ZQ-700 organiser as a pocket computer
Saturday, 21st March 2026
The Sharp ZQ-700 Electronic Organizer, also sold as the Sharp OZ-700 Wizard, was a pretty interesting device. Its large 239×80 pixel resolution back-lit LCD and QWERTY keyboard made it a comfortable device to use, though the built-in programs are somewhat simplified from Sharp's more sophisticated earlier offerings; there's also no card slot for software expansion and the connectivity is much more limited. Gone are the options to connect a serial modem, send a fax, print to a thermal printer or back up data to cassette tape, but perhaps this was all a sign of the times. The US version of the organiser proudly sports the mywizard.com domain name, and the features I mentioned were all pretty old hat in an era when the Internet was being rapidly embraced. Whilst the organiser could not directly connect to the Internet, the accompanying website allowed users to share and download data files for the organiser and synchronise them with a PC using the supplied data cable.
A programmable organiser: Sierpinski triangle code typed into a memo
Where this becomes particularly interesting the organiser's My Programs button. Previous Sharp organisers could be turned into pocket computers via the addition of a Scientific Computer card which included a powerful BASIC interpreter. The ZQ-700 has a BASIC interpreter built-in, and up to ten BASIC programs can be stored on the organiser and accessed via the My Programs button. Unfortunately, these BASIC programs cannot be edited directly on the organiser itself and there is no interactive BASIC prompt, but Sharp supplied a free SDK which let you edit BASIC programs and convert them into the tokenised form that could be transferred to the organiser. Being able to write your own programs to run on your organiser is an extremely powerful feature.
Even better, the BASIC interpreter does provide PEEK, POKE and CALL keywords even though these are not directly accessible when using Sharp's official SDK. By creating a BASIC program with a stub CALL at the start and appending machine code to the end of it it's possible to run native code on the organiser. The organiser is powered by a Z80 CPU, and so a user-developed alternative SDK (including a C compiler) was released, allowing people to write their own native code for the organiser.
Unfortunately, most of the sites relating to the ZQ-700 and its community are long-gone. The official mywizard.com has been offline since at least 2009, though interestingly Sharp do still host some downloads relating to the organiser on their global website. The mywizard.com site eventually required user registration to download files, so very little of the user-generated content has been preserved by the Internet Archive. However, some of the hobbyist sites about the organiser have been preserved there, so it is possible to scrape together a bit of a software collection that way.
LCD repair
Aside from the link rot there are some more pressing age-related issues with the ZQ-700 relating to its LCD. Or, as the case may be, non-pressing issues as the flat flex cable that provides an electrical connection between the main PCB and the LCD's rows and columns gradually comes unstuck.
The photo above shows the typical state of the organiser's LCD after all these years. The discoloured paintwork around the hinges is somewhat less typical; I bought two organisers recently for cheap due to their non-working condition, and both showed signs of severe alkaline battery leakage. The two organisers were sold as a pair, and both were showed the same owner's name and address when powered on. I always find it interesting if an electronic organiser has any old user data on it, as it gives you an impression of how much the owner appreciated the device; in this particular case these organisers were very heavily used, with around 5,000 records stored on each. This gave me all the more inclination to want to repair them. As well as thousands of contact details and diary entries there were also numerous BASIC programs in the My Programs section, all related to cars and financing, so I thought it would be worth trying to find a way of backing up said programs before erasing all of the personal data from memory.
Getting access to the LCD is reasonably easy; the rear cover simply clips on. I find it easies to start popping it off near the hinge side, unclipping both sides and working up towards the top edge furthest away from the hinge. Some screws hold the PCB in, with each screw hole marked with a white triangle. In my case one screw was missing from the factory! The LCD glass itself is secured to the front of the screen housing with double-sided tape; some gentle pressure on the screen from the inside will unstick it.
The flat flex cables that are stuck to the LCD glass use a heat-activated adhesive. One potential fix for the cables coming unstuck is to heat them with a soldering iron to reactivate the adhesive, though this is a somewhat risky procedure. In this case, however, that is not an option due to the use of two cables at right angles to each other, with the problematic column-driving cable being folded between the LCD and PCB with no easy way to access it with a soldering iron.
A mechanical fix can be an option, however. This involves finding some way to put pressure between the flex cable and the PCB and/or LCD to physically hold the cable against the contacts. Thin rubber sheeting can work well for this, and for the ZQ-700 series I've found cutting a piece that's 3mm wide and about 105mm long from a 2mm thick sheet does a good job.
I also put two layers of Kapton tape on each side of the rubber strip before cutting it out. Aside from a little extra thickness, this gives the otherwise grippy rubber strip a smooth surface that will make it easier to slide into the fold of the flat flex cable between the LCD and its PCB.
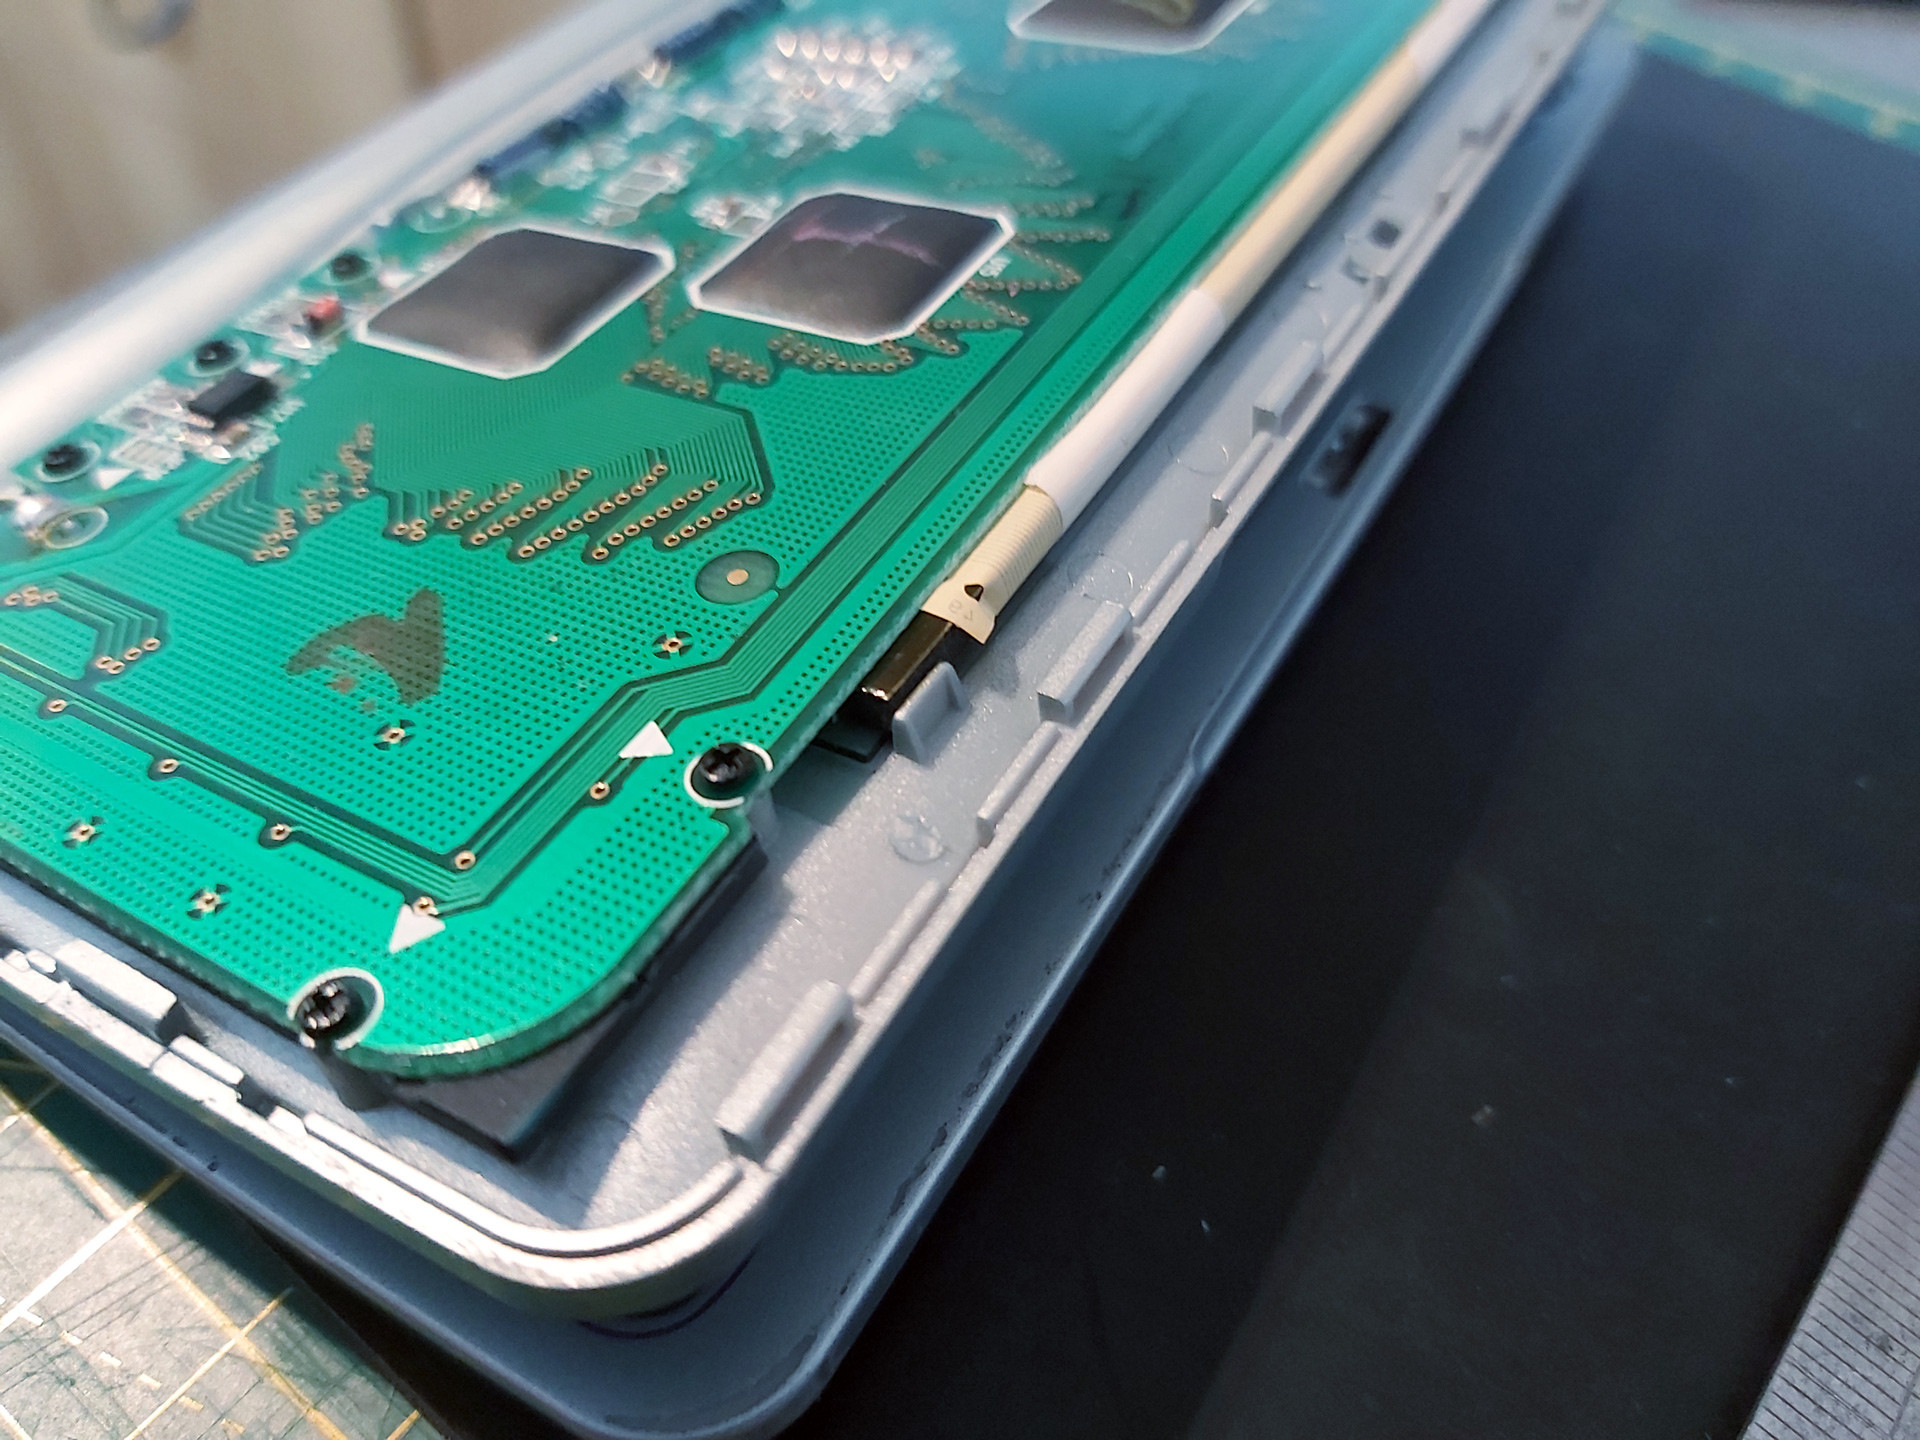
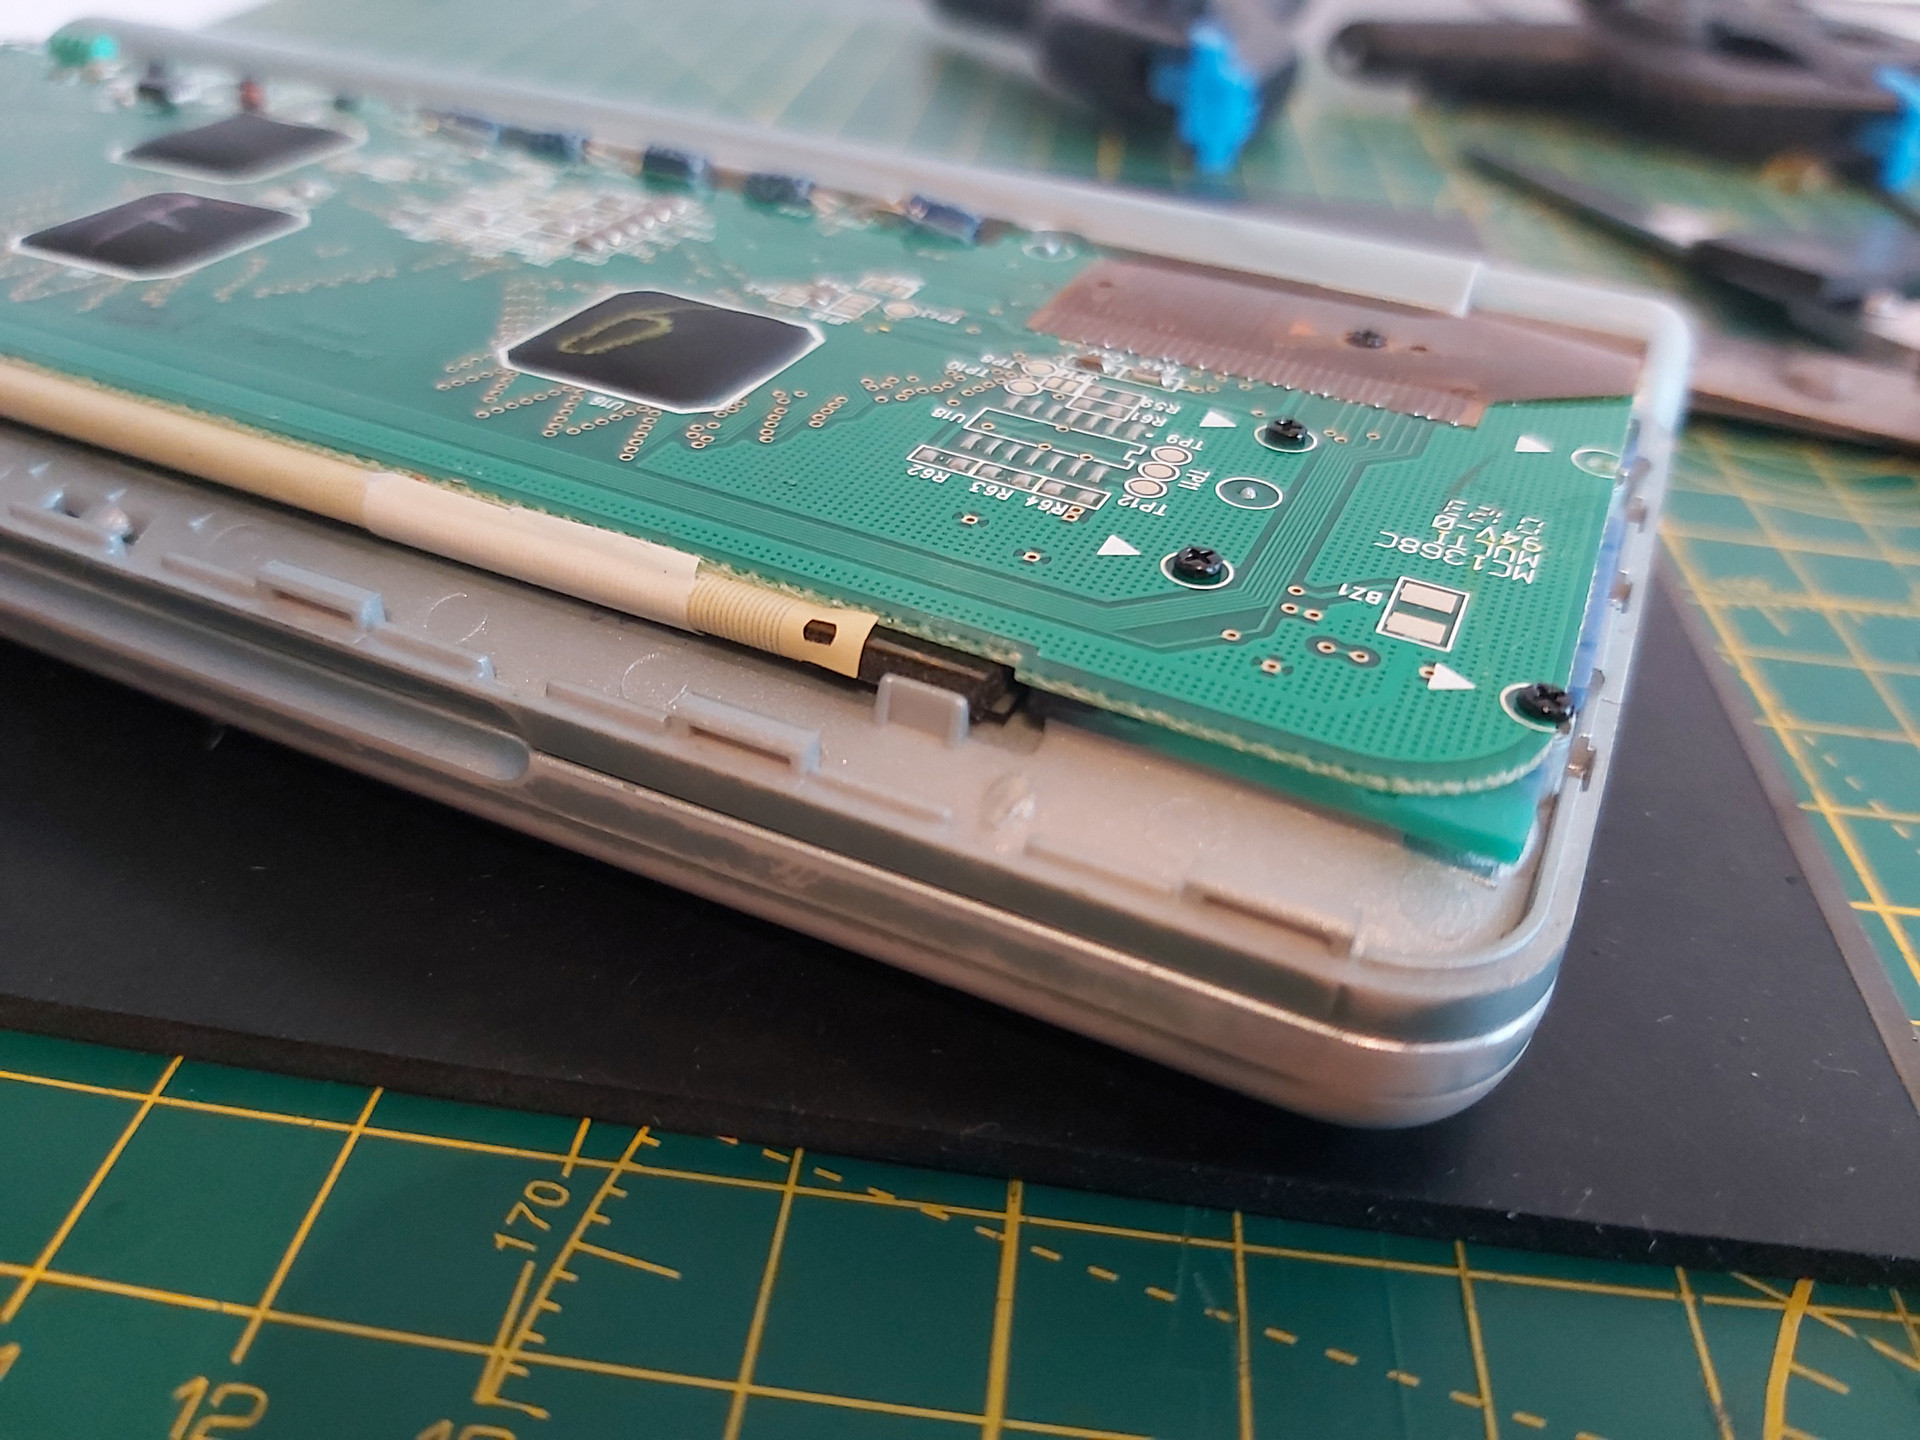
There are two pieces of white tape stuck to the back of the PCB and the flat flex cable which pull on the cable slightly and can make it harder to install the rubber strip. Rather than remove these entirely I very carefully peeled them off the PCB and then cut them rather than try to peel them off the fragile flat flex cable and cause further damage.
After installing the rubber strip and screwing the PCB back down, there was a notable improvement but not all of the columns came back. Putting some additional pressure on the back of the board in just the right place resulted in a complete picture. One possible way to apply this pressure is to put something inside the back cover so that when it's clipped back on it simulates what my thumb was doing in the previous set of photos:
Unfortunately in this organiser's case there was still one missing column, and this was with so much rubber stuck inside the back cover that the whole screen was bowing outwards and could no longer be clipped shut. This clearly wasn't the answer, so the rubber pieces inside the back cover were peeled off. Some targeted application of the heat treatment seemed like the next best option.
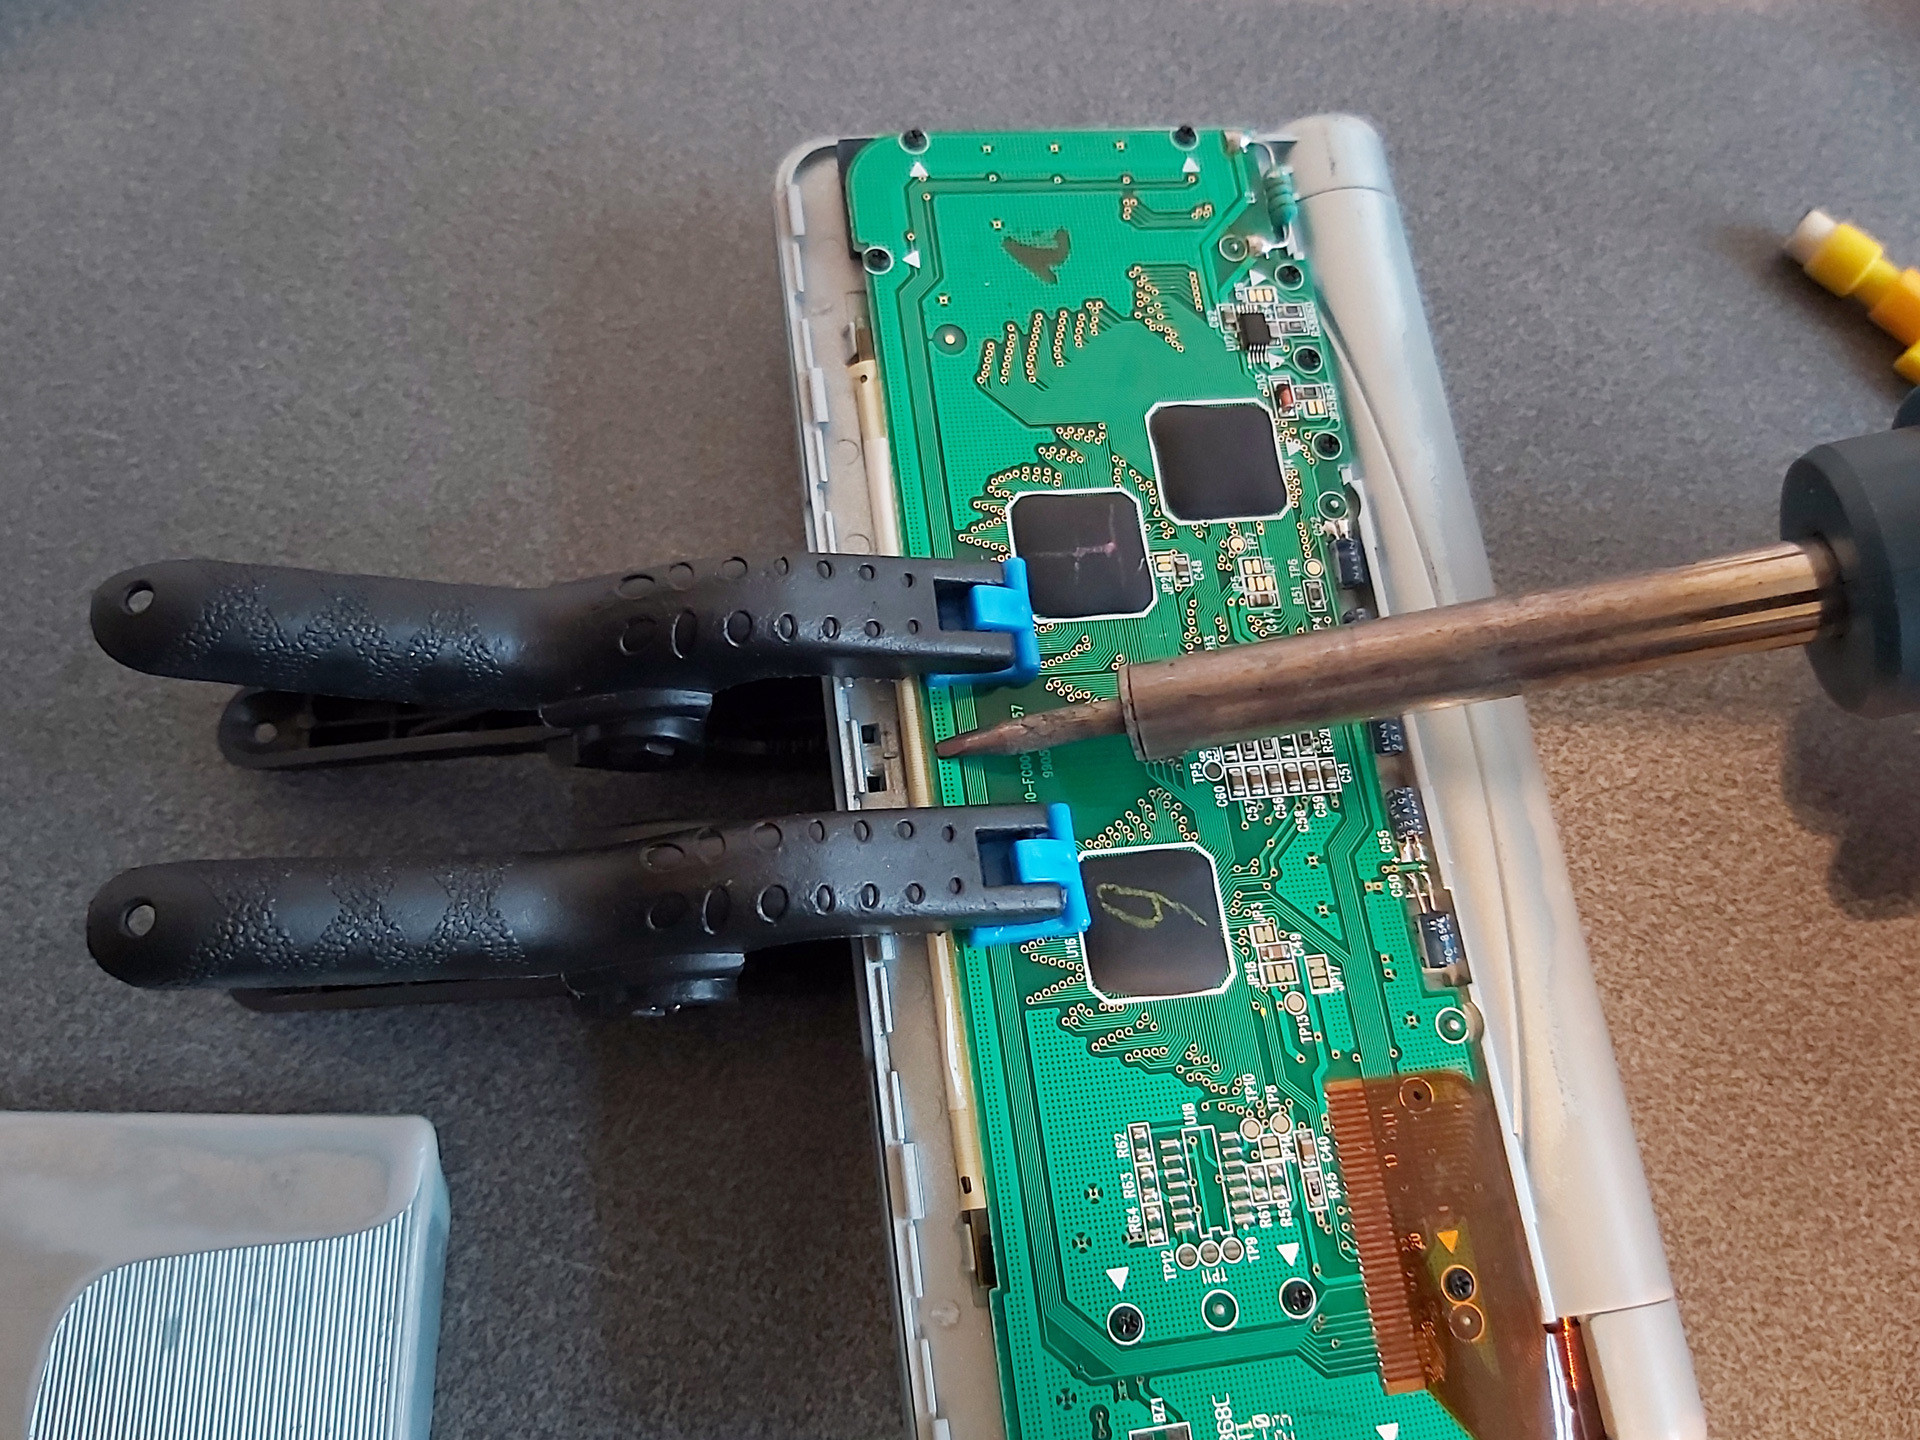
There is no direct access to the flex cable, however there is nothing too delicate on the opposite side of the PCB which we do have access to – mostly just a thick copper track. A pair of spring clamps were placed on either side of the missing columns, applying firm pressure to the cable courtesy of the rubber strip inside its fold. The soldering iron was set to 350°C and held against the copper track for a few seconds. Everything was left to cool, then the results were checked – all columns were back!
I must stress this is a risky operation, as the flex cable is very delicate and heating it can ruin it. 350°C is far too hot for directly heating the cable and if the soldering iron slips and makes contact with the cable you'll probably melt a hole in it. When directly heating the cable I use an iron at around 240°C, but even then I only lightly swipe it across the cable in the direction of the contacts – no prolonged contact and no firm pressure.
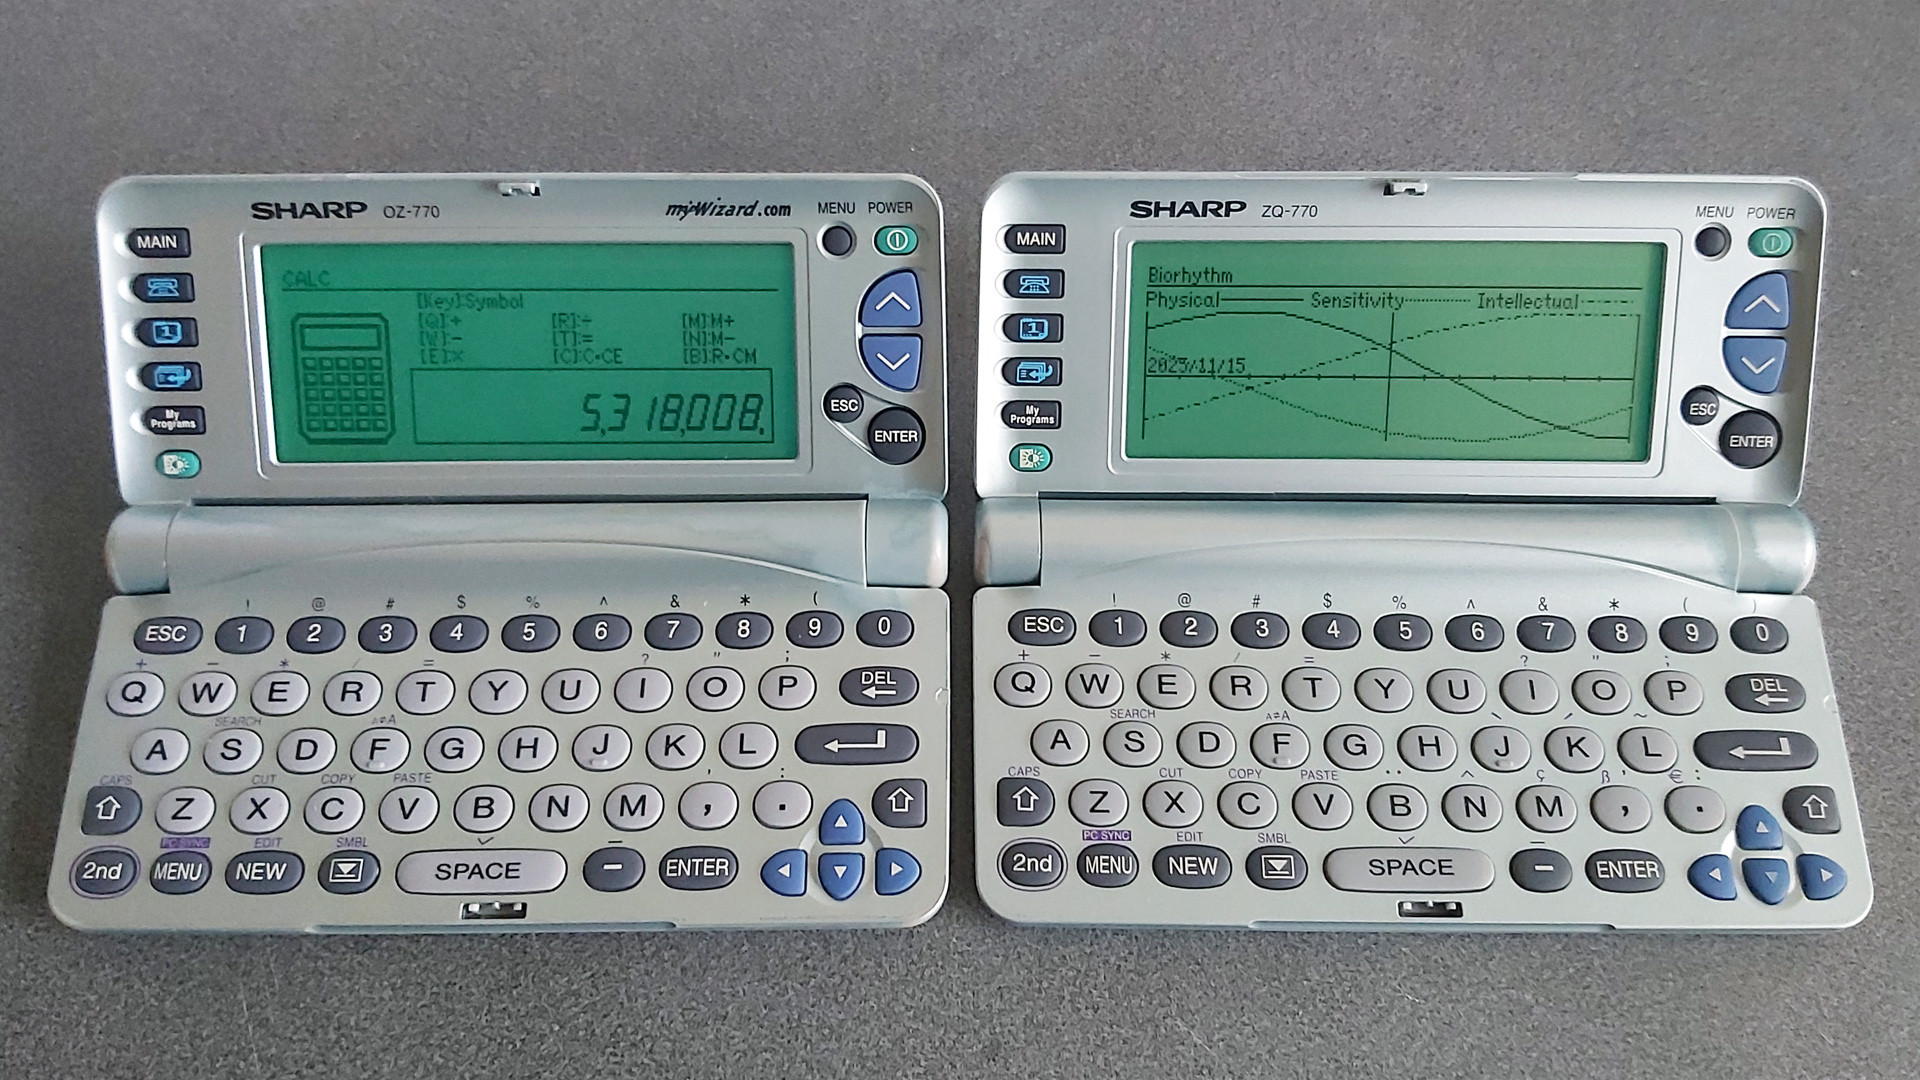
Once I had the OZ-770 working I turned my attention to the ZQ-770, the other organiser from the pair. This one also has faulty columns on its display, however the fault is rather more intermittent – gently flexing the screen brings the missing columns back, and once the organiser has been on for a short while they generally remain visible until the organiser is switched off for a while. It'll probably need repairing in the future, but for now it's working well enough that I don't want to risk accidentally making it worse.
Backing up My Programs from ZQ-700 series organisers
One of the two organisers I'd bought had a number of BASIC programs loaded into the My Programs area. Unlike the personal data, which I had wiped, I thought it would be interesting to preserve these BASIC programs. Connecting the organiser to a PC is easy enough via an RS-232 serial cable; though I don't have an original one, I was able to make my own from a 3.5mm TRRS connector and a DE-9 plug following the wiring diagram on IMSL Software's copy of a page from the OZdev website. IMSL Software also develop the XLink/Win software which can be used to synchronise data between a Windows PC and an organiser, though this won't let you back up the data from My Programs.
A home-made serial cable for the ZQ-770
Sharp supplied a copy of Day-Timer Organizer for similar purposes and though this won't help back up My Programs either there is a handy backup utility on the CD that can dump the entire contents of the organiser to a file. Someone has uploaded a copy of this OZ-700 Software CD-ROM to the Internet Archive, and though it can't seem to restore backups on modern versions of Windows it happily created backup images from my organisers.
I did take a look at the created backup files and though they looked like nonsense at first I think this is because all of the bit values are inverted. After flipping the bits back I could find various program fragments, though they not contiguous so I suspect there's a file system or similar data structure embedded in the backups that make pulling out the data a little more difficult.
Fortunately this is a solved problem: SbkExplorer can open the backup .sbk file and export the programs as individual .wzd files, ready for reinstallation on other organisers.
Extracting files from the My Programs portion of a backup using SbkExplorer.
When these BASIC programs were originally developed using Sharp's SDK they were stored as a .bas containing the source code as a plain text file and a .prj project file that contained some information about the program such as its full name and a text description. The program would be "compiled" into a .obj file (effectively a tokenised BASIC program with the comments stripped out) and then published as a .wzd file which is an XML-like file containing the description from the project file and the compiled object file as raw binary data. Sharp's downloader tool could then open the .wzd file, show the project description on the screen, and allow the user to transfer the compiled BASIC program to their organiser's My Programs menu.
The .wzd file recovered by SbkExplorer won't be a perfect match for the one used to install the program originally, as it will be missing any descriptive text. However, it's good enough to back up an installable version of the original program file. If you wanted to edit the source code for the program, then the Sharp Wizard Decompiler can be used to extract a .bas file from the .wzd. Again, this won't be a perfect match for the source material as any comments would have been stripped out by the Sharp SDK, but it's definitely a good starting point to recovering old programs.
Links to OZ-770 resources
Unfortunately, a lot of the old sites that used to host information about this series of Sharp Organisers are long gone. Fortunately, the Internet Archive's Wayback Machine has copies of a lot of them, and I've linked to those archived copies where the original sites are no longer online.
General tools
- Sharp's Software Downloads ZQ-700 series page still hosts the Downloader, Data Creation and SDK tools for the organiser as well as some sample installable .wzd files.
- IMSL Software show how to make a serial cable for the organiser and sell XLink/Win linking software that is compatible with the organiser.
- Day-Time Organizer: Sharp Edition was originally bundled with the organiser on CD-ROM and can be used to back up and restore data from the organiser.
- SbkExplorer can be used to extract data from a .sbk backup (created using the Backup Utility on the previous CD-ROM).
File archives and information about the organiser
- Wizworld.
- The OZ-750 Paradise.
- Marshall's Amazing Wizard Organizer.
- Nadisha Ranmuthu's Wizard.
- Grigori Fursin's Homepage (FSFM).
- Software for the PC and for Sharp Wizard OZ/ZQ 7xx Organizers mainly by Alex Pruss.
Software development
- OZdev Wizard Development: 2001, 2002. Lots of good information but the archives have some broken links, hence two captures from the two different domains are provided.
- Official Sharp SDK to develop programs using BASIC.
- Zifnab, an alternative SDK for developing BASIC programs (includes additional keywords like PEEK, POKE and CALL).
- Bacon, an organiser add-on that lets you execute BASIC programs created directly on the organiser as memos.
- Sharp Wizard Decompiler to decompile .wzd files into BASIC source files.
- C SDK with a lot of sample code.
The result of running the Sierpinski triangle code from the earlier memo using Bacon
If you pick up one of these old organisers you can probably have quite a lot of fun with it as a pocket computer containing a Z80 CPU, a large LCD and QWERTY keyboard. It's just a shame about the poor durability of the screen.
40-column text modes on Sharp organisers with the 16-column IQ-707 BASIC card
Wednesday, 2nd July 2025
Recent posts on here have taken a bit of a detour into Sharp Pocket Computer territory. When hunting down parts or accessories for them on eBay I'll occasionally be recommended other Sharp devices, such as their calculators or organisers, if an exact match for the thing I'm actually hunting for can't be found. Calculators are indeed a useful tool, so I appreciate those recommendations, but mid-1980s electronic organisers are not usually the sort of thing I'd be too interested in.
However, some of Sharp's organisers are definitely worth a look, and these are often considerably cheaper to pick up second-hand than pocket computers or calculators. I suspect this is partially due to difficulty in testing them and perhaps a bit of user error – they often require a large number of CR2032 cells to be installed, usually after removing a screwed-on back cover, and have a series of interlock switches that all need to be set just right before the device will even try to switch on. As a result, I've acquired quite a large collection of them for very little money, mostly sold as faulty or untested but all working just fine.
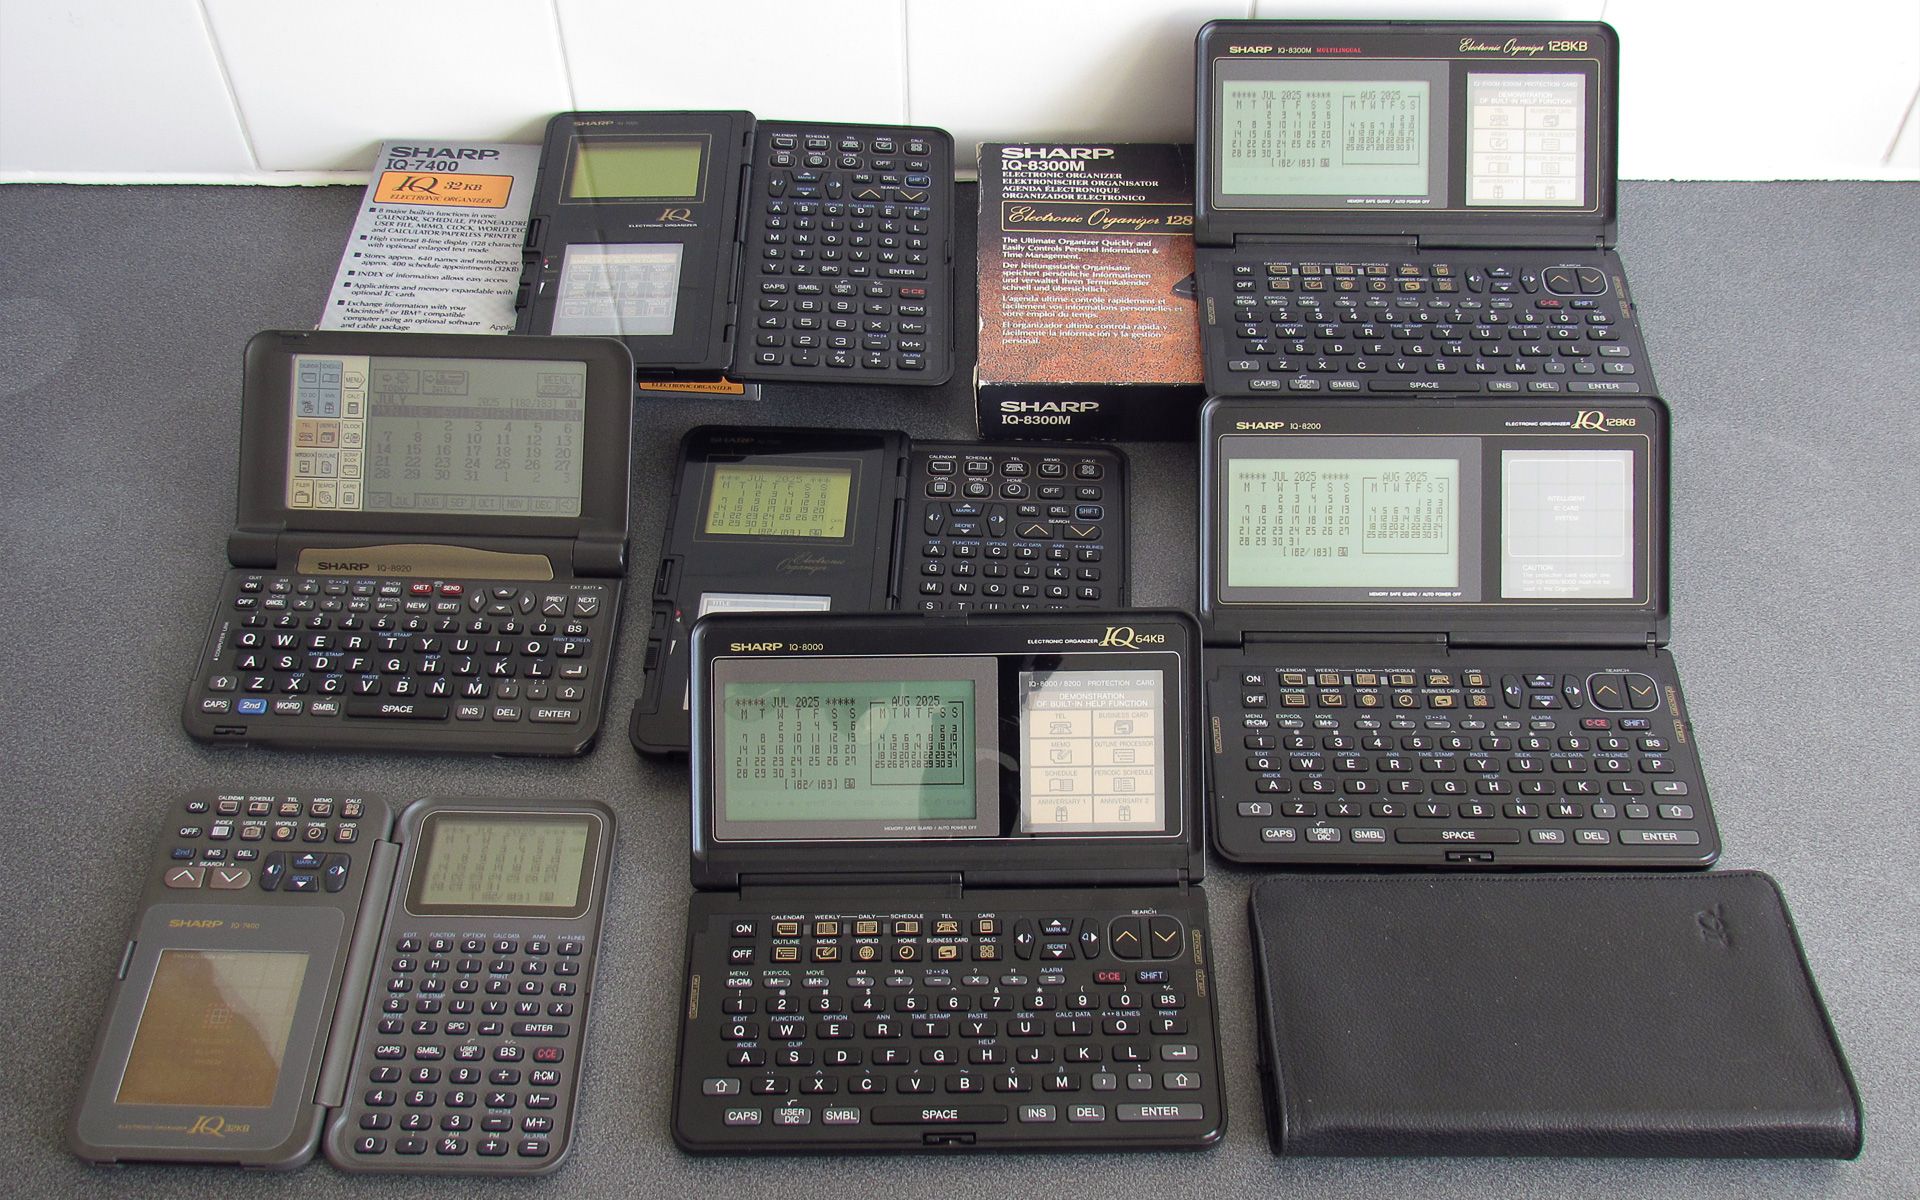
These particular organisers have a card slot on them, which can be used to expand the device's capabilities via a credit card-sized "IC card". The most common sort that you'll find is a RAM expansion card, which allows you to store more data (notes, calendar appointments, address book entries and the like) in a separate area to the device's built-in memory. More interesting, however, are the application IC cards. Dictionaries, thesauri, spreadsheets and even games were made available.
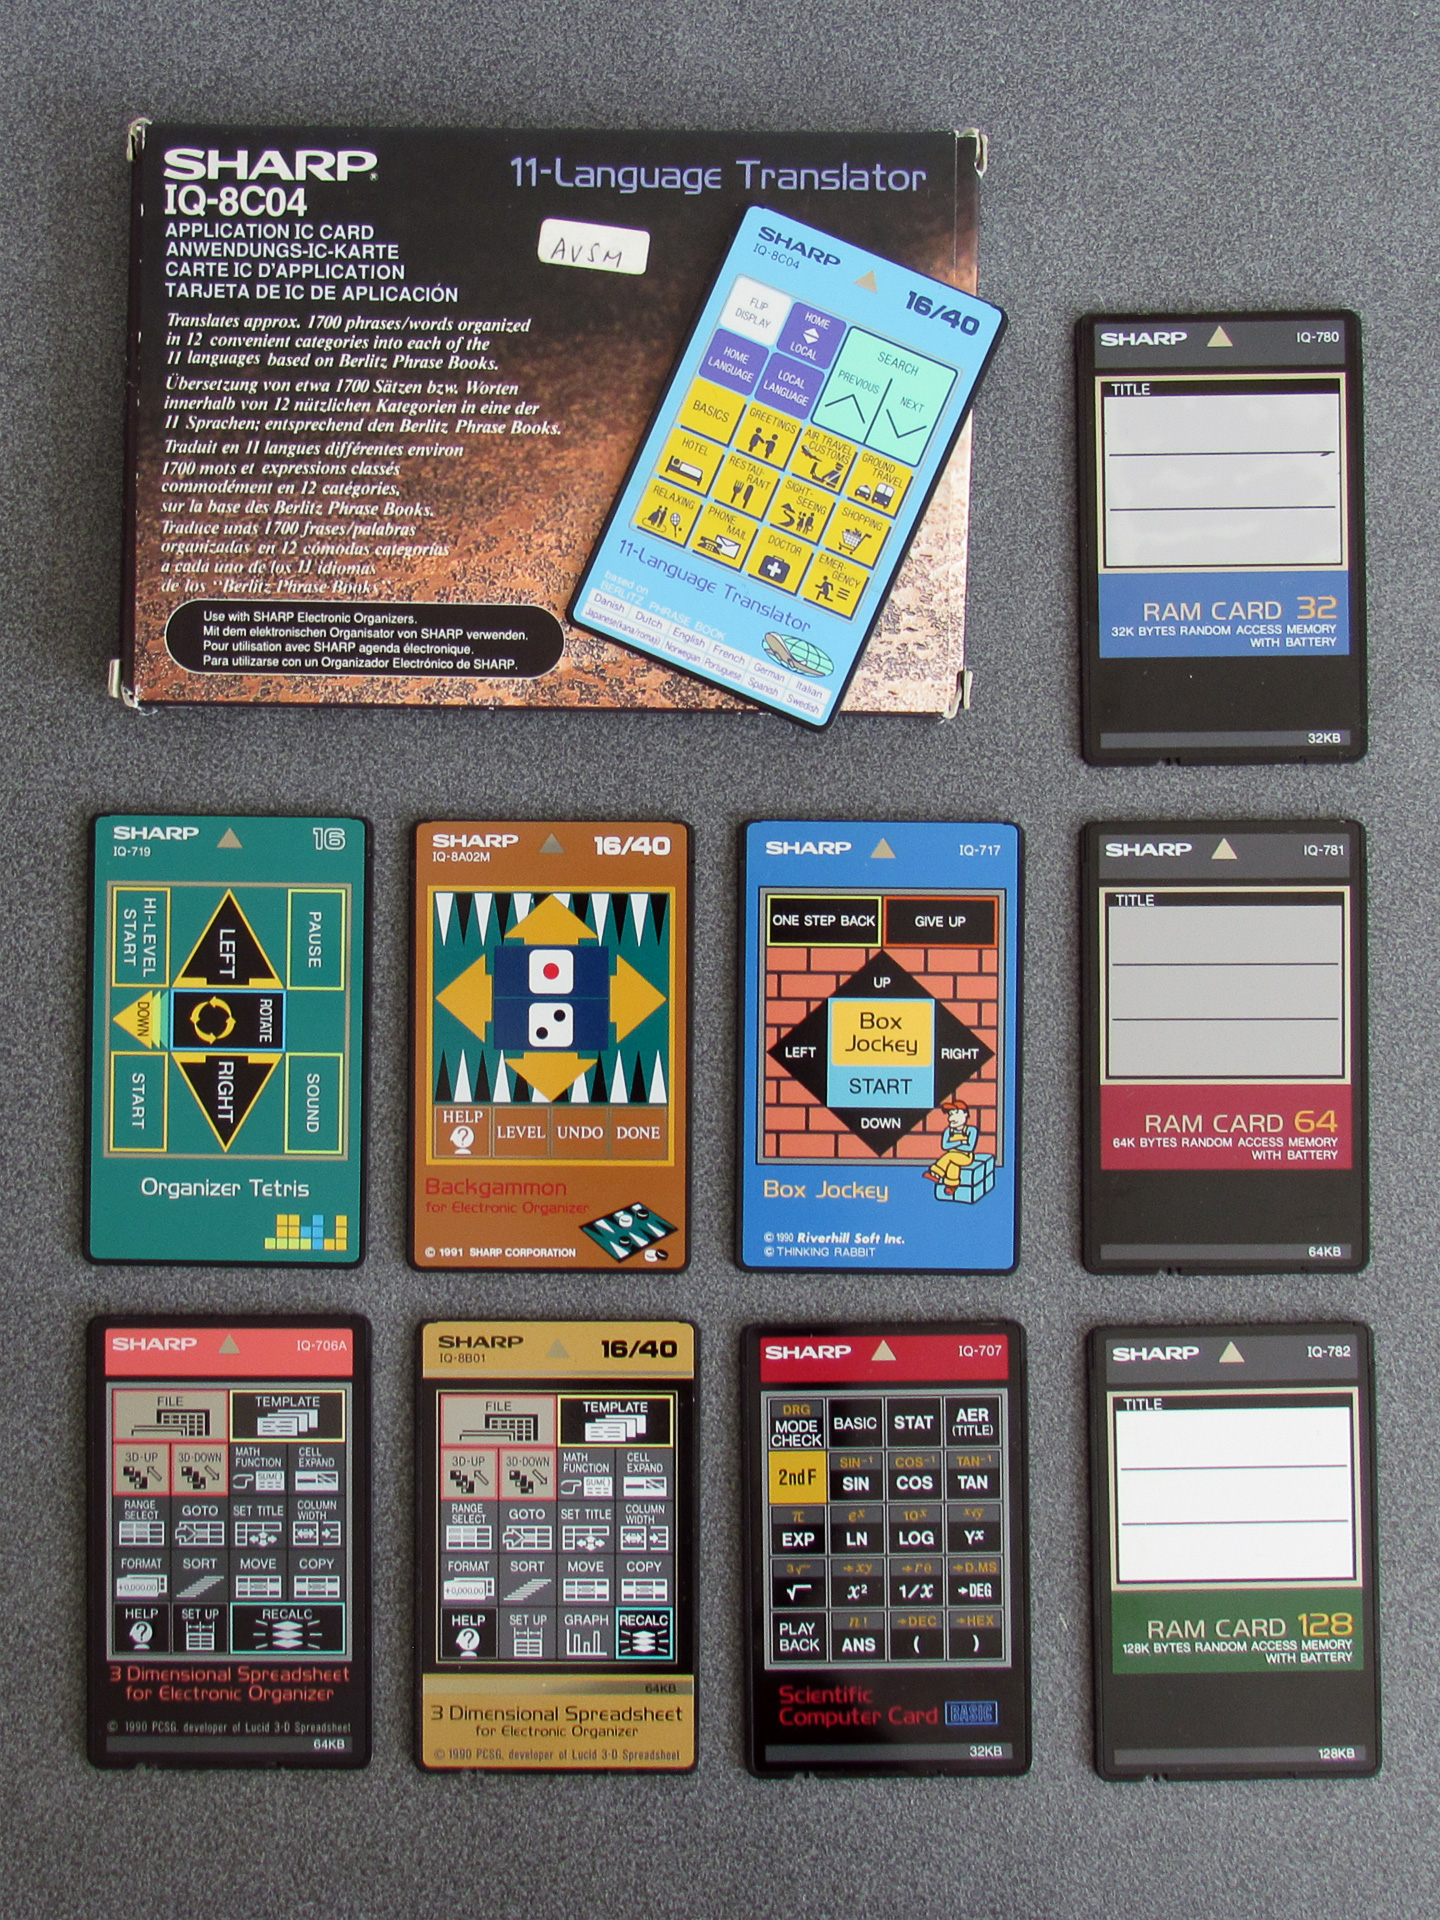
To me the most appealing is the Scientific Computer Card. The organisers do have a simple calculator built in, but the Scientific Computer Card adds more advanced calculator features such as trigonometric functions, logarithms and a statistics package. This is all handled via a very capable BASIC interpreter built into the card, and you can write your own programs on the organiser. The organisers also have a 4-pin "option" port that can be connected to a printer and cassette interface, and a 15-pin "PC link" serial port, so when you slot the card into your organiser you are in effect turning it into a pocket computer (though with all the accessories attached, you might need pretty large pockets!)
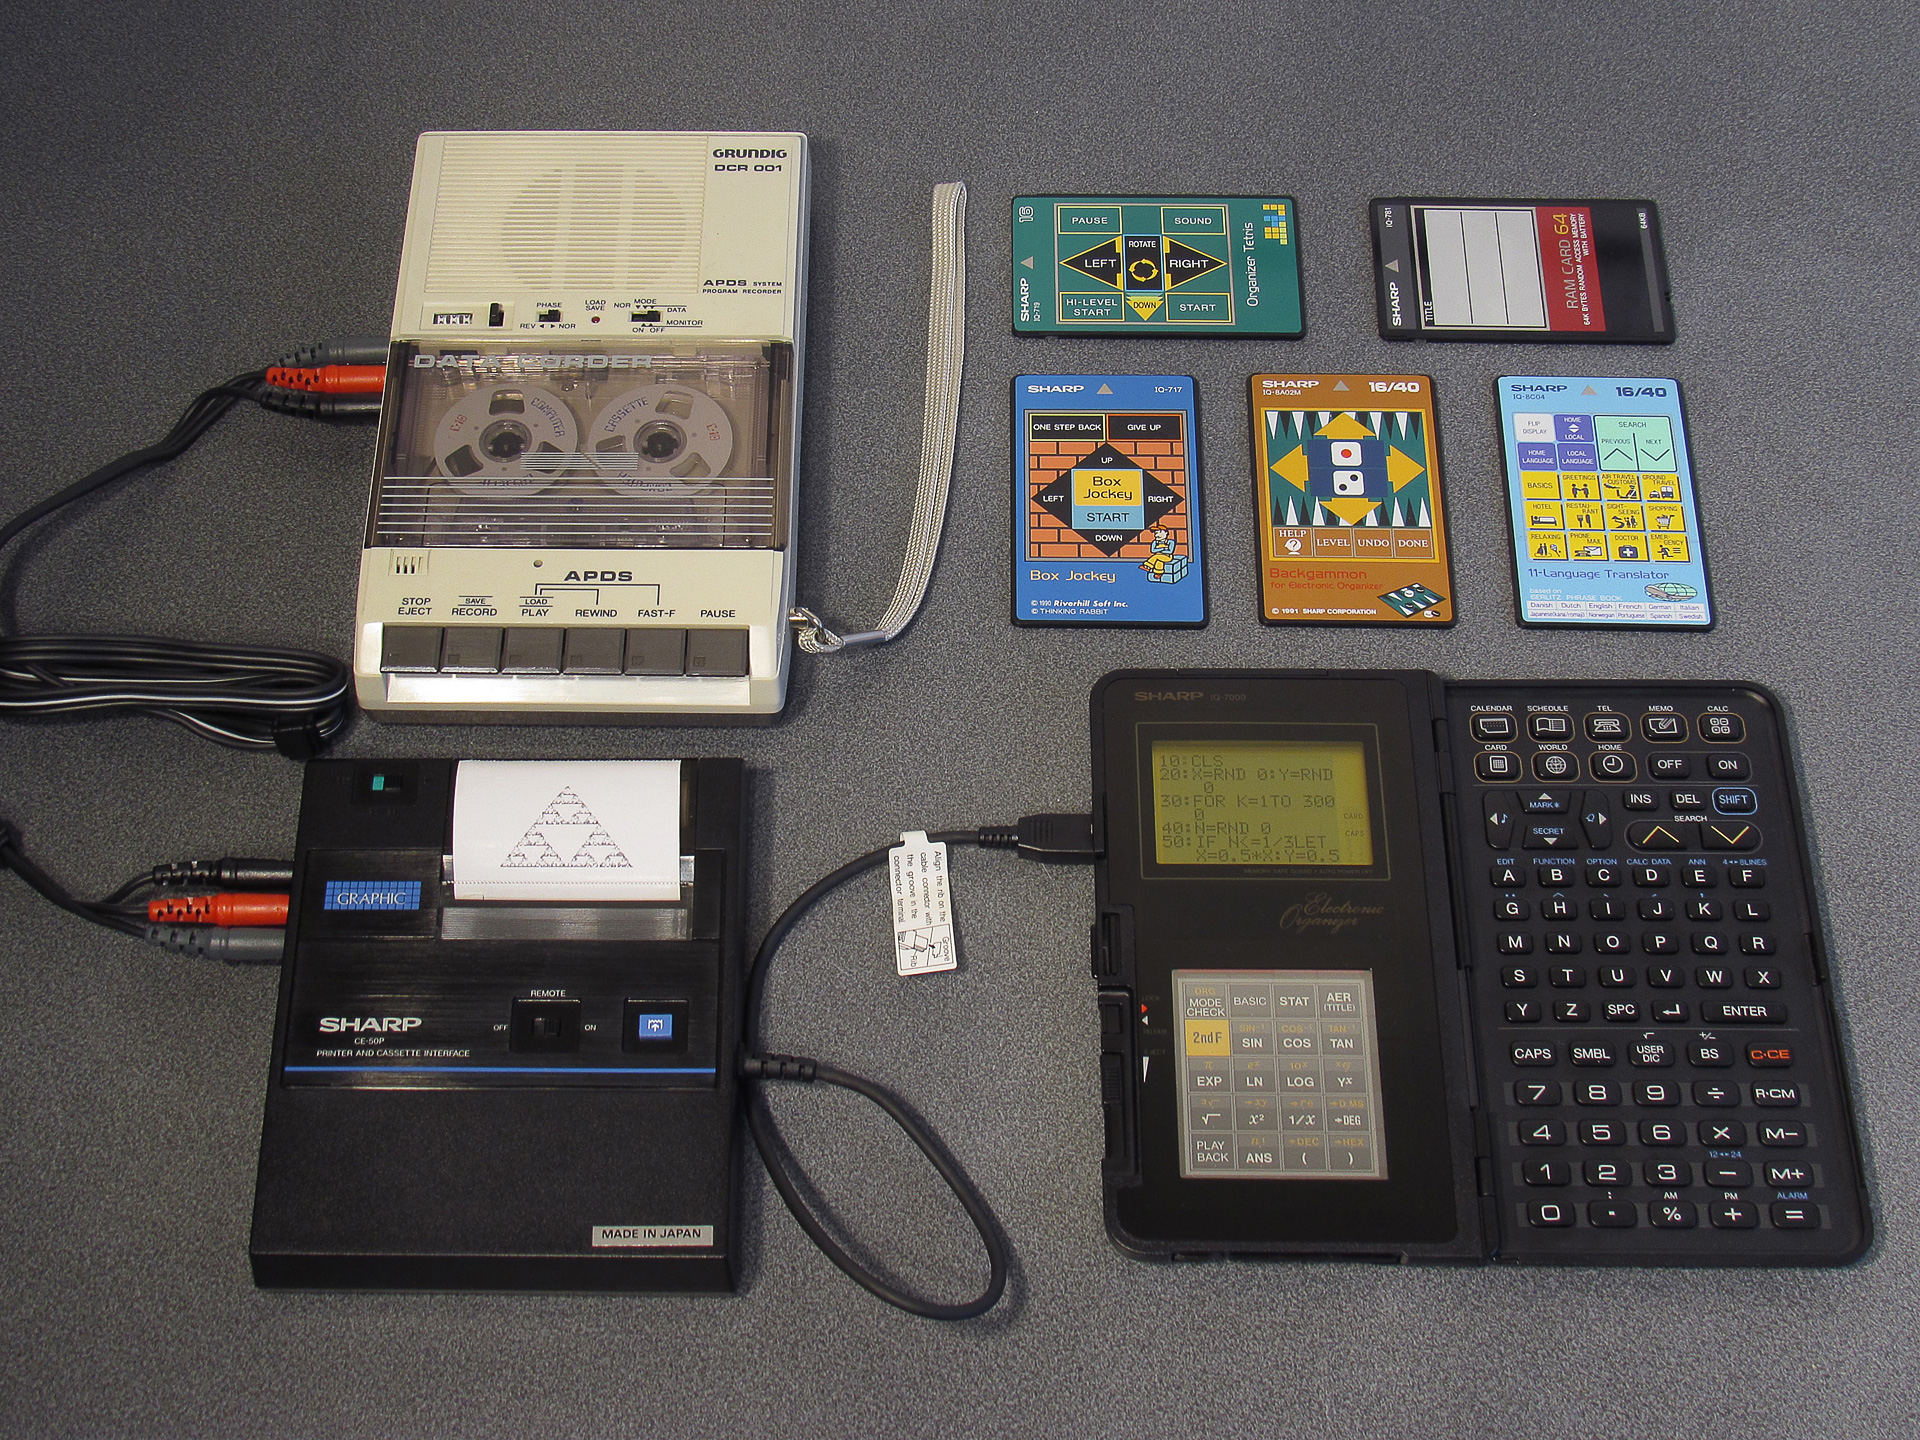
My only real criticism of this arrangement when compared to Sharp's dedicated pocket computers is the IQ-7000's keyboard. It's not too difficult to get used to the non-QWERTY alphabetic characters, but for BASIC programs you often need certain symbols (such as the speech mark, comma, semicolon, colon, less/greater than or ampersand) which are not present on the organiser's keyboard – they're only available via a pop-up menu that appears when you press the SMBL key. This menu only shows 10 options at a time and you need to hunt up and down through it to find the symbol you need; not an ideal experience!
Fortunately, Sharp released later organiser models (such as the IQ-8000) with QWERTY keyboards. Not only are these more comfortable to type on, but most of the symbols are now accessible via a shift key and these organisers retained backwards compatibility with the IC cards from the earlier IQ-7000 organisers.
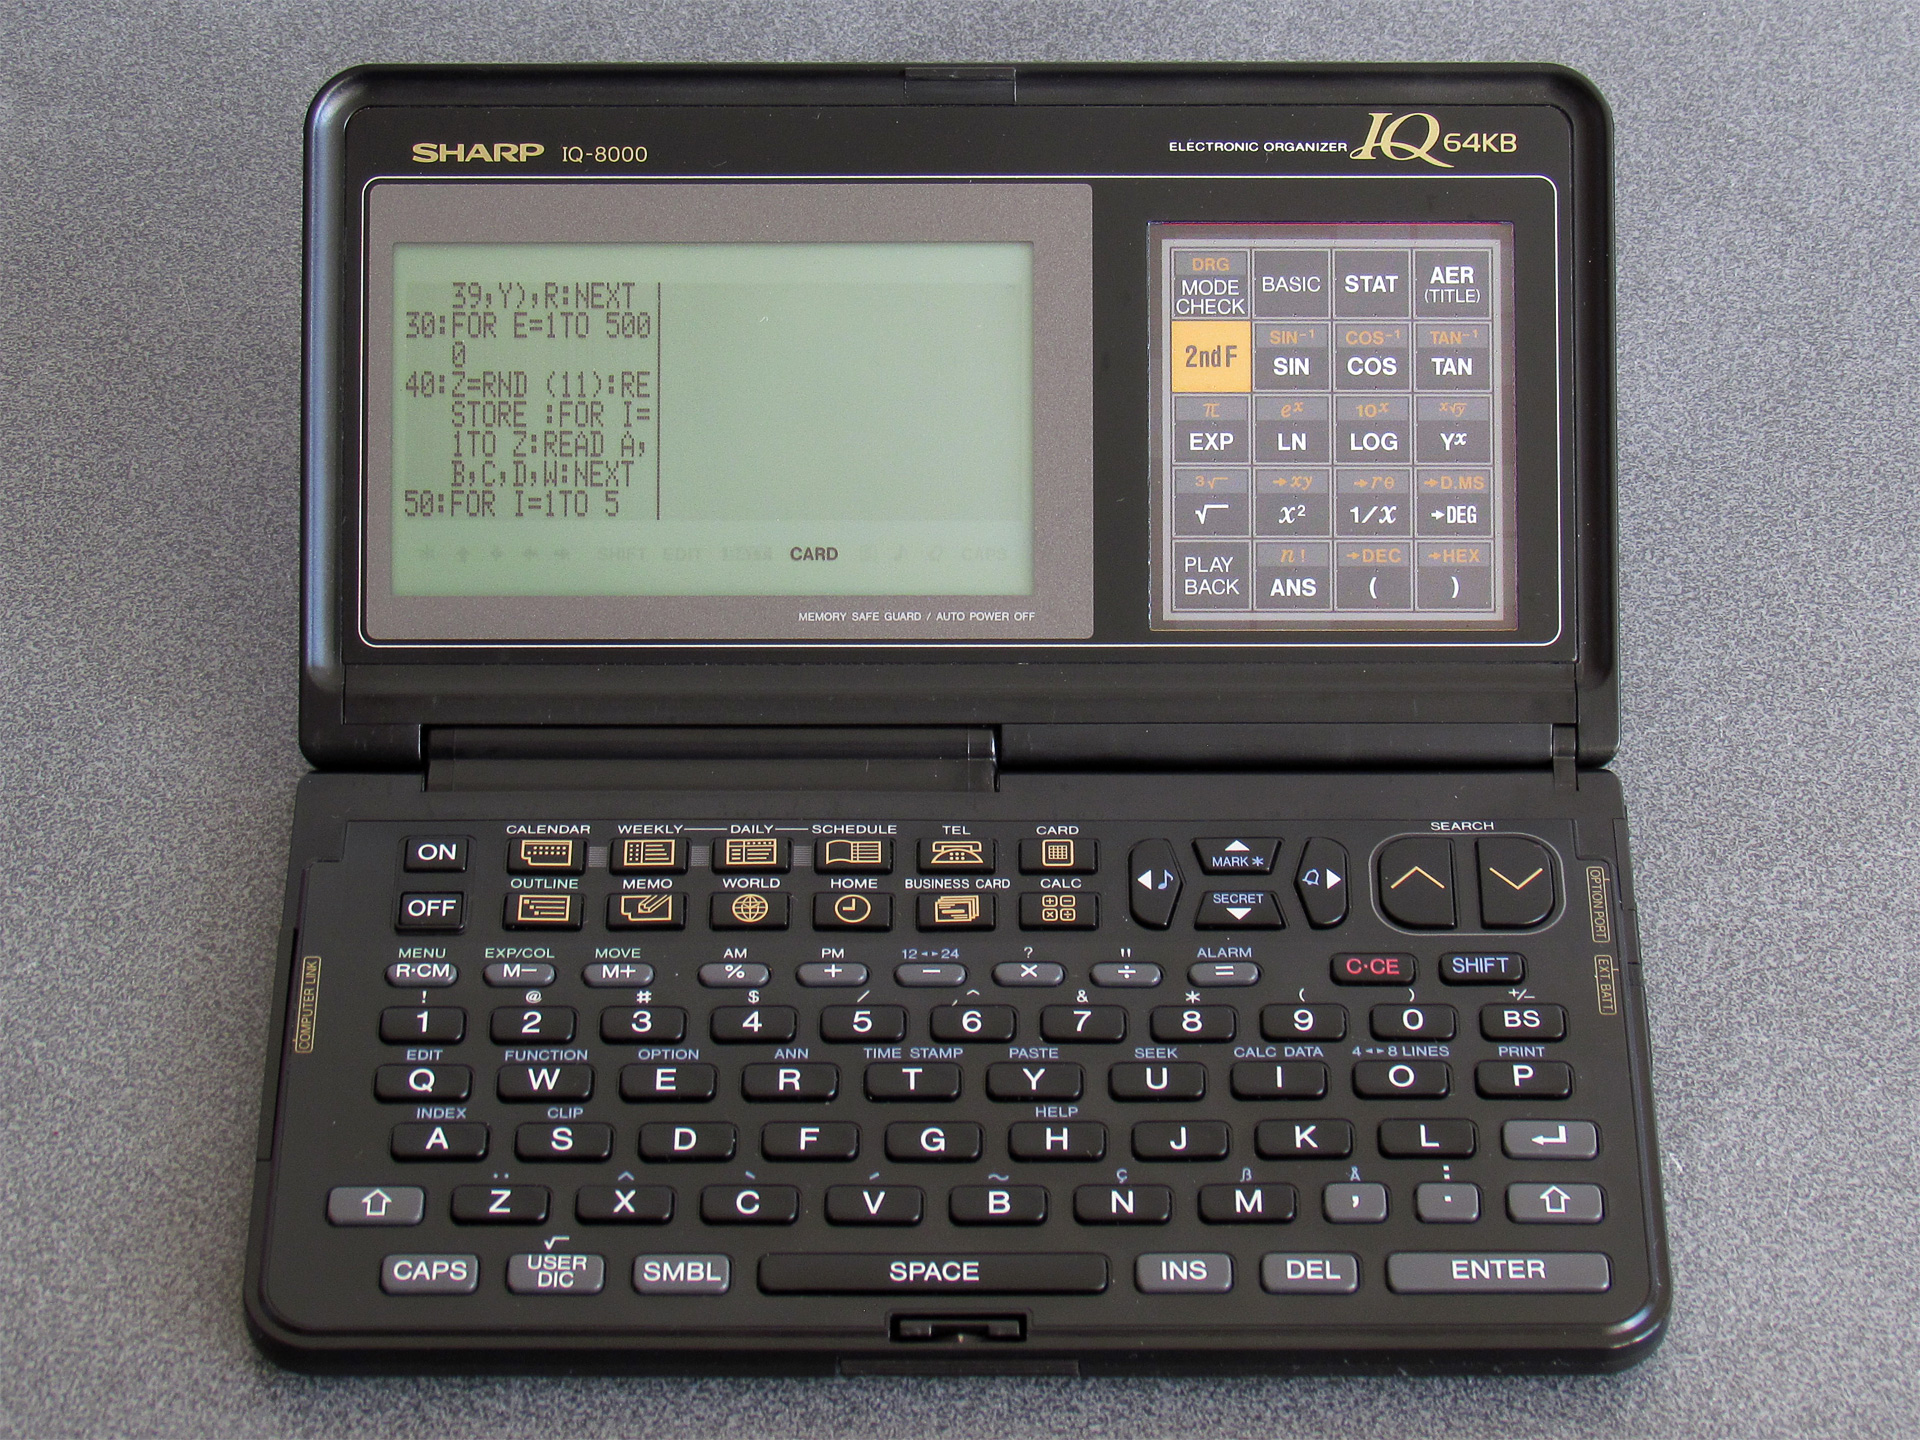
The screen is also quite a bit larger and clearer, albeit now with non-square pixels which can make applications look a little skinny. Unfortunately, old applications developed with the 96×64 pixel display on the IQ-7000 in mind won't know how to take advantage of the 240×64 pixel display of the IQ-8000 and so are rendered on the left hand side of the display with a separator line. That seems like an awful lot of wasted space!
Application cards that took full advantage of the larger screens (up to 40 columns of text) were sometimes sold separately to the versions that were only designed for the smaller-screen devices (16 columns of text). For example, the above photo shows two cards of the same software – 3 Dimensional Spreadsheet for Electronic Organizer – with different card numbers (IQ-706A v IQ-8B01). The card on the right has 16/40 printed in the top right corner, showing it supports both 16-column and 40-column organisers. The card on the left doesn't, and will work in both, but will only display in the leftmost 16 columns.
As an aside, another difference is that the IQ-8B01 version has an extra "Graph" button on it. When the cards are inserted the front labels are visible through a transparent window. That window is touch-sensitive and allows cards to provide custom key shortcuts to certain functions. The graph function will work on a smaller-screen organiser though it is a little cramped; I'm not sure why it wasn't otherwise provided on the IQ-706A.
There was a 40-column version of the Scientific Computer Card available (card number IQ-8B03), however I have yet to find one come up for sale and so I've been making the most of my IQ-707. However, I did find something interesting when I used it on my IQ-8000: certain primitive drawing operations could access the whole screen, even if the rest of the application was constrained to a smaller window.
The photo on the left shows the results of drawing a line from (0, 0) to (239, 63) – the line ends up being drawn successfully outside of the 96×64 window at the left of the screen. The second photo uses the same coordinates but also appends the X (invert) and BF (box fill) options which should in theory invert the whole screen, but only ends up inverting the leftmost 96×64 pixels.
Certain other drawing operations (such as PSET and GPRINT) will also happily draw to the whole screen, but text cannot be positioned or drawn outside the 16×8 grid. At this point I wasn't sure if it was the BASIC interpreter or the organiser's OS that was to blame, but I wasn't really sure how to pick apart either of them.
One potential clue came in the form of the WIDTH statement. The IQ-7000 effectively has two screen modes, with differently-sized text characters: the default small font in a 16×8 grid and a larger font that reduces the number of displayed characters to 12×4. These modes can be switched by pressing the button marked 4↔8 Lines, or programatically via WIDTH 16,8 or WIDTH 12,4. The IQ-8000 expands these to 40×8 and 30×4, but trying WIDTH 40,8 or WIDTH 30,4 just displayed an error message. However, something, somewhere must know where the rightmost column number is to allow for proper text wrapping.
I mentioned that the BASIC interpreter is very capable, and it does have an undocumented PEEK function which allows you to read a byte from anywhere in the organiser's memory. I wrote a BASIC program that would scan through memory, switching screen modes with WIDTH and seeing if the value at the address in question changed. Once I'd done this I looked at the addresses that had values that changed in meaningful ways (e.g. between 16 and 12 or 8 and 4).
It looks like the current screen width (in characters) is held in BASIC's memory at &3F988 and the height at &3F989. POKEing a larger width into &3F988 does look like it might start working – if you type then the cursor goes off the right of the 96×64 window and can be seen blinking in the screen beyond, however no characters are printed in this area and certain operations (such as listing programs with long lines) misbehaves in strange ways. There must be more to the puzzle.
Unfortunately, without knowing more about the internal operation of the operating system or BASIC I wasn't sure where to look. However, having been able to draw lines on the full screen I contented myself with adapting a very clever program by @bazzargh that renders the Great Wave as a fractal for the device (the BASIC listing can be seen here: GREATWAV.BAS).
The next breakthrough was coming across this GitHub repository when looking for other technical reference documents. It has a scan of the "ESR-L Instruction Manual" which documents the Sharp ESR-L microprocessor. Some hand-written notes on the cover of the scan mention that it's "for the PC-E500, OZ-7000 series [and] IQ-7000 series", so should be useful for the IQ-7000 organiser. Looking up the PC-E500 led me to this repository from the same owner which has a PC-E500 reference. Even if the IQ-7000 is not the same as the PC-E500, the use of the same CPU in products from the same company made me think there may be other similarities to help understand how the IQ-7000 works. Using the PC-E500 as a search term also brought me to a page of resources on Andrew Woods' website and from there and digging around in the links (including a few trips to the Internet Archive's Wayback Machine) I was able to source a cross-assembler and disassembler.
I now felt I was in a good position to start pulling apart the BASIC interpreter and OS to figure out if it was possible to use the full screen on my IQ-8000. Of course, I'd need to have a ROM dump to inspect, and fortunately this was quite easy to pull off; after all, I already had a BASIC interpreter running on the device! A simple loop over the desired address ranges, PEEKing each byte then PRINT#ing it to the organiser's serial port with a program on my PC receiving the data and storing it in a file left me with some hefty binaries to dig into.
The size did indeed present a bit of a problem. I did have a disassembler, but not a particularly sophisticated one and feeding it the 128KB of BASIC interpreter ROM didn't provide particularly useful results. I'd normally use Ghidra for a job like this, but it doesn't know about the Sharp ESR-L CPU.
However, Ghidra is user-extensible and I did now have an instruction manual/reference for the CPU, so I did my best to learn how to describe the CPU to Ghidra. This was no small undertaking, as I didn't really know my way around the CPU yet myself. After a bit of work I put together this terrible first attempt. I do not recommend using it yourself, as I haven't fully checked that every instruction disassembles correctly and a very large number of instructions don't describe what they do (or if they do, they might do it incorrectly). The disassembly should be somewhat usable, but the decompilation is mostly useless at the moment.
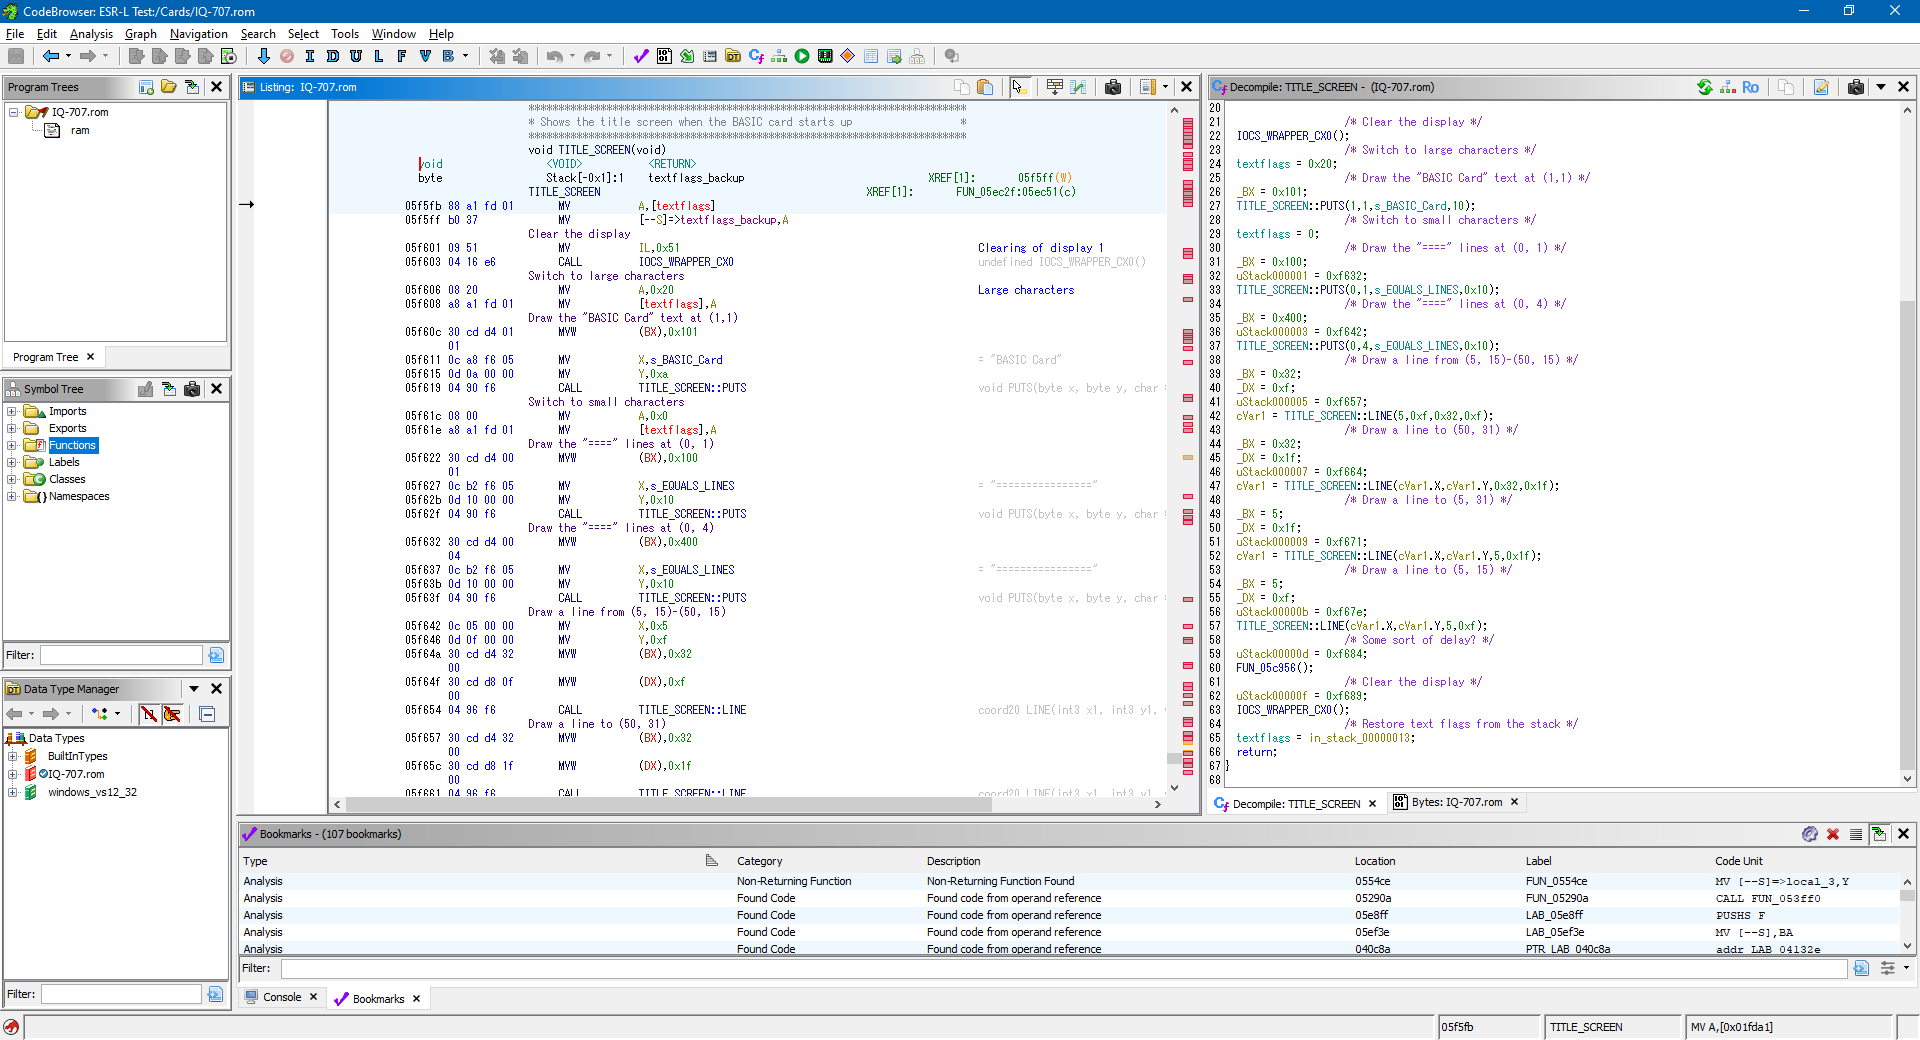
I thought the title screen would be a good starting point to disassemble as I could clearly find where the strings for "BASIC Card" and the equals signs that form the border were in the binary, and from there find out where they were referenced and disassemble the instructions around those references until it made some sort of sense.
This is where the PC-E500 reference ended up being surprisingly useful, as it does share a fair amount in common with the IQ-7000. The way that both operating systems provide access to the hardware is via an IOCS routine at address &FFFE8, and the routine numbers and parameter assignments in the CPU's internal memory appear to be the same on both devices. One difference is certain locations in RAM are different (for example, the location of the text flags or the dot pattern used to draw lines) however these differences are fairly easy to identify.
If you look at the Ghidra screenshot above you'll see that the disassembly on the left looks vaguely sensible but the decompilation on the right is a right mess: for reasons I haven't yet figured out it appears to show stack operations during calls as assignments to variables on the stack (uStack000001 etc) and assignments to variables in RAM which are used as parameters to functions (e.g. BX and DX) are shown as both manual assignments and in the function call parameters.
Trusting the disassembly rather than the decompilation, I dug around in the code, trying to find something that was making use of the magic numbers relating to the screen dimensions: anything with 16, 8, 12 and 4 in close proximity would be a good candidate and I eventually found something promising:
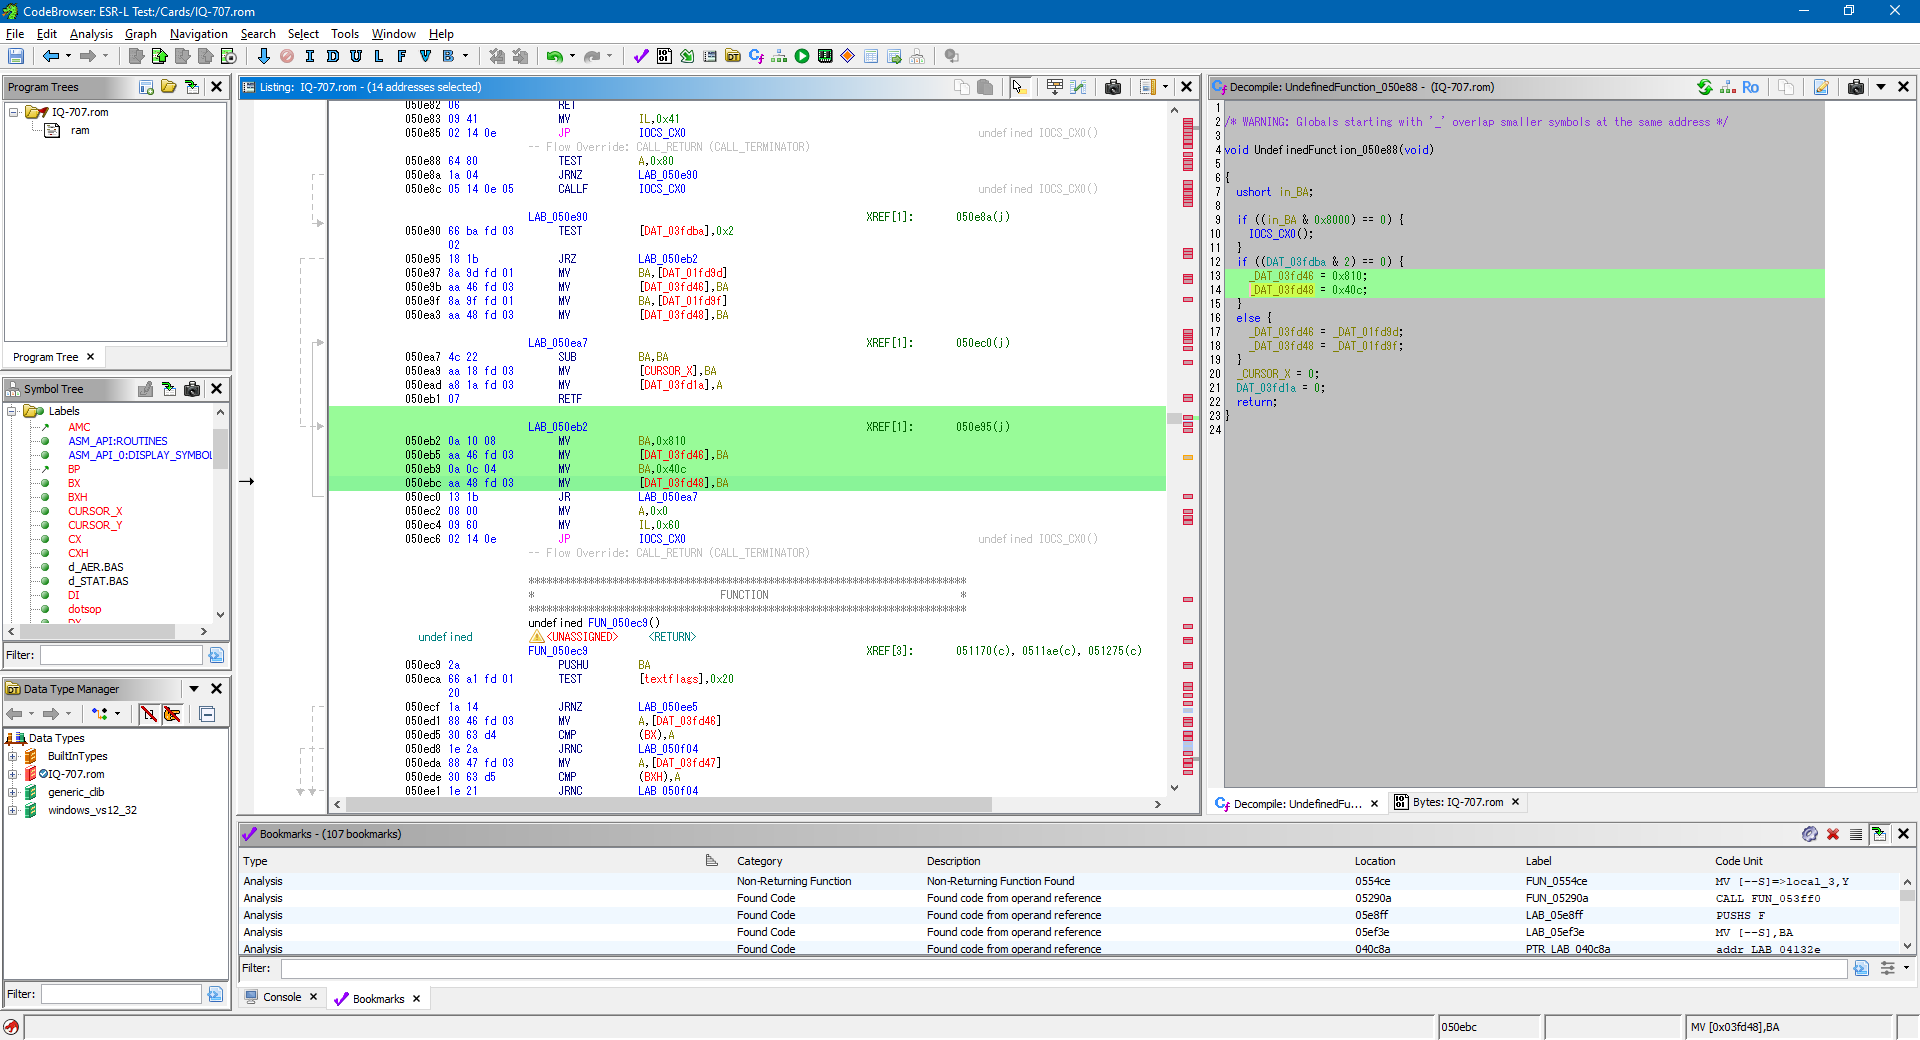
The ESR-L is a little-endian CPU so the hex constants 0x810 and 0x40C in the following code correspond to (16, 8) and (12, 4) in memory.
050eb2 0a 10 08          MV           BA,0x810
050eb5 aa 46 fd 03       MV           [DAT_03fd46],BA
050eb9 0a 0c 04          MV           BA,0x40c
050ebc aa 48 fd 03       MV           [DAT_03fd48],BA
They're stored at &3FD46 and &3FD48 in memory, so directly adjacent to each other, and the surrounding code blocks operate on the cursor's X position and textflags, so it all seems highly relevant to what we're looking for. Those values in memory can be changed with POKE:
POKE &3FD46,40,8,30,4
The side-effect of this change is that you can now use WIDTH 40,8 and WIDTH 30,4 and the mode changes accordingly. However, when you type, text is still invisible once the cursor roams outside the leftmost 96×64 region of the screen. Clearly something else needs to change.
Further up in the code the values at &3FD46 and &3FD48 are copied from other values at &1FD9D and &01FD9F:
050e97 8a 9d fd 01       MV           BA,[DAT_01fd9d]
050e9b aa 46 fd 03       MV           [DAT_03fd46],BA
050e9f 8a 9f fd 01       MV           BA,[DAT_01fd9f]
050ea3 aa 48 fd 03       MV           [DAT_03fd48],BA
These source addresses are in the organiser's own memory rather than the memory built into the BASIC card, so it seems likely that these are the system values for width and height of the screen in the small and large fonts respectively and BASIC maintains its own copies of them which are the values we found before. We could POKE our new text resolutions into those memory locations too, which can be done with this program:
10 POKE &1FD9D,40,8,30,4
20 POKE &3FD46,40,8,30,4
30 WIDTH 40,8
40 CLS
After doing this, the whole screen becomes available to our BASIC program! All graphics operations work on the whole screen and text can be placed and displayed anywhere on it successfully:
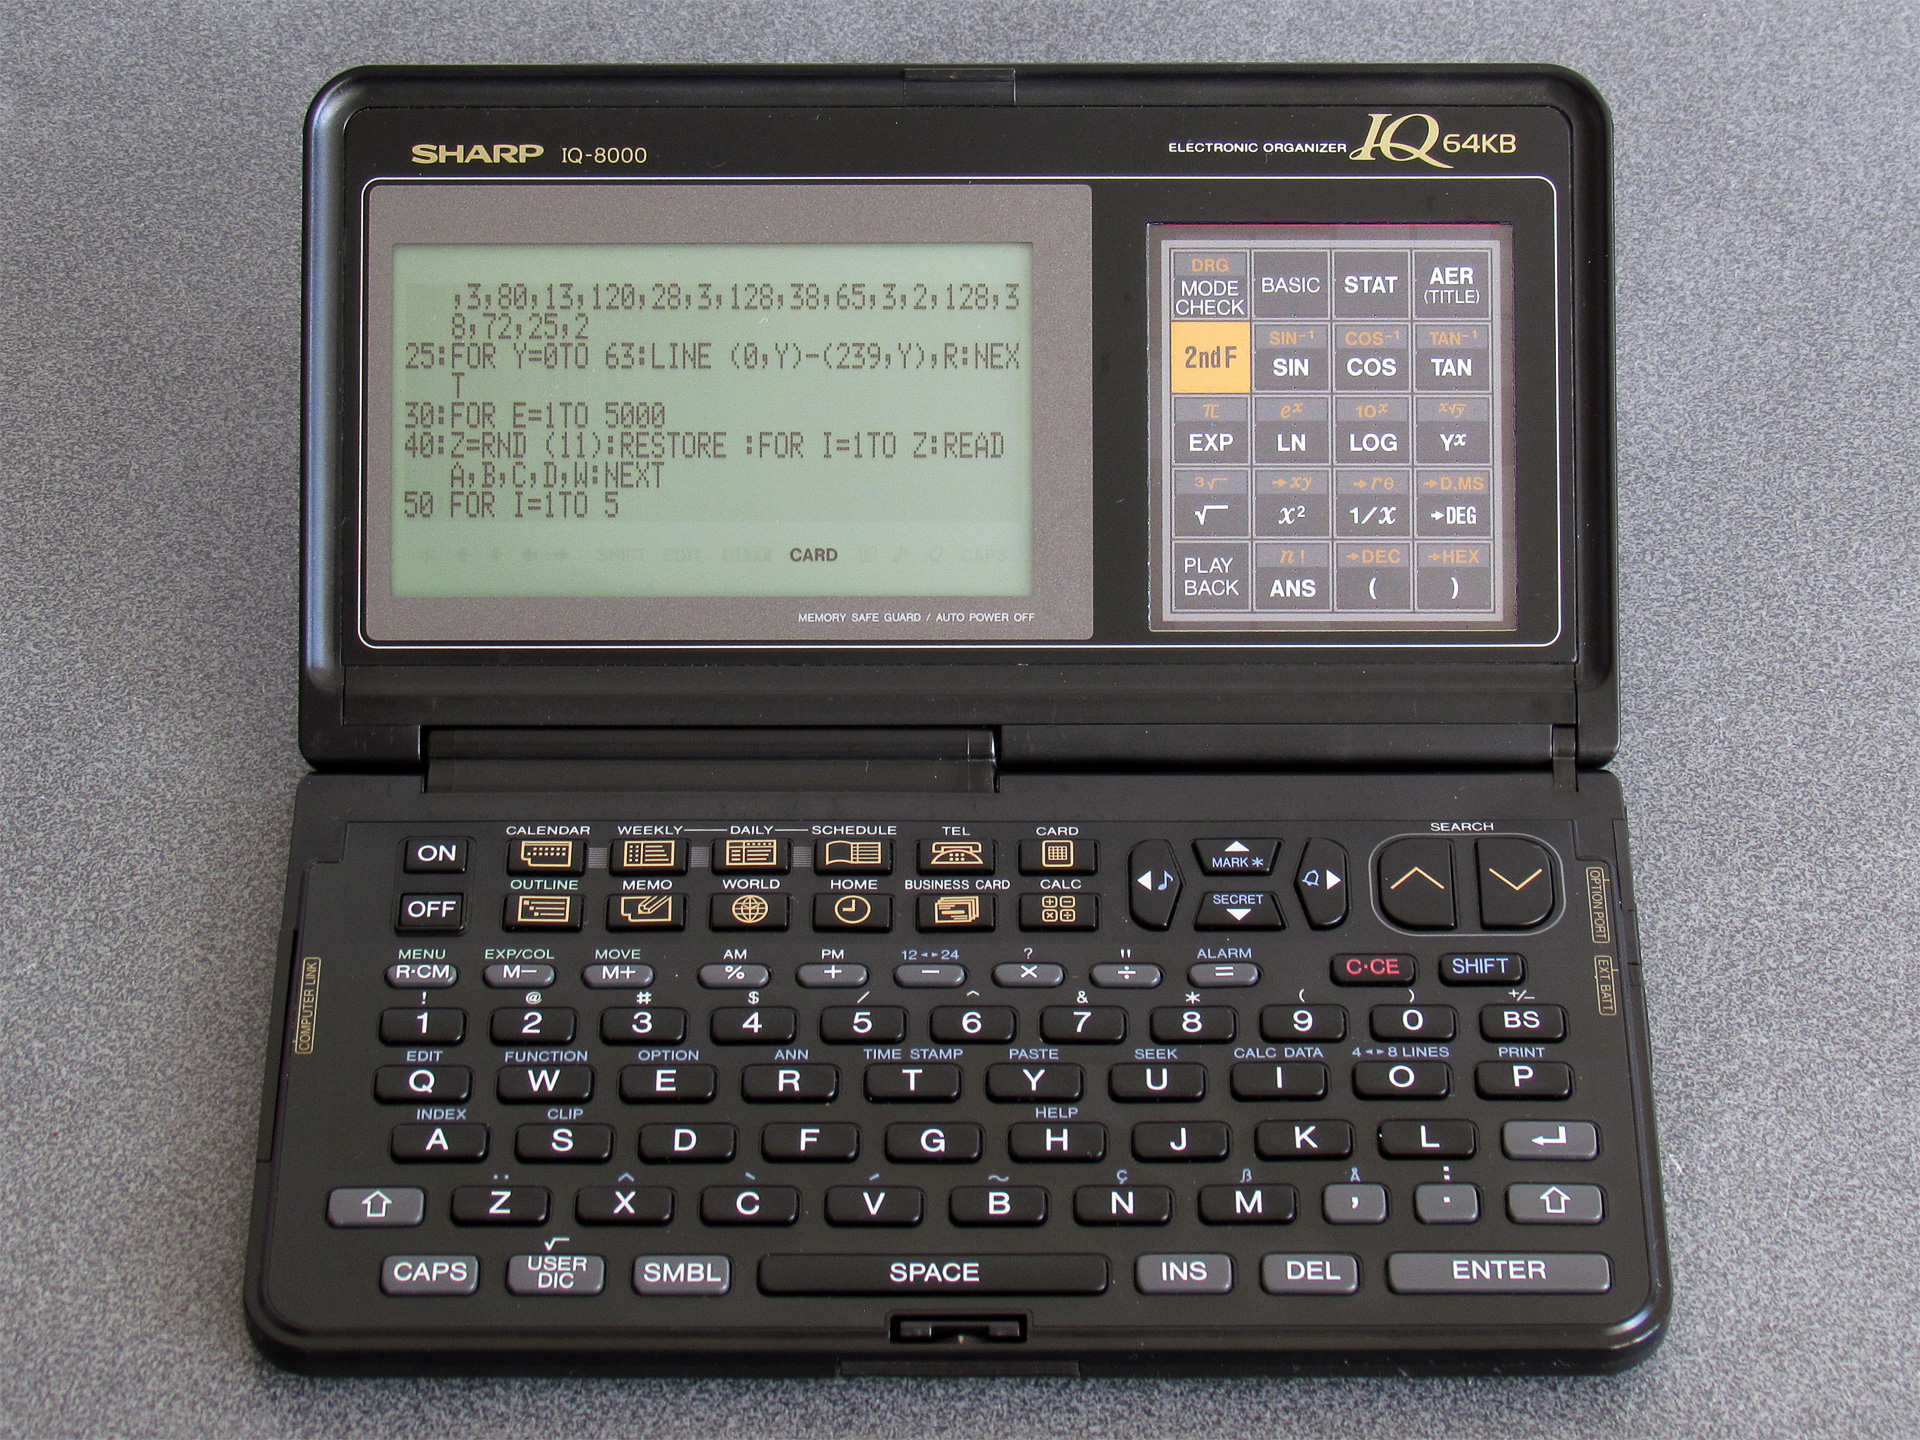
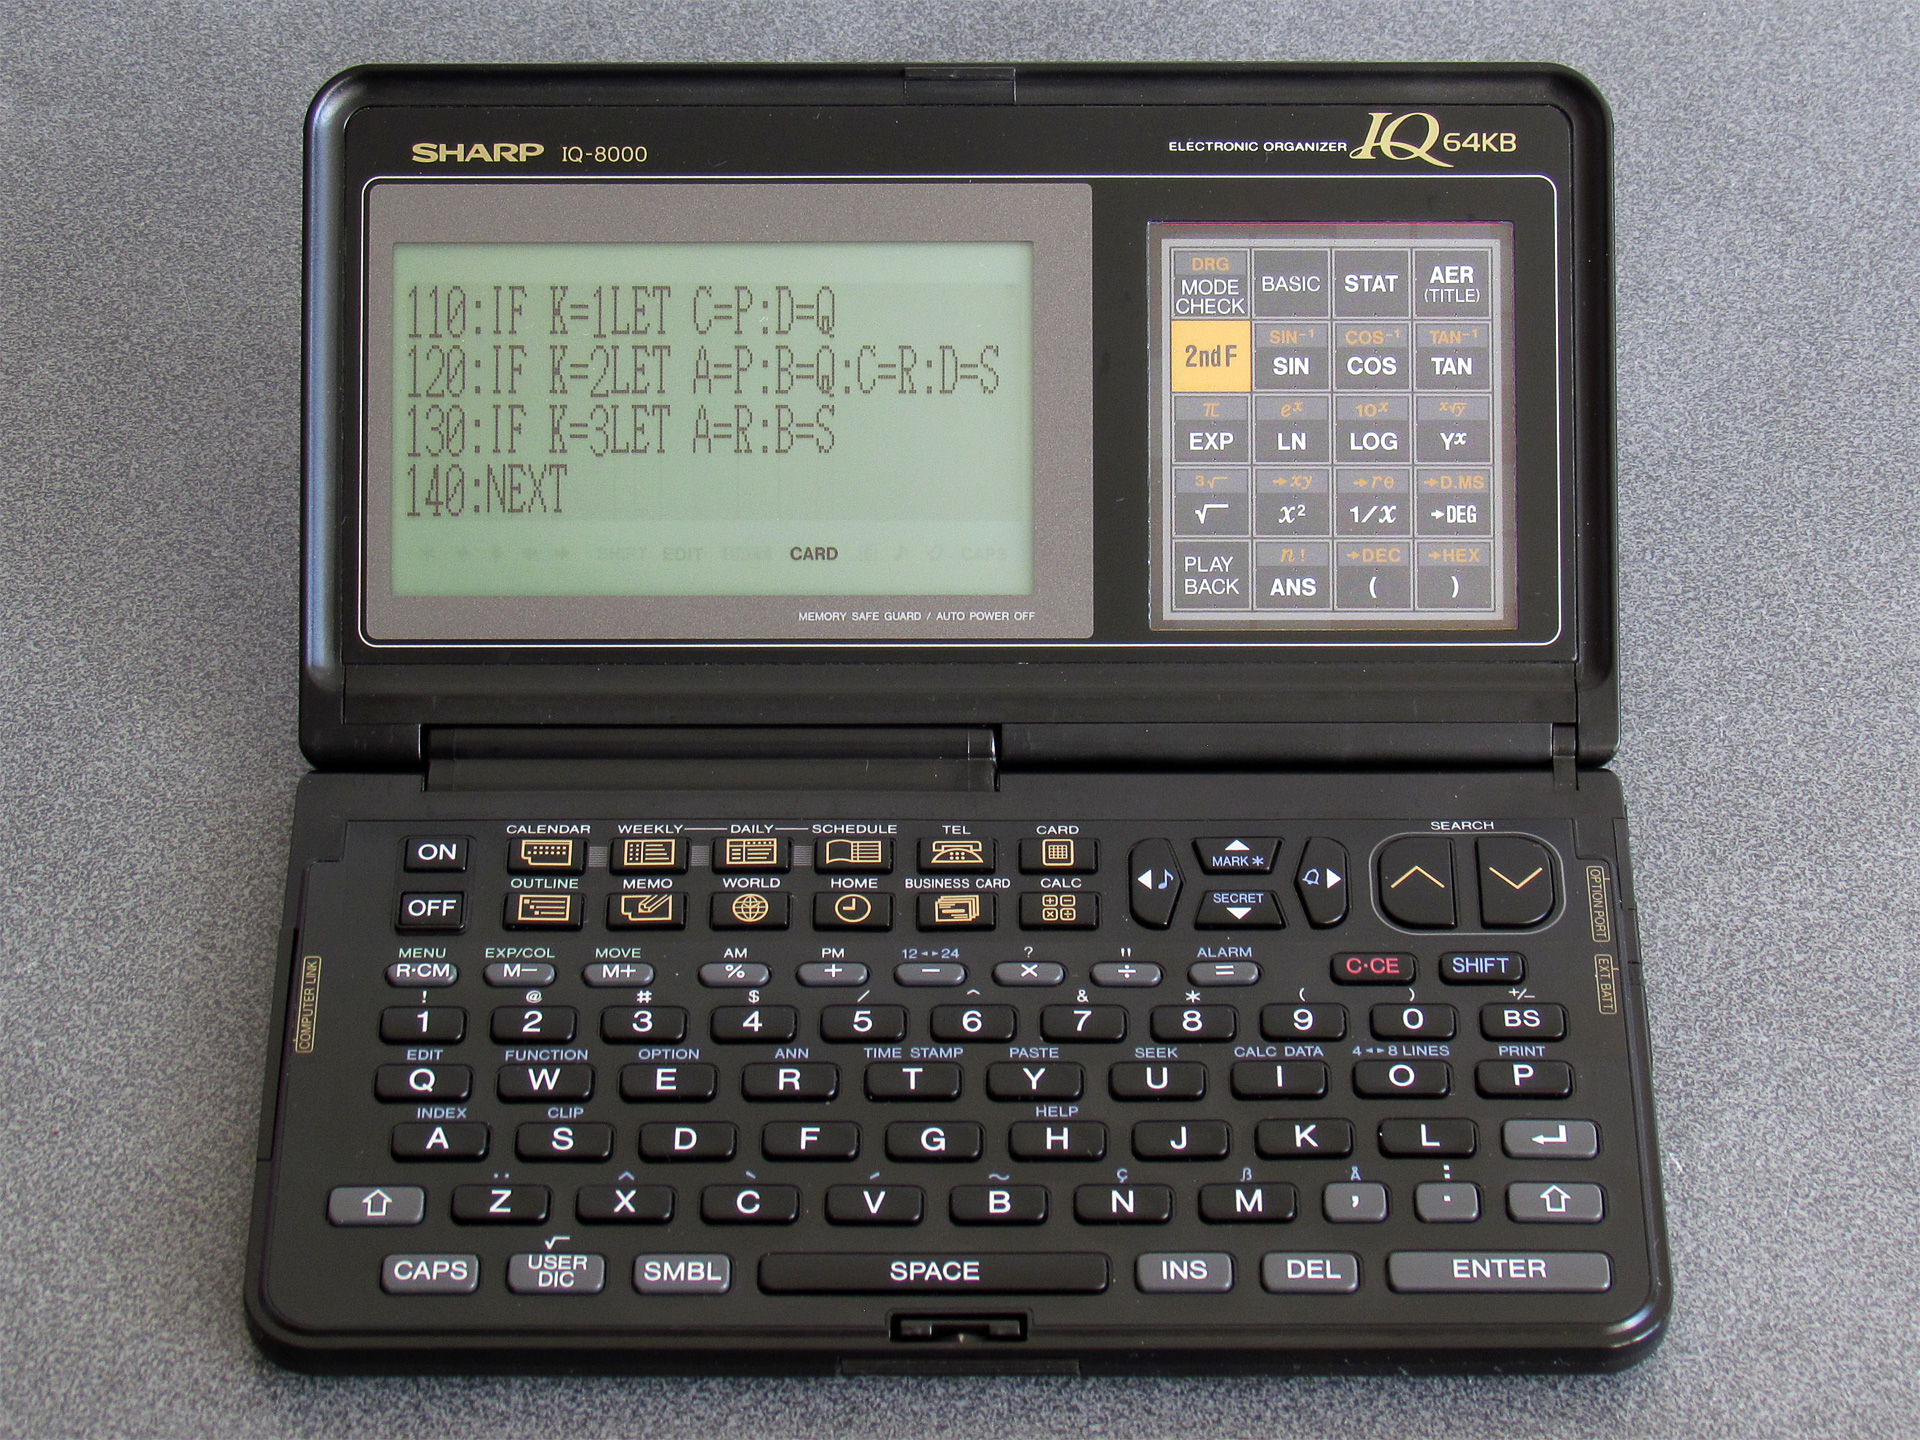
I doubt this is the "correct" way to do it, and there is likely a proper IOCS call that updates the screen resolution. As a result there may be other system variables that are not properly updated by directly POKEing values into memory, but so far I haven't run into any significant problems. As I continue to work through the system ROM disassembly I may find the appropriate routines, however.
I did try to see if the full screen size was stored somewhere in the ROM image, as it would be useful to use this to know how to properly set the display mode according to the current organiser's capabilities. I did find the byte sequence (16, 8, 12, 4) in the IQ-7000 (&F083C) and IQ-7400 (&F478A) ROM dumps and the byte sequence (40, 8, 30, 4) in the IQ-8000 (&F1412), IQ-8200 (&F1418) and IQ-8300M (&F1423) ROM dumps. I couldn't find any code that was able to meaningfully access these sequences from a user application. There may be some way to properly identify the device you're running on but I'm not currently sure of a reliable way. One potential option is to use POINT(96,0) – this returns the status of a pixel on the display (0 for off, 1 for on), and crucially it returns -1 if the value is outside the screen bounds. On an IQ-7000 it returns -1, but on an IQ-8000 it returns 0 or 1. However, a later organiser model throws a spanner in the works…
This is the Sharp IQ-8920. Its screen is still 240 pixels wide, like the IQ-8000, but it is significantly taller and has square pixels. When I first saw one of these online I was less interested in it as it didn't have the obvious card slot, but when I looked at a closer photo of it I could see that it still had one on the side. I couldn't see how this would work, as it's missing the window to see the card's buttons through, but I ended up picking one up anyway. It turns out it is still backwards-compatible with the cards from the earlier organisers, and this backwards-compatibility is achieved by displaying the card's buttons directly on the resistive touchscreen (I assume there's a database of cards and their button assignments somewhere in the IQ-8920's ROM). The IQ-8920 also corrects one notable oversight of the IQ-8000…
Attempting to draw graphics out-of-bounds on the IQ-8920 results in them being properly clipped, unlike the IQ-8000 which permits some graphics operations to work even when only the leftmost 96×64 region of the screen should be accessible. This means that on the IQ-8920, POINT(96,0) returns -1 by default and so this can't be used to detect a device with a screen that is wider than 96 pixels.
However, the same BASIC POKE program can be used to get the IQ-8920 to use the full width of the display:
I did also try extending the height of the screen, and though this looks a little promising at the start (as you work down the screen, new lines of text start overwriting the on-screen button display) things go very wrong when the screen tries to scroll and the organiser hangs quite often. Some other scrolling operations do misbehave (e.g. when scrolling through a program listing, occasionally a single line of text may appear invisible) and I'm not entirely sure what the cause is yet. The Great Wave does at least now appear on the IQ-8920:
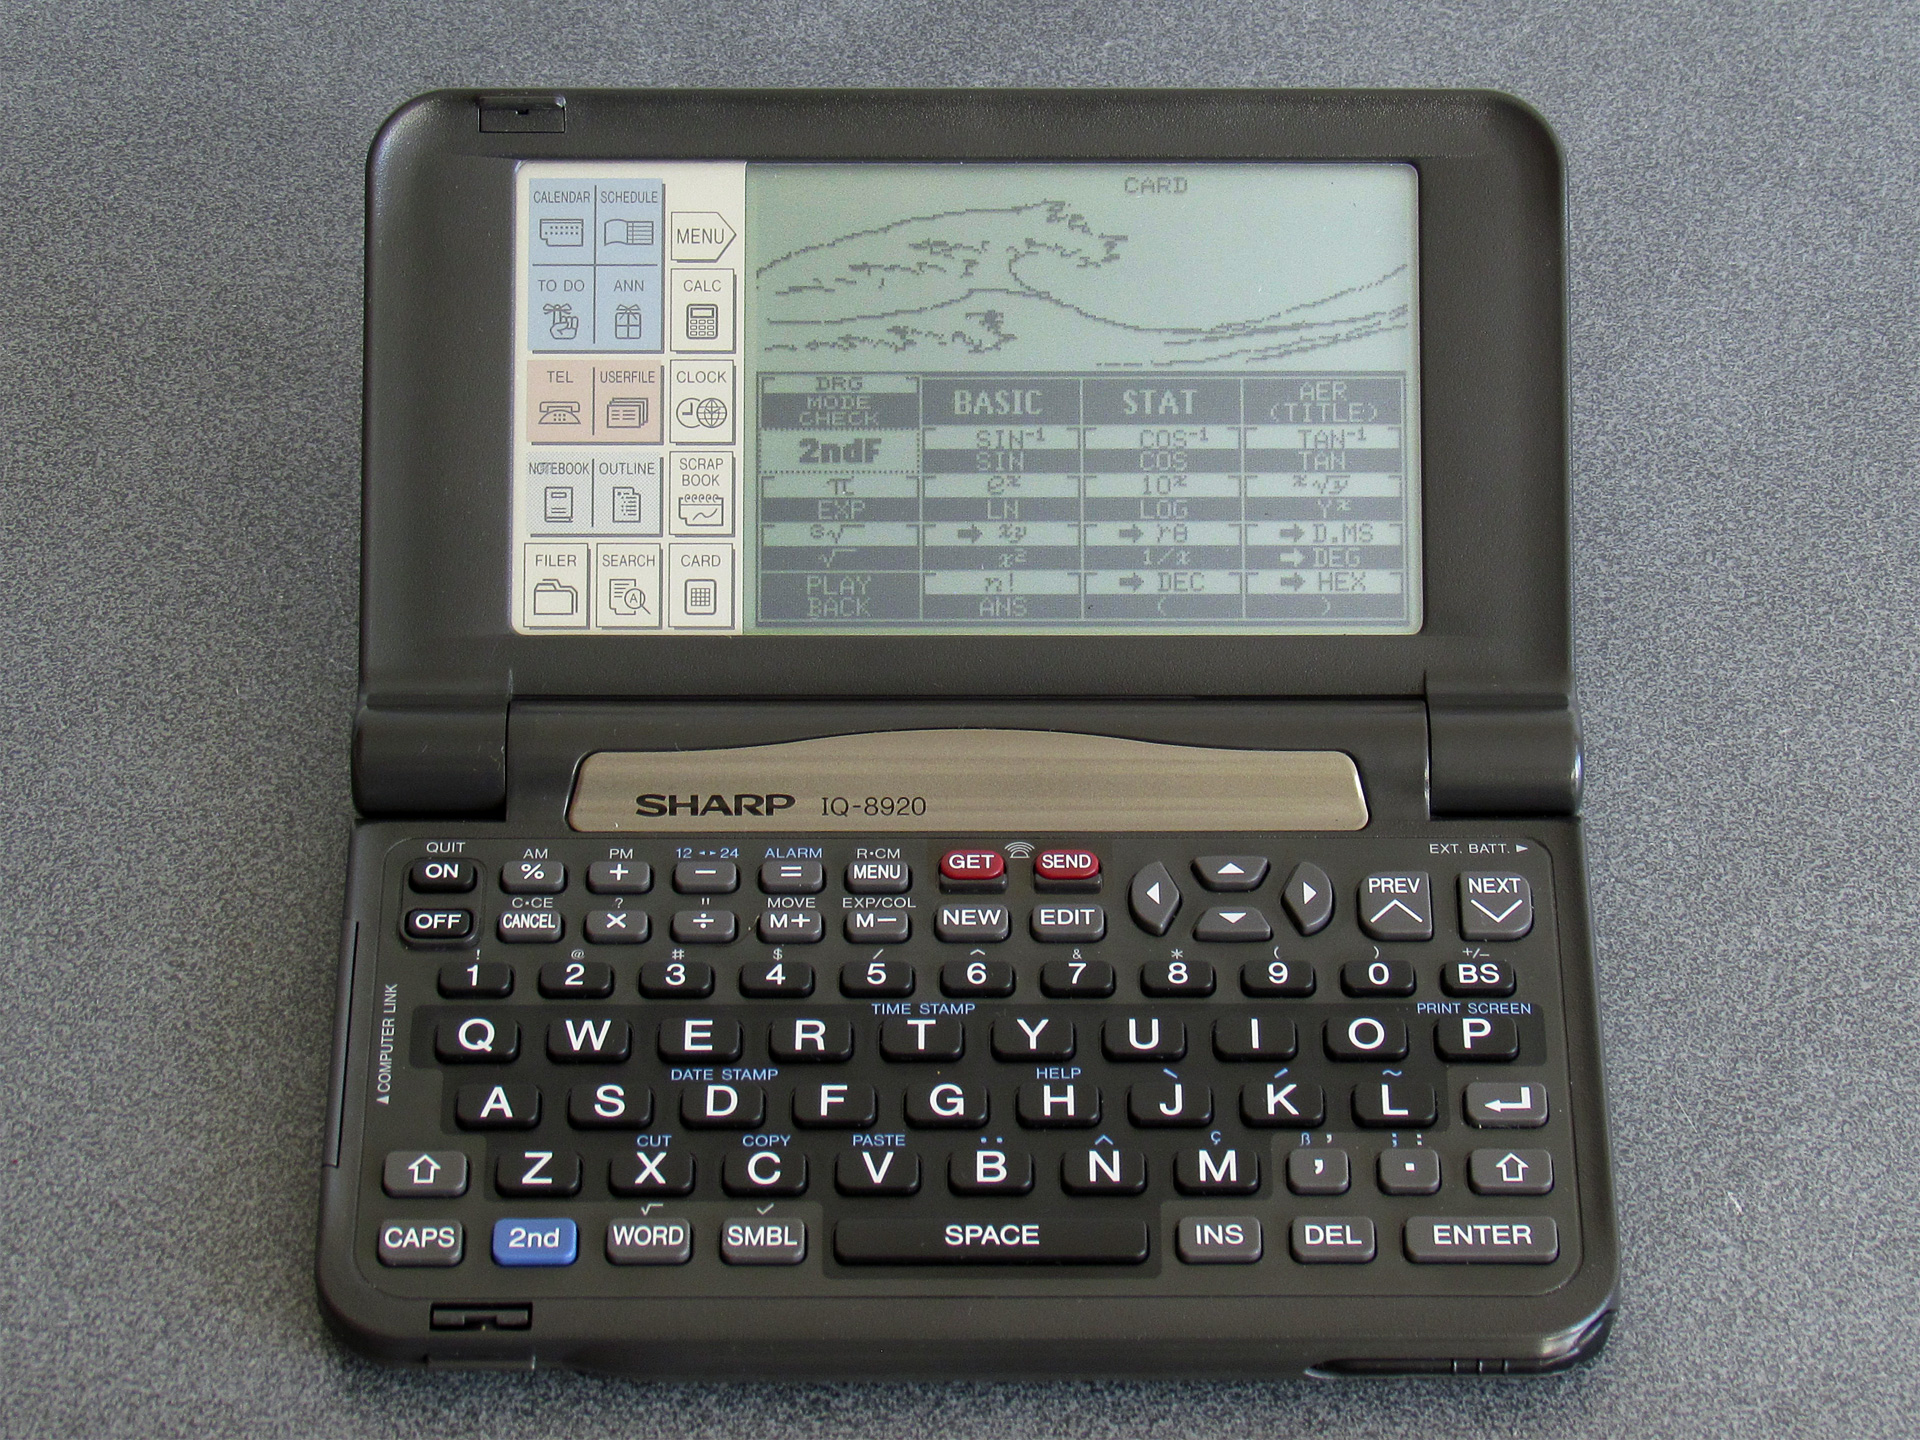
One thing which susprisingly does not misbehave is if you extend the screen resolution on an original IQ-7000 or IQ-7400. Text disappears off the right of the display, but I haven't seen it crash or hang the organiser. POINT(96,0) still returns -1 with the screen extended on this organiser, so one solution may be to just to try to set the screen to the higher resolution, check if POINT(96,0) is out of bounds, and if it is reset back to the lower resolution. The program would then look like this:
10 POKE &1FD9D,40,8,30,4
20 POKE &3FD46,40,8,30,4
30 WIDTH 40,8
40 CLS
50 IF POINT(96,0)=0THEN END
60 POKE &1FD9D,16,8,12,4
70 POKE &3FD46,16,8,12,4
80 WIDTH 16,8
90 CLS
I will continue to dive into the OS ROM disassemblies to see if I can find ways to make this more reliable and whether there's a more correct way to do this. It would be useful to be able to dump the ROMs for the other 16/40 cards I have to see how they manage the mode switch, however as I've been dumping the ROMs from a BASIC program and I don't have an organiser with two card slots I don't currently have a way to do that. The card lock switch (which causes the organiser to switch off and reset when changing cards) appears to be handled in software (rather than being a hardware interlock) so it may be possible to write a ROM dumping program in assembly, copy it to somewhere safe in RAM from a BASIC program and then hot-swap the cards. There's 2KB of clipboard buffer that looks usable for this process, and you can CALL machine code you've POKEd into memory – I have no idea whether that will be technically possible, though, so this is just something at a very early idea stage.
I did discover a test menu in the IQ-7000 and IQ-7400 ROMs, though. Bear in mind that accessing these will reset your organiser's settings and may clear the RAM, so don't do it on an organiser that contains data you care about!
The one in the IQ-7000 isn't particularly enlightening, but can be accessed by holding ON+9 when pressing the reset button. The one on the IQ-7400 is more interesting and can be accessed by holding ON+CALC when resetting. Of particular note here is a memory dump, which allows you to enter an address and shows the data at that address on the screen. This would allow you to dump an IC card, but it only shows 16 bytes at a time and so could be very time consuming to work through! There is also a memory save and load routine in the test menu that looks like it will transmit the data from the organiser, but unfortunately it doesn't appear to let you enter the start address or length and just exports the built-in RAM rather than letting you enter the address of a card in the slot. The IQ-7400 also has a ROM version screen that can be shown by holding ON+A when resetting.
I don't know if this will have persuaded anyone that Sharp's electronics organisers are more interesting than they might first appear, but if you can pick one up along with a Scientific Computer Card I think you'll find they're fun little devices to experiment with!
Highlighting and tape loading PC-1500 BASIC programs on the web
Friday, 9th May 2025
I don't think I've had a proper dose of "man-flu" since COVID and I haven't missed it at all. This journal entry has been written in a state of sleep deprivation whilst being tanked up on Lucozade and Lemsip (expiry date: March 2020) so hopefully it still makes some degree of sense.
In my current state the most obvious project is to subject myself to the banshee howls of tape loading. I've implemented some degree of tape loading support to my site before by taking tokenised BBC BASIC programs and running them through a web service that converts them to UEF files that can be played back in the browser with PlayUEF, and with my recent interest in the Sharp PC-1500 it would seem like a sensible idea to do something similar for that computer.
Unfortunately, whilst PlayUEF is a superb piece of software for loading Acorn software, it is less ideal for the Sharp PC-1500. This isn't a limitation of the UEF format itself, it's just that Sharp PC-1500 programs are stored at a different base frequency (1270Hz instead of 1200Hz), use a 0° phase instead of 180° phase, and repeat the wave patterns for 0 bits and 1 bits four times longer than the BBC Micro format ("300 baud" mode instead of "1200 baud" mode). None of those features were supported by PlayUEF, however it is open source software so I hacked them into my own fork of the project.
Note that I do say "hacked", as PlayUEF does take some shortcuts when generating the resulting waveform that I found a bit awkward to work around. For example, it needs to allocate a buffer to write the wave file to and so needs to know the number of samples in the resulting wave file to do so. It normally does this by multiplying the number of wave cycles in the file by the number of samples per cycle, but that only works if the number of samples per cycle remains constant through the file (which they won't if we're changing the frequency on the fly) and the number of cycles per bit also needs to remain consistent (which it won't if we're outputting four times as many wave cycles for the Sharp PC-1500 when compared to BBC Micro).
In the end I worked around this with a two-pass solution: the first time around a zero-byte buffer is allocated and written to (which appears to work?) and the final length is calculated by adding up the total number of samples. The second time around the buffer is allocated the total number of samples it requires.
Whilst this works and the end result loads fine onto an actual Sharp PC-1500, the code is now a bit of a mess and there are a lot of nifty visualisations and "fast loading" tricks that only make sense to the BBC Micro but are still baked into PlayUEF. For my own use I might make a less sexy alternative to PlayUEF that just converts a UEF to a wave for loading via the web. However, for now it works as-is.
To support all this I also needed way to tokenise (and detokenise) Sharp PC-1500 BASIC programs and convert the resulting binary into a UEF tape image. To do this I've knocked together a couple of PHP classes, sharp_pc1500_basic and sharp_pc1500_tape that do the work and these files can be downloaded in sharp-pc-1500-php.zip.
Here are some examples of how this works (click the "Load file as tape image" to hear the beautiful sounds):
Relocatable Quick-Tape installer for the Sharp PC-1500
Saturday, 26th April 2025
After my previous journal post about faster saving and loading of Sharp PC-1500 programs to and from tape I discovered that I was using a somewhat out-of-date version of Sharp Pocket Tools. The later version I upgraded to adds support for the "SuperTape" and "Quick-Tape" formats, and also includes copies of the PC-1500 programs for those formats.
Both formats appear to support file names and verification of the recorded data (a minor gripe I had with the Fast Load was its lack of these features). SuperTape apparently manages even higher speeds, though at the cost of somewhat more RAM than Fast Load (711 bytes, or 761 for the full version with the ability to merge a program with the existing one in memory, instead of Fast Load's 540 bytes). Quick-Tape seems to be about the same speed as Fast Load, but actually consumes less memory overall (only 508 bytes). Quick-Tape also explicitly supports saving machine language programs by specifying a start and end address, something that I cannot see is supported with the SuperTape format, though it looks like it might support loading machine language programs if the correct load address is stored in the file.
Based on my experiences with Fast Load and the documentation that accompanies SuperTape and Quick-Tape I came up with a rough feature comparison table (I can't claim it's completely accurate, as it's based on what I've gleaned from the documentation):
| Format | Fast Load | SuperTape | Quick-Tape |
|---|---|---|---|
| Speed | Fast | Fastest | Fast |
| Filenames | ✗ | ✓ | ✓ |
| Verification | ✗ | ✓ | ✓ |
| Machine language | ✗ | (Maybe?) | ✓ |
| Variables | ✓ | ✗ | ✗ |
| RAM usage (bytes) | 540 | 711–761 | 508 |
| Relocatable | ✓ | (Partial) | ✗ |
To get a rough idea of speed I tried converting the Globe application to a wave file. Both Fast Load and Quick-Tape produce a file that's 30 seconds long — a huge improvement over the seven minutes that the native cassette routines take. SuperTape still manages to blow both of these out of the water with a file that's only 13 seconds long! Only Fast Load seems to have the ability to save BASIC's variables to tape, though this is not a feature I personally have any use for.
The ability to relocate the machine language routines that make up the tape routines is a very important one, however! The available range of memory addresses in a PC-1500 computer will depend on which memory expansion module is installed and whether any other machine language routines are also loaded. Fast Load can be relocated to anywhere you want in memory via its BASIC installer program. SuperTape has a few different versions for different starting addresses based on certain memory modules as well as a BASIC installer, however as far as I can see it doesn't seem to allow being loaded at an arbitrary address which would make it trickier for it to coexist alongside other machine language programs on the computer. Quick-Tape doesn't have any relocation support at all, only working if loaded to address &00C5 and used with the CE-161 memory expansion module.
However, Quick-Tape seems like it would otherwise be ideal — it consumes the last RAM, it seems the most feature-complete and though it's not quite as fast as SuperTape it's still a massive improvement over the native cassette routines.
I therefore decided I'd try to make a relocatable version of Quick-Tape. To assist with this I first disassembled it using lhTools. It doesn't load any data nor jump to any absolute addresses within its own memory space, which is a good start — in fact, it only calls three subroutines inside itself: &01BE, &01BF and &01CF. You can spot these easily in the disassembled code as they are assigned named labels by lhTools instead of absolute addresses, for example in this snippet:
lbl_0_159:
	SJP	lbl_0_1be ; labelled address inside our memory
	ADR	Y
	LOP	lbl_0_159
	LDA	YH
	SJP	lbl_0_1bf ; labelled address inside our memory
	LDA	YL
	SJP	lbl_0_1bf ; labelled address inside our memory
...as opposed to:
lbl_0_117:
	SJP	BBD6 ; absolute address outside our memory
	VMJ	0A
	SJP	BBC0 ; another absolute address outside our memory
The version of lhTools I'm using is one I've modified to use the standard LH5801 instruction mnemonics instead of the Z80-inspired ones it normally uses; it also disassembles vectored subroutine calls into standard VMJ instructions instead of the lhTools pseudo-instructions, though as I haven't got it to re-assembled these instructions properly yet this is not something I'm able to share just yet. However, the important thing here is the subroutine called with the SJP instruction.
Now that we know where these subroutine calls are, a BASIC program can be written that patches the loaded machine language program with the correct target addresses for where it's been relocated to. Similarly, the reserve program (which contains BASIC CALL statements to call the entry points in the machine language program) needs to have its addresses patched to point at the relocated machine language program. The resulting installer looks like this:
    10 M=PEEK &7863*256+197:B=PEEK &7865*256+PEEK &7866
    20 IF B-M<508 PRINT "No room": END
    30 L=M: IF B-M>508 WAIT 0: PRINT "Load @";L;" ";: INPUT L
    40 CLS : WAIT : IF (L<M) OR (L+508>B) PRINT "Bad address": GOTO 10
    50 WAIT 0: PRINT "Play QUICK-TAPE...": CLOAD M"QUICK-TAPE";L
    60 FOR I=1 TO 3: READ A,C: FOR J=1 TO C
    70 READ O: POKE O+L,(A+L)/256,(A+L) AND 255
    80 NEXT J: NEXT I
    90 DATA 249,1,149,250,2,157,161,266,3,411,443,452
   100 M=M-197: PRINT "Play QUICK-RESERVE...": CLOAD M"QUICK-RESERVE";M
   110 FOR I=1 TO 6: READ A,O:A$=RIGHT$("00"+STR$ (A+L),5)
   120 FOR J=1 TO 5: POKE M+O+J,ASC MID$(A$,J,1): NEXT J: NEXT I
   130 DATA 4,89,6,101,5,113,2,130,1,153,0,165
   140 CLEAR :Z$="": WAIT : PRINT "QUICK-TAPE installed"
You can download the installer and reserve program as ready-to-go WAV files in Quick-Tape-Install.zip. You'll also need to create a WAV file for Quick-Tape itself, which can be downloaded as part of Pocket Tools. Instructions can be found inside the installer zip archive.
Faster tape loading on the Sharp PC-1500 with Fast Load
Sunday, 20th April 2025
After I've typed a program into my Sharp PC-1500, I tend to save it to my PC for long-term storage using the CE-150 cassette interface. I use the same cassette interface to download programs shared by others over the Internet, and have written a previous post about resampling those shared wave files if you're struggling to load them.
Loading a program this way is quicker than typing them in, but not by much! The Globe application is 5697 bytes in length but takes the best part of seven minutes to load from tape. I was therefore very intrigued by the Fast Load application, which "enables fast loading (4000 baud, 13 times the normal speed) of all Basic or machine language programs and variables".
I didn't have the easiest time using this program, so thought I'd put together this post in case it helps anyone else with similar struggles!
Fast Load's component parts
The included documentation is a little confusing. I assume it's been abbreviated from what would have been included with the original tape, but I'm really not sure. It mentions using CLOAD M to load FAST-LOAD, however if this is to be a relocatable module then how should it be relocated once loaded, and after that point how are you to invoke the saving and loading routines?
Included in the zip archive there are actually three different recordings for three different files, and after studying them a little they need to be loaded in the following order:
- FAST-RELO: This is a BASIC program that loads the other two files and performs the relocation.
- FAST-RESERVE: This is a reserve program that provides the key mappings to call the save/load routines.
- FAST-LOAD: This is the machine language program that implements the save/load routines.
Understanding how all three parts operate will require a bit of knowledge of the PC-1500 and how memory is arranged.
PC-1500 memory layout for reserve program, machine language program and BASIC program
A reserve program occupies the first 197 bytes of RAM. This program can redefine the six keys positioned directly under the display to type in a sequence of characters when pressed. Three separate groups of key mappings are provided (the current group is indicated by the presence of an I, II or III icon on the display) which can be cycled through by pressing the select key. A string can also be stored for each group to act as a reminder of which key does what, and this can be displayed by pressing the RCL key. In the case of Fast Load, the reserve program sets up four keys (two in reserve group II, two in reserve group III) to execute the program/variable save/load routines which it does by typing in CALL <address> and pressing the Enter key. The appropriate routine address for each key is patched into the reserve program by the FAST-RELO BASIC program.
The routines themselves need to be loaded somewhere into memory. By default, the current BASIC program starts in memory immediately after the reserve program's fixed 197 bytes at the bottom of memory, however it is possible to move the start of the BASIC program by passing a numeric parameter to NEW. The numeric parameter defines the start of the BASIC program in memory, but it will not allow you to move it below the end of the reserve program and so a good way to reset the BASIC memory to its largest default is with NEW 0 – a command that you are prompted to enter whenever the device has been reset or a memory expansion module has been changed.
By moving the start of the BASIC program to a higher address in memory it leaves a gap between the end of the reserve program area and the BASIC program that is free for us to load persistent machine language programs.
Note that memory does not necessarily start at address 0, either! In its base configuration RAM starts at &4000, with a CE-155 (8KB) RAM expansion module RAM starts at &3800 and with a CE-161 (16KB) RAM expansion module RAM starts at &0000. Fortunately you can read the most significant byte of the RAM start address from address &7863, which makes it a bit easier to calculate sensible values to load to.
Loading Fast Load into memory using its loader
For simplicity, if we assume we're only going to load Fast Load (and don't need to worry about reserving any additional RAM) then the process should be:
- Move the start of the BASIC program up to start of RAM + 197 bytes for the reserve program + 540 bytes for Fast Load.
- Use CLOAD to load the FAST-RELO BASIC program.
- RUN the BASIC program, it should start trying to load the next part.
- Play FAST-RESERVE to load the reserve program into memory.
- Once this has loaded the computer will beep and prompt @: to ask where to load Fast Load to.
- Enter the start of RAM + 197 bytes for the reserve program, then when it starts loading again play FAST-LOAD. The reserve program and machine language program are then patched to their new addresses and you should be good to go – the save/load routines are now accessible using F1 (!) and F5 (%) when using reserve groups II or III.
As mentioned before, the most significant byte of the start of memory can be retrieved from &7863, and so the process would look like this on the computer's screen (using values from the readme included with Fast Load):
NEW PEEK &7863*256+736
CLOAD
RUN
@:PEEK &7863*256+197
Unfortunately, this didn't work; attempting to save seemed to do something sensible, but loads didn't work and after that everything seemed to completely haywire – garbled memory, weird crashes and lockups. What's wrong?
Off by one!
I earlier mentioned that the reserve program is 197 bytes and Fast Load is 540 bytes, so we need to set the start of the BASIC program to 197+540 bytes from the start of memory. 197+540 is 737, however the figure given in the readme is 736. This is one byte too short, and as a result the BASIC program ends up overwriting the last byte of the Fast Load routines. This is a RTN instruction and as a result is fairly important, as without it a subroutine will not return and instead end up executing whatever instructions the start of the BASIC program has put there instead. Not good! Fortunately, it's a very simple fix – just move the start of the BASIC program to the correct position (NEW PEEK &7863*256+737).
It's only a phase…
Once everything is loaded in again (and at the correct location) the routines should now work. I loaded the Globe application using a conventional CLOAD and then used Fast Load to save the program back to my PC. This only took around 30 seconds, roughly fourteen times faster than the native routines! Very impressive, but only useful if the programs could then be loaded back onto the computer. Unfortunately, attempting to load the program back didn't work – the recording would finish playing but the computer was still stuck in its "Busy" state. On a hunch, I tried inverting the wave in the recording software, as I know from previous experience that cassette recorders tend to invert the phase between recording and playback. Doing that did the trick, and I could load back a program in 30 seconds that previously took seven minutes. Brilliant!
Unfortunately, Fast Load does seem to be fairly bare-bones. I haven't been able to find a verification routine similar to the native CLOAD ?, which compares the data on tape to the data in memory to allow you to verify that it was saved correctly, for example. Similarly I've only been able to find routines that save/load from the BASIC program area or the variable area, there doesn't seem to be a user-accessible way to save or load an arbitrary block of data based on its start and end addresses which would be required to save or load machine language programs. It doesn't even support filenames or file types to differentiate between programs and variable data! I have dug through a dissassembly of the Fast Load routines but couldn't spot anything, and the routines that are there do seem to go one byte beyond where they should to include a terminator byte as well. It's entirely possible that I missed something, but I'm still very happy about the speed improvements so don't mind the other limitations too much.
Digging into the protocol
Of course, once I'd got this working I wanted to dig into the cassette protocol used by Fast Load. Fortunately, it's very straightforward! There are two bit states, with the phase being 0°:
- A "0" (zero) bit is represented by one cycle of a 2500Hz tone.
- A "1" (one) bit is represented by two cycles of a 5000Hz tone.
Each byte is sent as follows:
- A "0" (zero) start bit.
- Eight data bits, least significant bit first.
- A "1" (one) stop bit.
There are two "1" bits between each byte, and the transfer starts with 3 seconds of 5000Hz pilot tone. The data format within the transfer is:
- Two byte data size (MSB first).
- Data bytes (including &FF program terminator).
- Three byte checksum (MSB first).
The checksum is calculated by adding up all of the bytes in the data section (including the &FF terminator).
All of this puts the "4000 baud" claim somewhat in question. Each bit takes the same amount of time – two 5000Hz cycles take as much time as one 2500Hz cycle, so the bit rate would appear to be 2500 baud, not 4000. In our "Globe" example, a 5697 byte program is saved in around 30 seconds. 5697 bytes becomes 5703 when we add the two bytes for the size prefix, the one byte terminator and three byte checksum. Each transmitted byte takes up eight bits for the data bits, two bits for the start and stop and two bits between each byte, so that comes to 5703×12=68436 bits in total. Divided by our 2500 baud rate gives us 27.37 seconds, plus the three seconds for the pilot tone comes to 30.37 seconds, matching our recording – so I think it's fair to say the baud rate is 2500.
Buiding some tools to work with recordings
There is a suite of tools called Pocket Tools that allows you to work with recordings of programs in the native PC-1500 format. You can extract binary data from a wave file recorded from the PC-1500, or detokenise a text BASIC program listing from one, or convert binary data or a text BASIC program listing into a wave file that can be played into the PC-1500. I've written a pair of tools, fwav2bin and fbin2wav, that perform a similar function for Fast Tools. These programs only implement saving and loading raw binary data – if you want to convert to or from BASIC program listings you'll need to first convert to or from a binary image (e.g. using Pocket Tools or lhTools).
Overall I've been very impressed with the speed boost you can achieve with Fast Load, once I managed to get it working.
Resampling Sharp PC-1500 tape recordings
Wednesday, 16th October 2024
This is a quick post about problems I'd been having loading tape cassette recordings from my PC to a Sharp PC-1500 Pocket Computer along with a potential solution for anyone having similar issues.
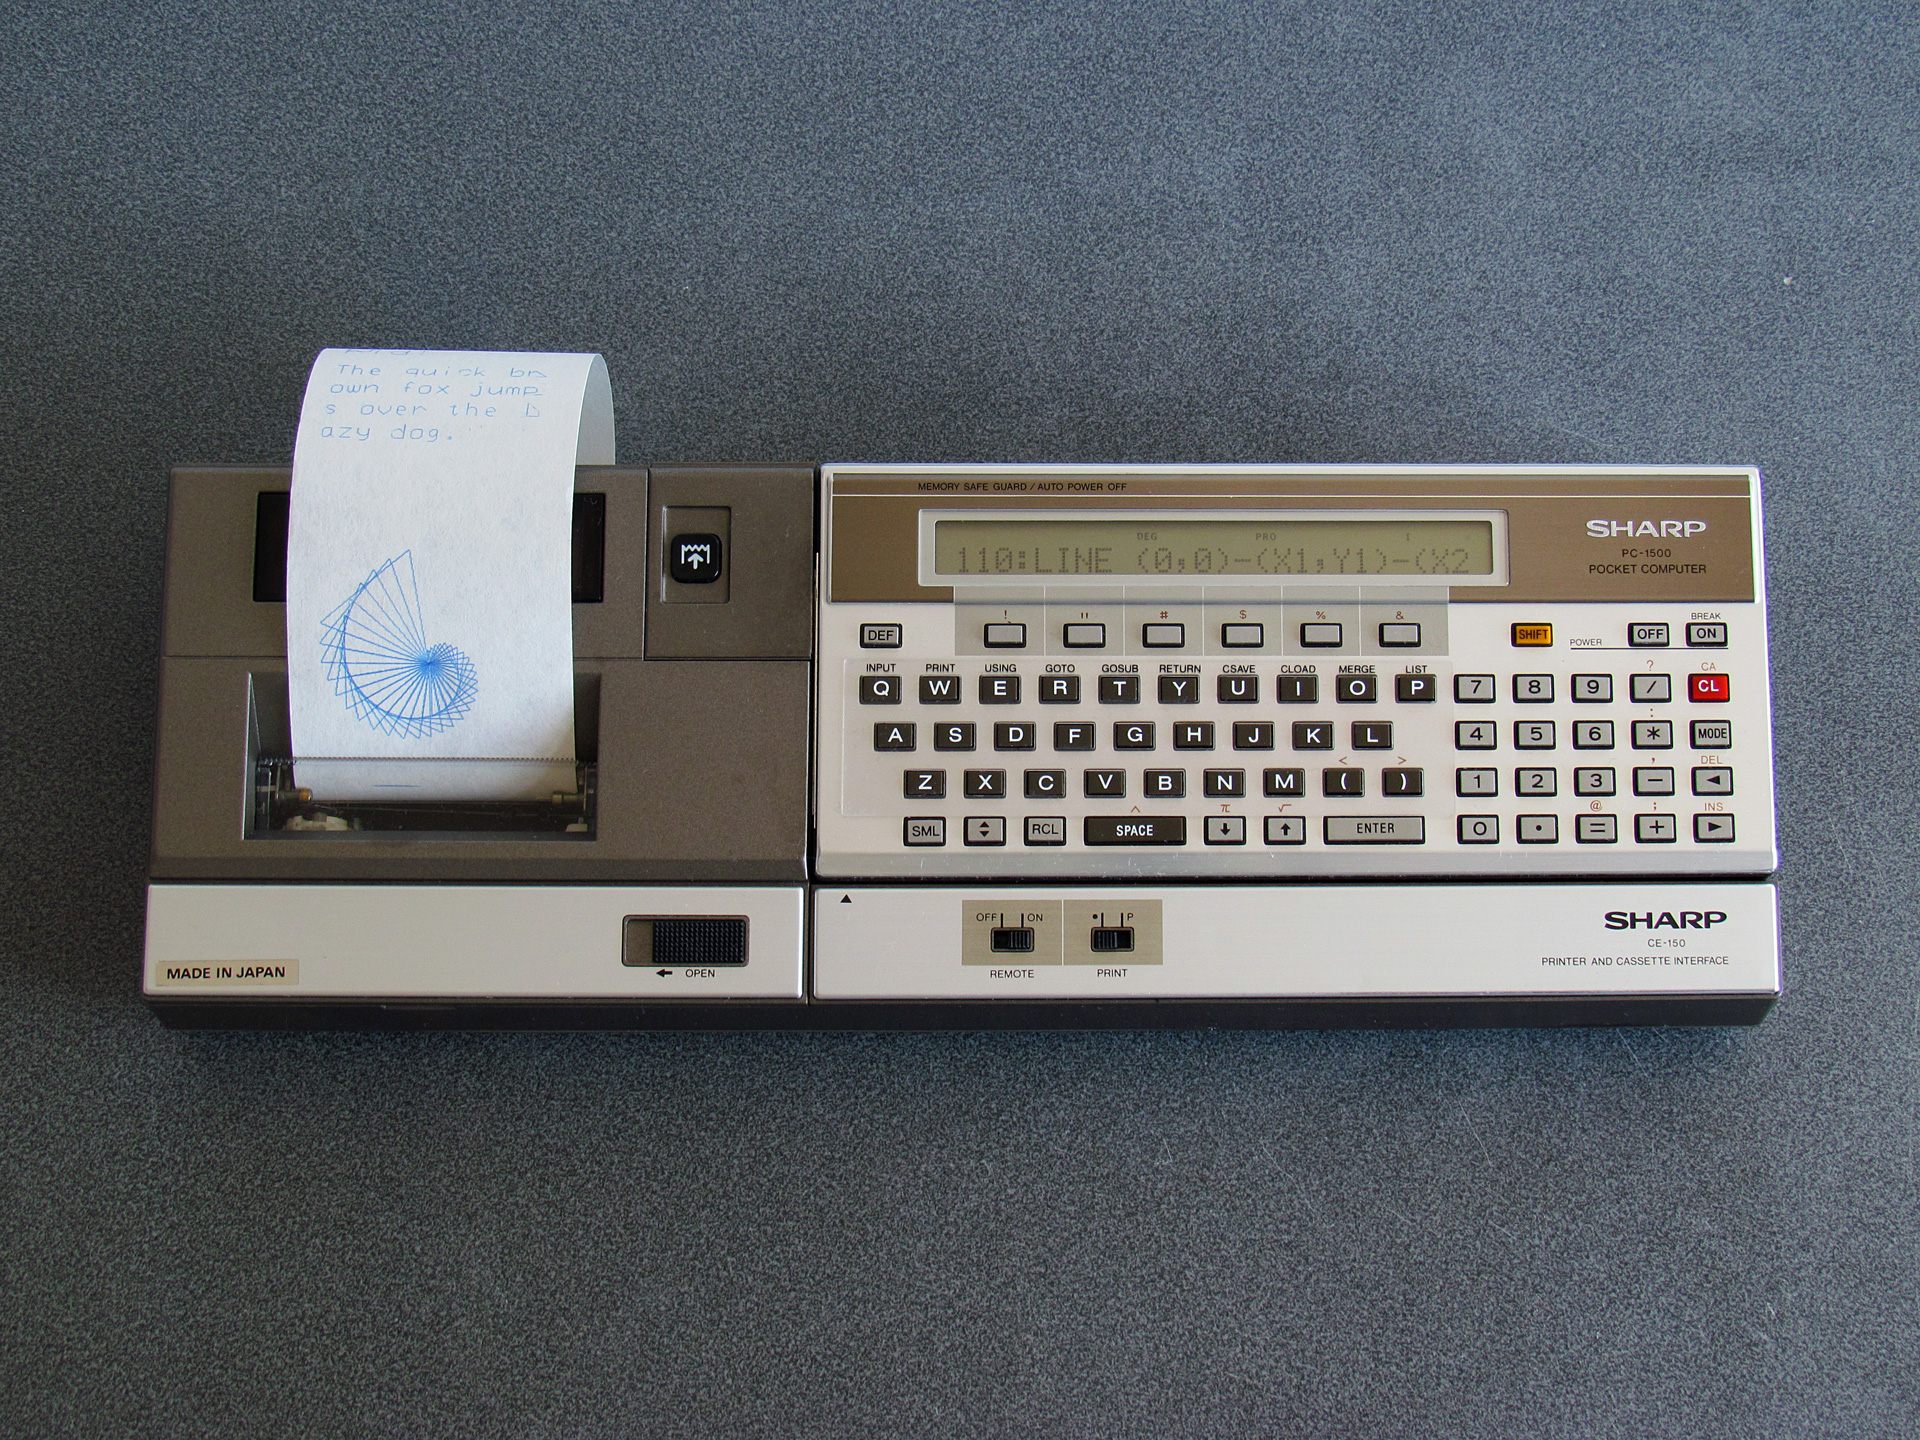
Sharp PC-1500 Pocket Computer connected to the CE-150 Printer and Cassette Interface
The Sharp PC-1500 is a small computer from the early 1980s that can run programs primarily written in BASIC. Programs can be saved to and loaded back from cassette tape but to do this requires it to be connected to the CE-150, a cassette interface that also includes a four-colour plotter. It's the plotter that really attracted me to the computer in the first place, but being able to load programs from cassette rather than having to type them in by hand is definitely a very handy feature!
Unfortunately this CE-150 interface contains an internal battery pack of five Ni-Cd cells. A certain amount of battery leakage is a risk in any old piece of electronics hardware, but having said battery pack soldered directly in with no easy way for the user to remove it for long-term storage makes it more of a certainty than a risk. My CE-150 had not escaped, with heavy corrosion visible on the metal plate under the computer…
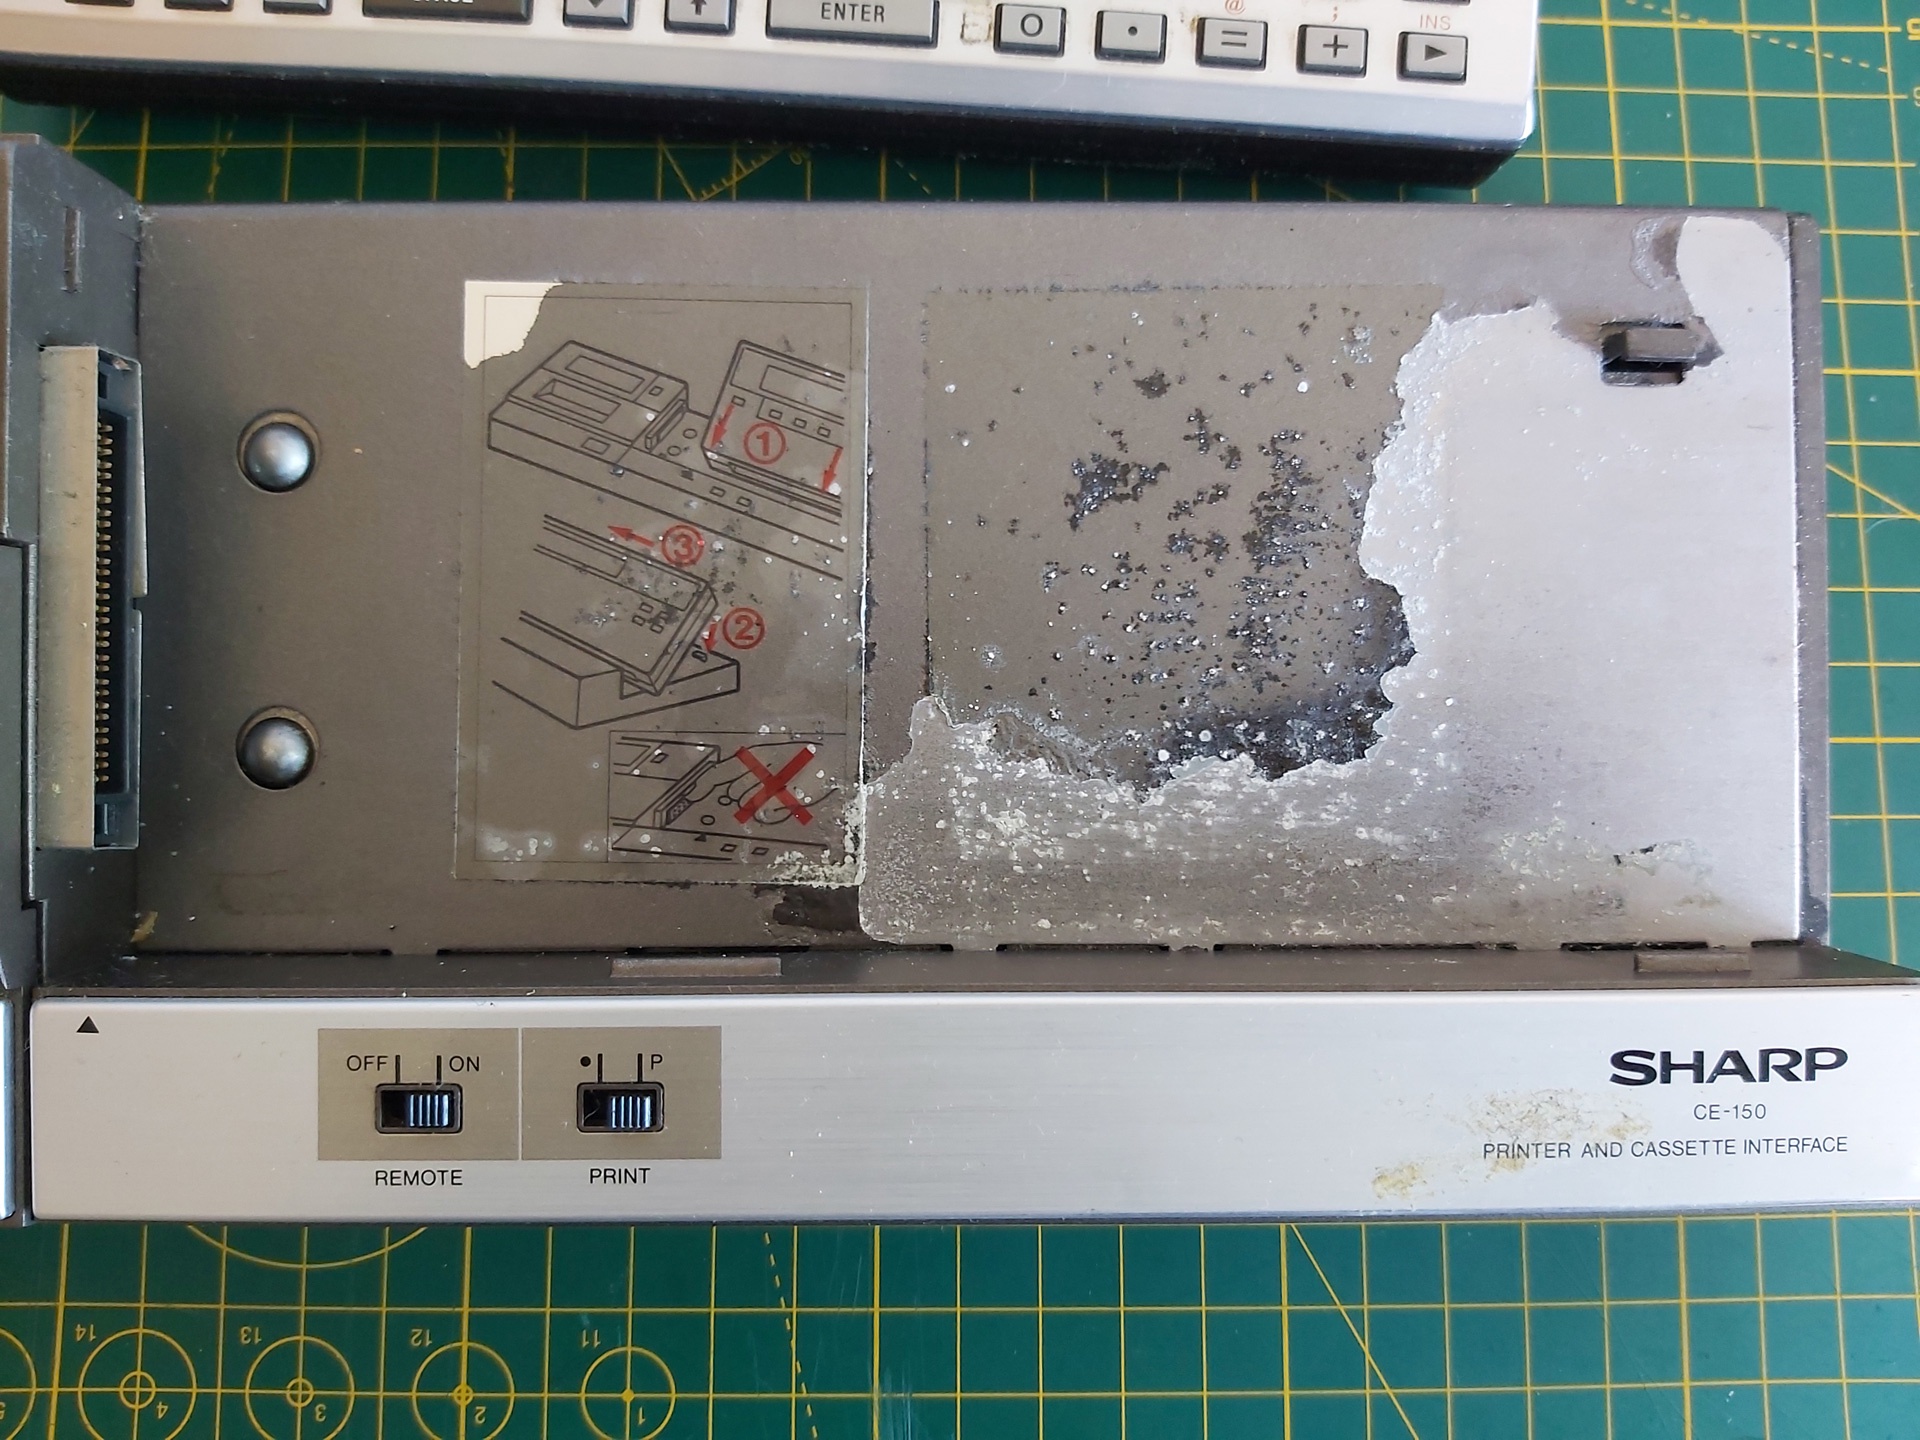
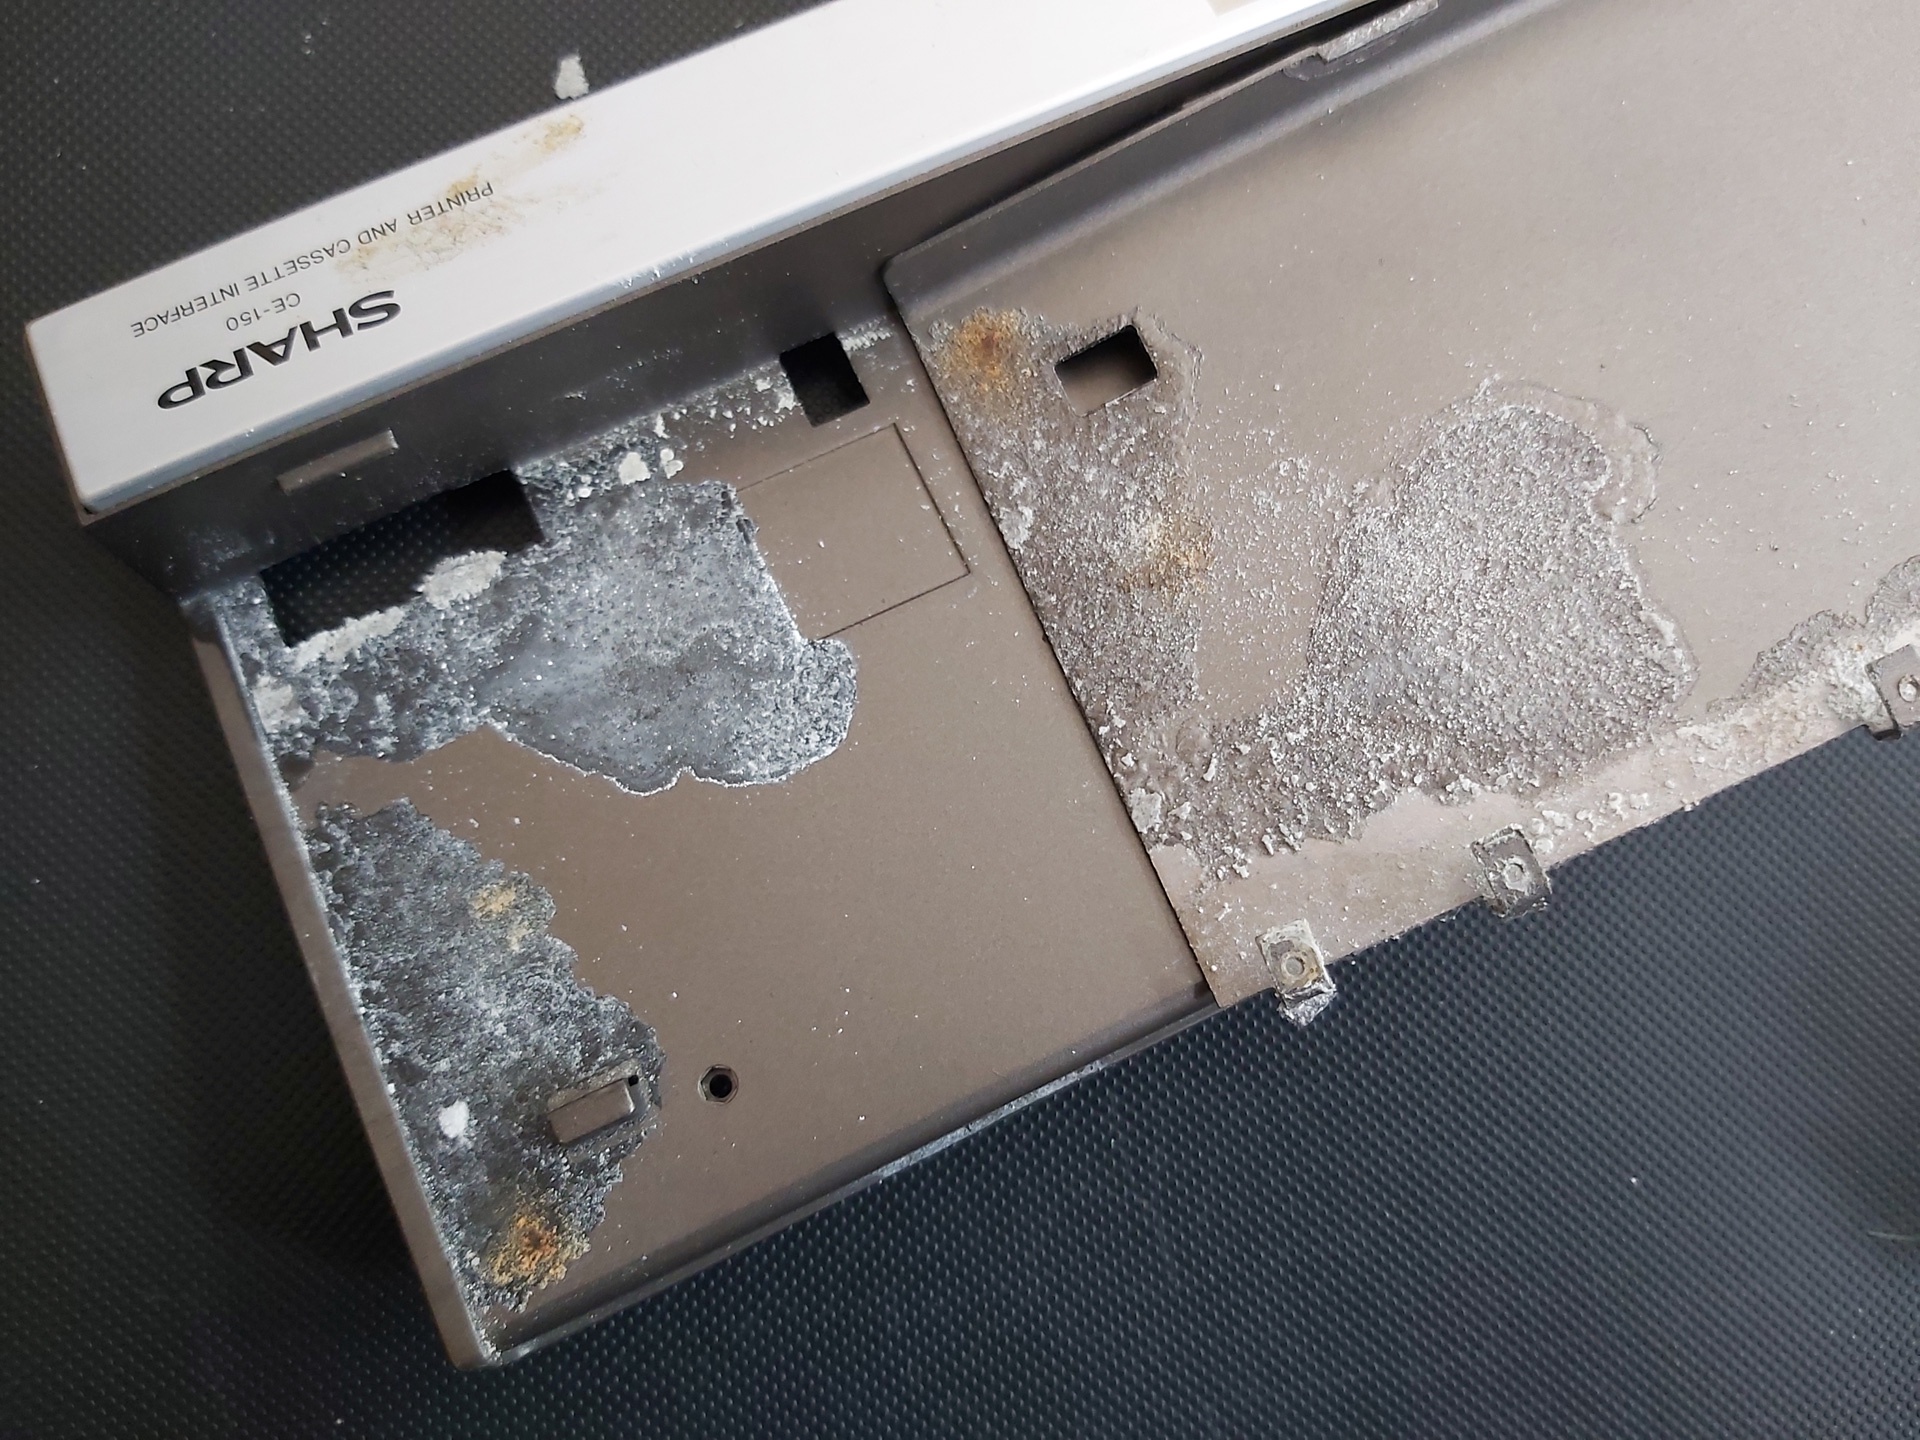
The inside of the PC-1500 was a bit better and not quite as musty-smelling, but circuit board traces had definitely been eaten away in places and some of the internal metal structure was looking a bit crusty.
I cleaned up the rusty metal using some appliance descaler (and recorded a video of the process, which can be found on YouTube) then got to work with a scalpel and some fine enamelled copper wire to repair the damaged traces.
Thankfully when I put it all back together again I was greeted by the NEW0? :CHECK prompt, so I connected the computer to the CE-150 and confirmed I could save and load back programs using my PC in place of a cassette recorder. Hooray!
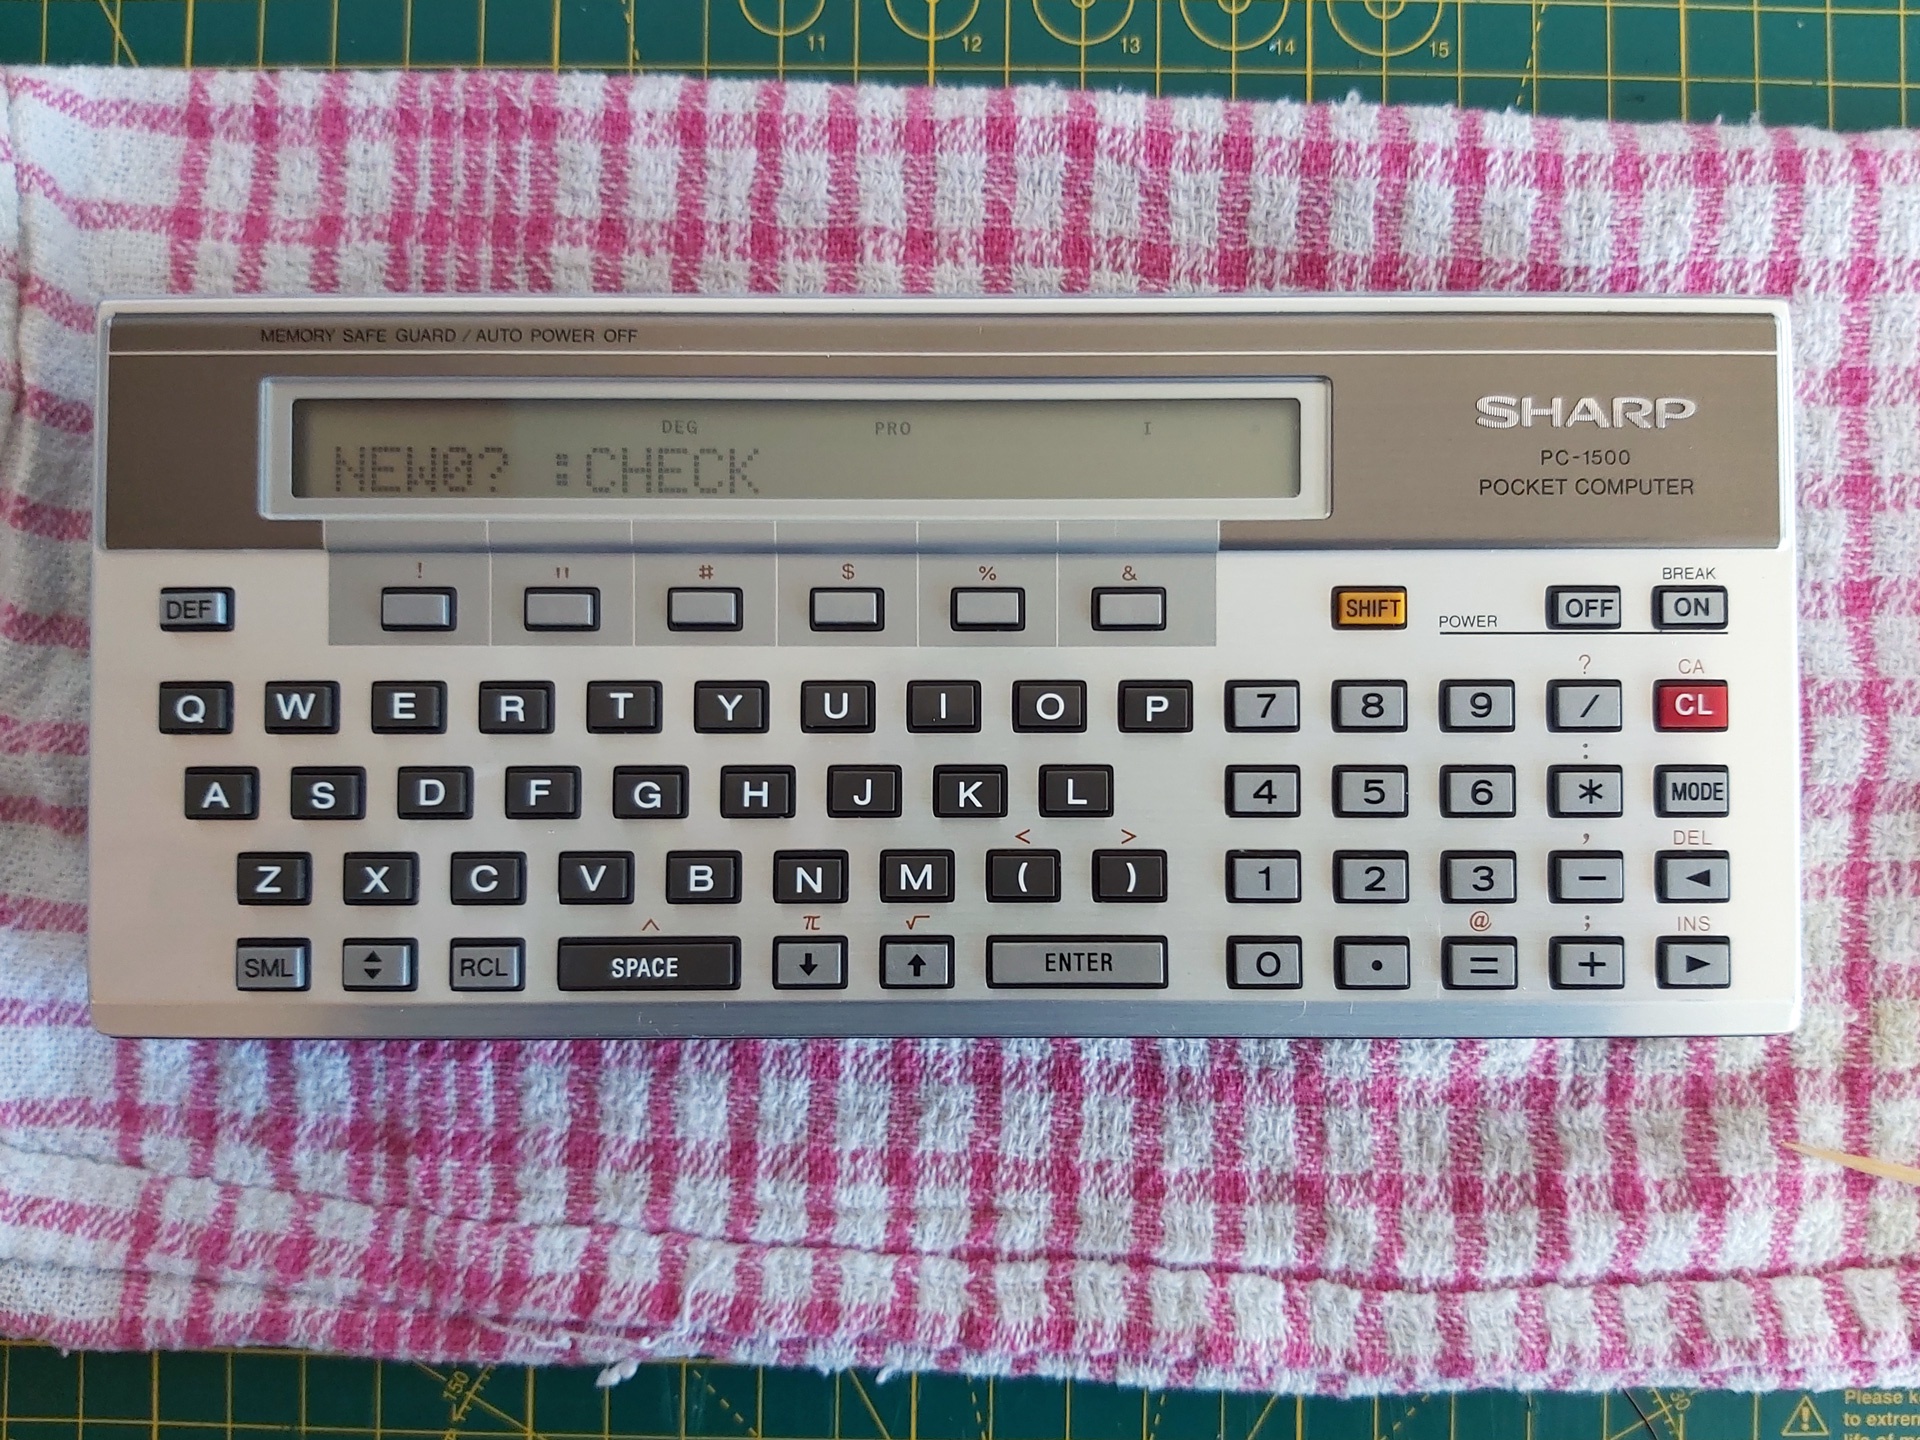
When looking to see what other people had managed to achieve with the computer I found the Sharp PC-1500 (TRS-80 PC-2) resource page which hosts several games and applications which can be downloaded in WAV format. I downloaded a few, but when playing them back on my PC the PC-1500 would refuse to load them. It could load from my own recordings, why not these?
The odd thing is that my own recordings started with a few seconds of constant pilot tone followed by the varying pulses of the program data I was trying to load. When playing back the downloaded recordings they'd start with silence and only make sound when they got to the actual data – and that data sounded quite unlike what my own recordings sounded like. What was going on? I opened a recording in Audacity to see what it looked like, and zoomed in:
That looks like the pilot tone, in that it alternates between high and low at a fixed frequency, though it's only one sample high then one sample low so is a square wave rather than the smooth sine wave I was expecting. The cassette format uses frequency-shift keying so I would expect to see data further on in the recording at half the frequency, or twice the period, i.e. two samples high and then two samples low. Scrolling along, I certainly find that:
Why does it look so spiky, though? It would only need to look like that if it had been sampled at an extremely low rate, and indeed that's what I found – these files are recorded at a 5kHz sample rate:
5kHz is a pretty unusual (and very low!) sample rate that I suspected my sound card was not handling particularly gracefully. Typically audio would need to be resampled to 44.1kHz or 48kHz before playing back, so I thought I'd try resampling in Audacity. This produced this weirdness:
Instead of a sine wave that alternates between two frequencies, I ended up with something more akin to an amplitude-modulated signal! The high-frequency pilot also disappears entirely, apart from what looks to be some initial ringing:
Now, this is a complete guess, but I suspect that what is happening is an attempt to reduce unpleasant harmonics in the resampled audio. A square wave (such as the one we're resampling) produces a lot of harmonics at higher frequencies. As the original audio was sampled at 5kHz, the highest frequency that this could represent was 2.5kHz (alternating high and low each sample, as per the pilot tone). A low-pass filter at 2.5kHz could therefore reduce the harmonics, though I'd still expect some of it to get through (rather than it being apparently being attenuated to zero in this case!) In any case, the signal is being destroyed by the resampling process, so it's no wonder the computer can't load the data.
So, what's the solution? A simpler resampling algorithm that just duplicates samples (a sort of "nearest neighbour") should give us an acceptable square wave when processing, however I could not find any way to achieve this natively in Audacity. Fortunately, though, there's a Nyquist Plugin script that can be used to repeat all samples (install via Tools→Nyquish Plugin Installer, then check it's listed in Tools→Plugin Manager – it will appear as Effect→Repeat Samples). As we want to end up around 44.1kHz the plugin can be used to repeat each sample eight times, which would take our 5kHz sample rate to 40kHz:
↓
When played back the pilot tone can finally be heard, but it's at much too low a pitch! This is because the samples have been repeated eight times, but the track's sample rate hasn't been increased to match. This can be done by right-clicking the track and selecting Rate→Other and entering 40kHz:
Now when the clip is played back it sounds as it should. As a further experiment, the sample rate could be changed from its somewhat odd 40kHz to a more conventional 44.1kHz via Tracks→Resample. When this is done, the nice clean square wave loses definition again:
As I mentioned earlier, square waves have a lot of harmonics, and the resampling process makes these harmonics extremely visible riding on top and bottom of each cycle of the square wave. There is one way to clean this up quite nicely, however – as we want to cull high-frequency harmonics, and as the original recording could only represent frequencies up to 2.5kHz we can apply a low-pass filter at 2.5kHz from the Effects menu:
↓
This resulting file sounds much better and loads into the computer as it should. It's a bit of a convoluted process, but it does at least bypass the resampling weirdness that distorts the original files in such a way that they can't be loaded. The only additional step I might recommend is to more neatly balance the signal around zero by normalising it as the first step:
In summary, the steps are as follows:
- Normalise the file (Effect→Normalize)
- Repeat all samples by 8× (Effect→Repeat Samples)
- Set track sample rate to 8× what it was (right-click, Rate→Other, multiply the value by 8)
- Resample to 44.1kHz (Tracks→Resample)
- Low-pass filter at 2.5kHz (Effect→Low-Pass Filter)
Happy tape loading!
Subscribe to an RSS feed that only contains items with the Sharp tag.